Makeup Tips and Tricks Archives - Page 2 of 27 - Beauty Buzz Skip to main content
Category

Makeup Tips and Tricks

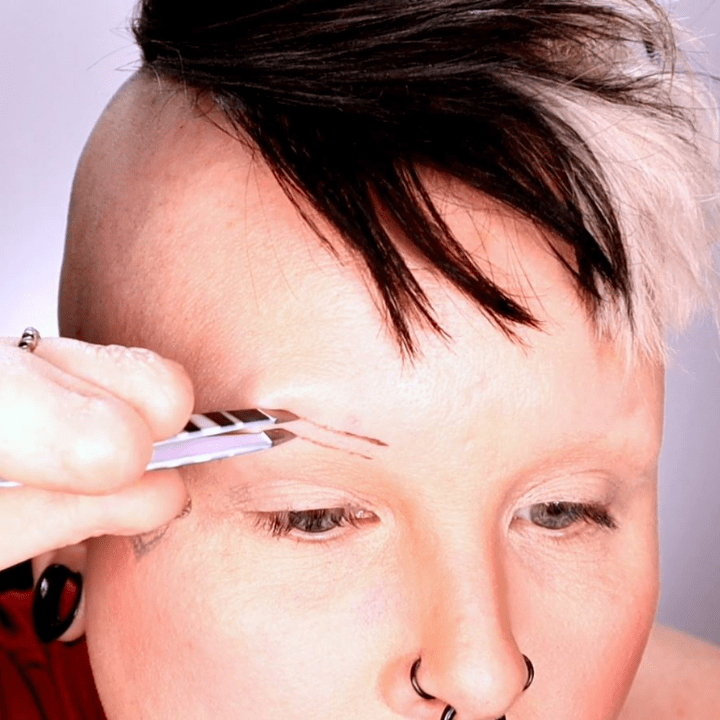
Learn how to do makeup eyebrow tutorial Feature Image

Learn How to Do Makeup: Realistic Eyebrows Tutorial

By Education, Makeup Tips and Tricks, Makeup Tutorial, QC Student Ambassador 4 Comments

Want to learn how to do makeup so YOU can pursue a professional career as an MUA? We’ve got a killer tutorial that’ll help you get started! 💕

Amanda Ramey’s Realistic Eyebrows Makeup Tutorial

Amanda Ramey is a Student Ambassador of QC Makeup Academy. She is also a graduate of the follow certification courses:

  • Master Makeup Artistry
  • Pro Makeup Workshop
  • Airbrush Makeup Workshop
  • Special FX Makeup

Today, she’s here to demonstrate just how much QC’s competitive training has helped her learn how to do makeup! In the following video, watch as Amanda breaks down the technique and steps involved in creating hair-like, realistic eyebrows… even if you have no eyebrows at all!

Want to connect with Amanda directly? Join QC’s Virtual Classroom on Facebook today!

Let’s Recap!

When it comes to learning how to do makeup, the key is to get a proper education. Only through professional training will you gain a mastery of proper technique, makeup theory, and the fundamentals needed to create ANY makeup style.

In this tutorial, Amanda utilizes several critical techniques taught to her in QC’s Master Makeup Artistry Course. Particularly, she demonstrates:

  • A light hand;
  • The use of fine, hair-like stokes;
  • An understanding of color theory;
  • How to create dimension;
  • And how to achieve symmetry.

Prior to the tutorial itself, Amanda also shows an old photo of what her eyebrows used to look like before she got professionally trained. As you’ll see, the difference between then and now is like night and day!

Learn How to Do Makeup with QC Makeup Academy!

QC Makeup Academy offers a wide variety of self-paced, online makeup courses suitable for EVERY skill level. You get two full years to complete your program – but since your training is done entirely at your pace, you can graduate in as little or as much time as you need!

As part of your course, we will provide you with direct online access to all of your course materials. Moreover, we’ll also mail a physical copy of your materials – as well as your free makeup kit – right to your front door. Our wide array of assignments range from quizzes, self-studies, and hands-on training. Your tutor will be a real industry expert with years of in-field experience. After you submit each Unit, your tutor will review all of your work and provide you with audio feedback to help you grow and better your craft!

Once you graduate, you’ll receive your official, internationally-recognized certification in the mail. This certification is the PERFECT addition to any makeup artist’s resume. Not only will it impress your clients; it’ll help you stand out from the competition!

Learn how to makeup eyebrow tutorial in-post image

Additional Perks of Being a QC Student

Here are a handful of other reasons why you should learn how to do makeup with QC Makeup Academy:

  • We hold an A+ ranking with the Better Business Bureau and have been a pioneer of online learning since 1984.
  • Furthermore, all of our courses and certifications are internationally-recognized.
  • Our tuition is highly competitive, as well as flexible. You have the option to pay your course in full, or take advantage of our low monthly payment plan.
  • Plus, once you enroll in one course, all of your future courses will be 50% off.
  • As a QC student, you gain access to all sorts of amazing makeup discounts with big-name brands.
  • Our Customer Support and online community are second to none.

So, what are you waiting for? Learn how to do makeup professionally and start your dream career in as little as 3-6 months by enrolling with QC today!

TikTok makeup hacks article, Apr 22 2021, Feature Image

Do These 5 Viral TikTok Makeup Hacks ACTUALLY Work?

By Makeup Tips and Tricks, Makeup Trends, QC Student Ambassador No Comments

There are countless trending TikTok makeup hacks floating around out there… but do they actually work? QC Makeup Academy’s Student Ambassador, Amanda Ramey, is on the case and aims to find out once and for all!

Testing 5 Viral TikTok Makeup Hacks

Amanda Ramey is a professional makeup artist and a graduate of the following QC Makeup Academy certification programs:

  • Master Makeup Artistry
  • Pro Makeup Workshop
  • Airbrush Makeup Workshop
  • Special FX Makeup

In the following video, Amanda uses her professional knowledge and experience to test 5 popular TikTok makeup hacks. Her goal? To see if they achieve what they say they’ll achieve – or if they fail the test!

Want to connect with Amanda directly? Join QC Makeup Academy’s Virtual Classroom on Facebook today!

To Recap…

Amanda reviewed and tested out the following makeup hacks (as made popular on TikTok):

  • Face Lift Concealer Hack (1:02 – 3:27). After testing out this hack, keeping in mind the professional training under her belt, Amanda gave it a score of 9/10.
  • Fork Contour Hack (3:29 – 5:25). Scoring the lowest of all 5 viral TikTok makeup hacks, this one earned a painful (but warranted) 0/10 rating from Amanda.
  • Blush Hack (5:27 – 7:18). Thanks to this makeup hack’s accurate techniques and correct application, Amanda gave it a solid 10/10!
  • Eyebrow Tweezer Hack (7:20 – 10:04). There is so much wrong with this hack, we don’t even know where to begin. In fact, it got Amanda go shook that she didn’t even remember to rate it… But based on her reaction after trying it out, we think she probably gave it a -5/10.
  • Eyeliner Hack (10:05 – 12:50). While this hack technically works, it’s going to make symmetry and matching the other eye a major challenge. For these reasons, Amanda gave this hack a rating of 6/10.
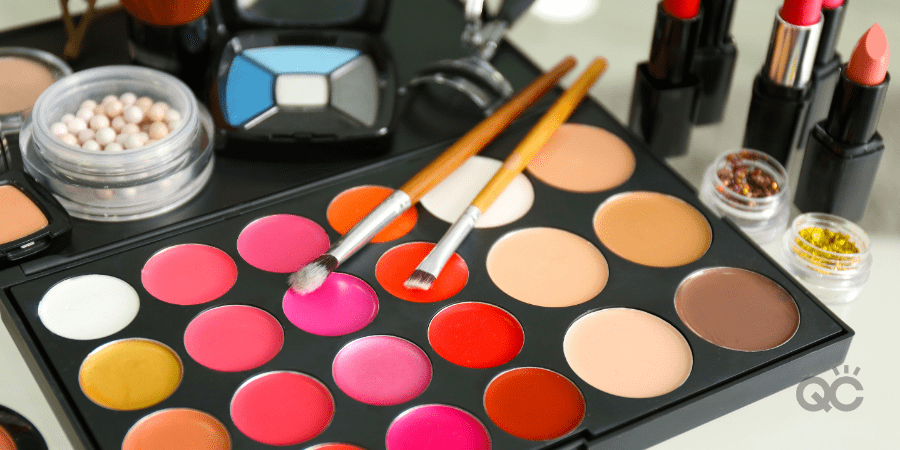
Why NO TikTok Makeup Hacks Can Beat Professional Training

Makeup hacks are fun to try, – and definitely cool when they work as promised. However, they can never truly replace professional training! Learning makeup through social media will never be the same as learning proper practice from industry-trained experts.

Remember: when you learn makeup from influencers, you are only learning how to copy a style. Style is not the same as technique. Knowing only style will forever limit you to being a trend-follower.

Techniques, on the other hand, are the foundations you need to learn in order to be able to create different makeup styles. Technique will arm you with all the skills needed to be able to transcend, get creative, and become a trend-setter.

You need one in order to be able to master the other – but ALWAYS in this order. As the saying goes, “You have to learn to walk before you can run.”
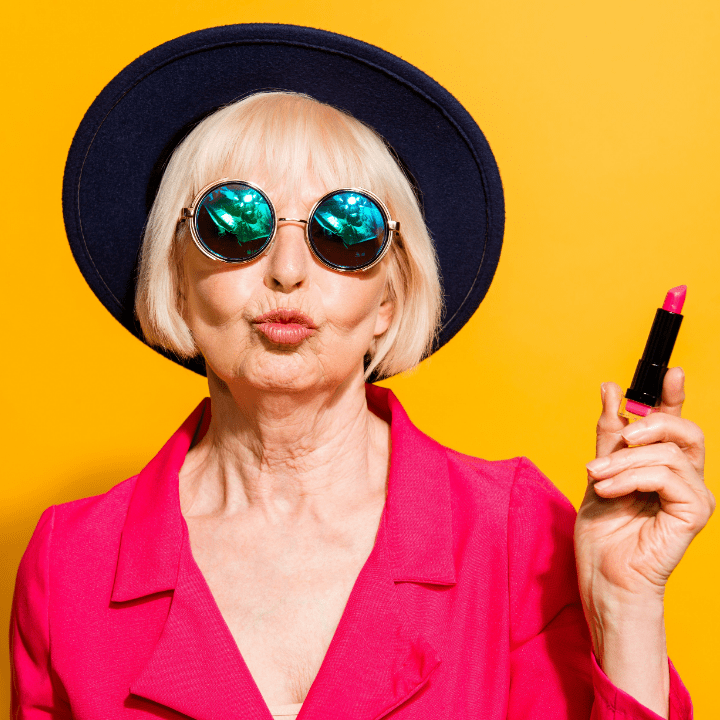

Become a professionally certified makeup artist in as little as 3-6 months by enrolling with QC Makeup Academy today!

My Top 6 Makeup Artistry Tips for Mature Skin

By Career Advice, Education, Makeup Tips and Tricks, QC Student Ambassador, Your Makeup Career 2 Comments

Want to become a master of makeup artistry and skincare for mature skin? QC Makeup Academy’s Student Ambassador, Cheri Stevens, has 6 awesome tips to get you started! To learn more about Cheri, read her full Ambassador Feature here!

makeup artistry mature skin article, Cheri Stevens, new headshot

What is ‘mature skin‘? Why is it important that professional makeup artists have a good working knowledge of mature skin?

Well, for starters, mature skin is everywhere! You see it all the time in film and television. For example, just look at Jane Fonda, Susan Sarandon, Sigourney Weaver, Raquel Welch, etc. All of these women are gorgeous! But they still need to know good skincare. Furthermore, they need an educated makeup artist to make them look and feel fabulous.

This can be done with proper makeup artistry training and good skincare knowledge!

Makeup Artistry: Younger Vs. Mature Skin

What are some of the similarities when it comes to applying makeup on younger skin, versus applying makeup on mature skin? In short, both require a solid understanding of technique. Moreover, they can both utilize creativity through the use of color and application.

On the other hand, what are some of the most common differences? How does makeup artistry for younger skin vary when compared to makeup artistry for mature skin?

The answer is quite simple. The products you choose for a younger client’s skin will be quite different in nature than the products you’d use on mature skin. Mature skin needs a lighter hand. It will also require a more specified skincare regimen that specifically targets mature skin. One example would be cream products that do not dry out the skin. Another prime example would be products that have less shimmer to them.

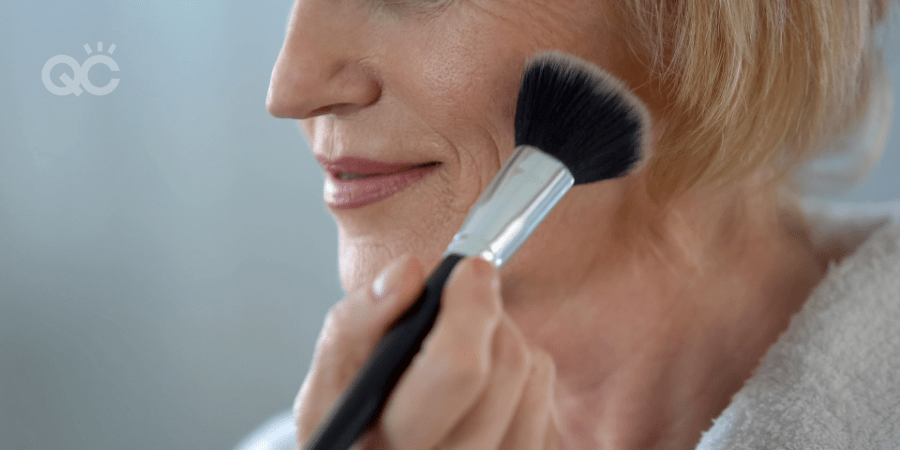
older woman applying powder to face using powder brush

6 Makeup Artistry and Skincare Tips for Mature Skin

1. Prep the skin with moisture!

Mature skin can be dry. So, using a good moisturizer is essential before applying any makeup! Apply a nice, even layer of moisturizer to the face. Preferably, opt for a moisturizer with some Hyaluronic Acid in it. This will help reduce the appearance of fine lines and wrinkles. When you hydrate the skin beforehand, you’re creating a prime, soft, and hydrated canvas for the makeup application.

2. Use targeted ingredients in skincare products!

You’ll need to start by determining your client’s skincare goals.

For example, are they fighting fine lines and wrinkles? Are they looking into adding some Retinol into their routine? Are they out in the sun a lot? If so, you should recommend that they add sunscreen to their regular routine, for added skin protection. Is your client’s skin dry? Look for Hyaluronic Acid in their moisturizer.

Help them turn their skin into the best possible version of itself! Using the right skincare products always comes first. As a result, applying makeup onto it will become a no brainer. And who knows…with good skincare, they might need even less makeup to look amazing!

3. Build in sheer layers!

When it comes to mature skin, you want to apply foundation with a light hand and build as needed. Foundation on mature skin can sometimes settle into fine lines and look cakey. Using sheer layers assures that the makeup is even and smooth, thus preventing it from settling into lines and looking overdone.

4. Add that POP of color!

Sometimes, mature skin can have a dull appearance. The best way to combat this is to make it glow! A nice pop of a cream blush on the cheeks will liven the skin and make the client look fresh. Creams are also great for mature skin because they don’t settle the same way that powders do.

Take it one step further by apply color with a touch of shimmer. This will bring a glow back to your client’s face. No doubt, they’ll feel youthful and fresh!

5. Line that pucker!

Always apply a lip liner to the lips. As we age, our lips can droop and lose definition. Lining the lips can strengthen the natural lip line, prevent lipstick from feathering, and make the lips look their best shape.

Just don’t overline your client’s lips too much, of course! It’s also worth nothing that you should keep the color soft, so as not to make the lips look harsh.

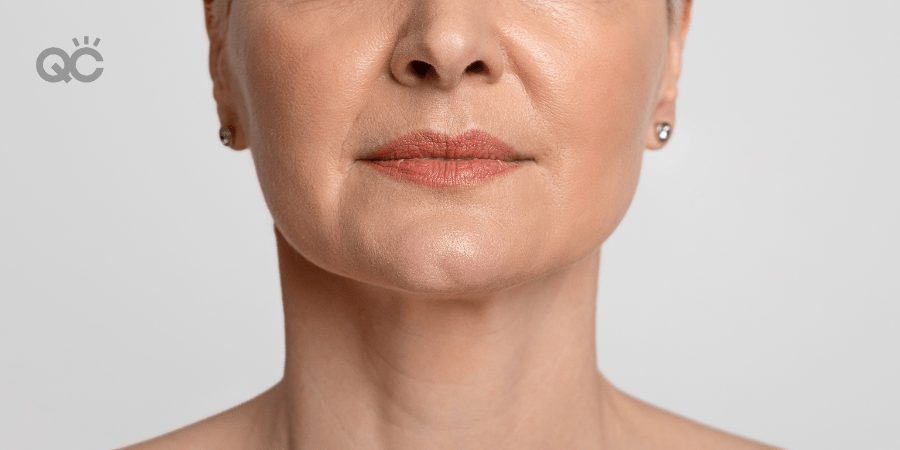
mature model, close up shot of lip makeup

6. Keep it soft!

As we age, we certainly don’t want to be perceived as being older than we are. So, keep the makeup light! Avoid harsh, dark eyeliners, loud colors, or shimmers that highlight lines and wrinkles. Instead, go with soft, matte colors and well-defined lips. You’ll have your client glowing and gorgeous, no matter what age they are!

The Importance of Professional Training

Why is it so crucial for makeup artists to have sufficient training for mature skin? Like with any other area of makeup artistry, a proper education is always important. To be the very best you can be, and acquire the right knowledge needed to do the job, getting certification training is the single best way to go.

When it comes to mature skin, professional training is especially important. This type of makeup artistry requires a very specific set of refined skills. You’ll need to be able to apply products that will enhance your client’s skin and features – while at the same time, omitting ones that would detract from any discoloration, wrinkles, and fine lines.

Skincare for Mature Skin

Personally speaking, skincare training has been SO essential for me as a makeup artist! I find this knowledge paramount.

A thorough understanding of skincare helps me better assess the client’s skin prior to the application. Plus, I can properly address any skin issues that could be relevant to the makeup work I’m about to do. It’s important to be educated on which products will be needed for each client, depending on the skin issues and/or type(s) they may have (i.e. dryness, oiliness, discoloration, lines, etc.).

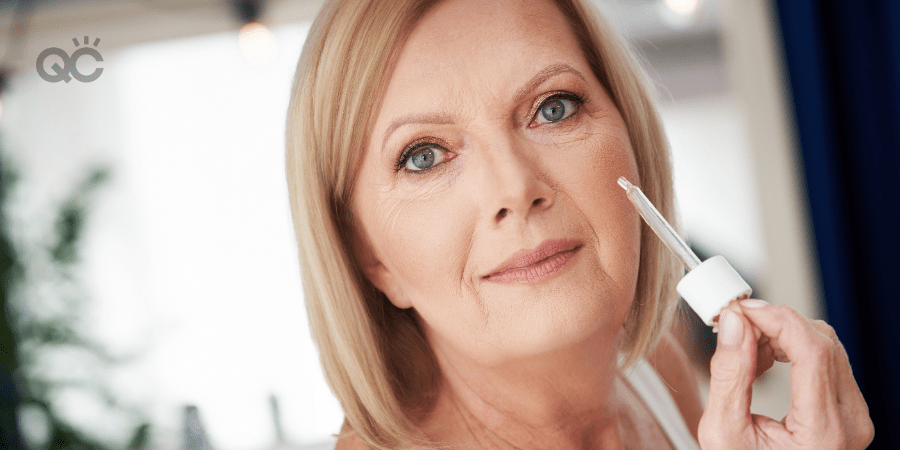
older woman applying skincare serum in cheek

QC Makeup Academy’s Skincare Course

In Unit D of QC’s Skincare Course, you’ll learn all about working with mature skin. As a graduate of this course, the most important lessons I learned from this particular unit were knowing what happens to aging skin, as well as ways to take care of it with the proper ingredients.

In assignment D4 of the Skincare Unit, Anti-Aging Skincare for Mature Clients, you get to delve into the specifics of mature skin. This particular Not only do you get the chance to work with a client demographic you may not have worked with before; you also get to really examine and assess the issues of a mature client.

These lessons have been very critical for me as a professional makeup artist – and they’ll be just as critical for you, too! Knowing how to properly work with mature skin is an amazing asset to add to your skill-set. Furthermore, you’ll gain a broader sense knowledge of skin types and you’ll be able to add mature skin to your repertoire.

In my opinion, this is not an age bracket to be left out of the mix. Makeup artistry is for ALL ages, and proper skincare training just makes your portfolio that much better!

Makeup Artistry for Mature Skin

This is taught in Unit C of QC’s Master Makeup Artistry Course. In assignment C5, The Mature Client Makeup Application, you’re tasked with doing a real-life makeup application on a model with mature skin.

The lessons taught in this unit/assignment are essential for any professional beauty expert. They’ll help you broaden your skill-set and gain the knowledge needed to enhance your client’s face with makeup, without overpowering it. Thus, you can keep their application age-appropriate and beautiful.

beautiful mature-skinned model

Become a master of makeup artistry for ALL types of skin by enrolling with QC Makeup Academy today!

airbrush makeup article feb 26 2021 feature image

4 SFX Airbrush Makeup Techniques to WOW Clients!

By Airbrush Makeup, Makeup Tips and Tricks, Special Effects Makeup, Your Makeup Career No Comments

Airbrush makeup is always an excellent service to add to your beauty business. Not only is it a hot commodity among clients – it’s considered a rarer service. This all means that you’ll definitely be able to stand out from the competition, increase your bookings, better your reputation, and boost your income!

While airbrush makeup is well-known in the bridal and editorial world, it’s also a staple in special effects makeup, too. So, how can you take your airbrush game to the next level? First, you’ll obviously need to master the basics. Once you’ve done that, you can then advance your skill-set by learning some truly awesome SFX airbrush techniques.

What are some of the techniques we’re talking about? Let’s have a look!

makeup artist pouring product into airbrush makeup machine

4 SFX Airbrush Makeup Techniques You Need to Know

1. Working with Stencils

Stencils can be used on the body, the face, or even particular areas such as the eyebrows. Typically, they’re made from sheets of plastic or thick paper. However, as you gain more experience, you can dabble in creating your very own.

When used correctly (and carefully), stencils offer a quick and easy way to add fine detail and flair to your SFX airbrush makeup design. If creating a character, eyebrow stencils are a popular way to completely reshape the arch, thickness, and overall look of the person’s brows. Just made sure you completely block out their natural eyebrows first!

Pro Tip: Not sure how to block out eyebrows? QC Makeup Academy’s Master Makeup Artistry Course will teach you everything you need to know!

2. Using Brighter Pigments and Unconventional Colors

Typical airbrush makeup applications will tend to rely on natural, traditional colors. But when you step into the world of special effects, airbrush makeup often maximizes its full potential when brighter, bolder pigments are used.

You’ll also have the freedom to work a lot with unconventional colors. You’ll quickly discover that it’s surprisingly easy to change a model’s skin tone to a deep purple, a brilliant blue, or a stunning green when using an airbrush machine (just to name a few examples).

Cady Heron really put it best when she said, “The limit does not exist.” 😉

Pro Tip: Just remember that when working with heavily pigmented makeup, it’s always easier to layer darker colors over lighter ones.

model with bright blue makeup on face and fingertips

3. Creating Patterns

One of the most effective ways to make your SFX airbrush makeup POP is by creating some sort of pattern on the model’s skin. For example, with an airbrush machine, adding spots of varying sizes is an effortless process. Another idea is to apply airbrush makeup over a pair of lace tights of fishnet stockings, in order to create precise lines and detailed designs.

Pro Tip: Creating character makeup? You can also use airbrush makeup to develop signature patterns that are 100% unique to and consistent with the character!

4. Combining Airbrush Makeup with Different Techniques

If you truly want to dazzle your clients and leave them in awe, show them the full extent of your skills by combining airbrush makeup techniques with other fundamental techniques you’ve acquired throughout your training!

For example, why not use airbrush makeup to create a stunning, intricately-detailed makeup look – and then add some traditional eye makeup by hand? Alternately, how about combining airbrush makeup with prosthetics?

The point is, SFX airbrush makeup is a game-changer in-and-of itself. But once you realize that it can be combined with all the other techniques you know, too, there’s no stopping the kinds of looks and designs you can create! You gain access to an untapped level of creativity explored in very few other areas of makeup artistry.

Pro Tip: Never worked with prosthetics before? Learn this (and so much more) in QC’s Special FX Makeup Course!

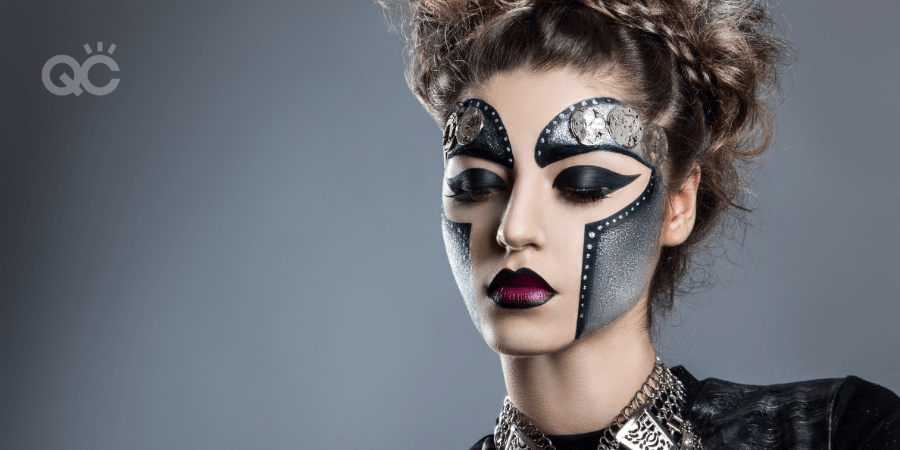
model with different makeup techniques applied on face

Want to delve deeper into this, as well as learn even more about airbrush makeup? QC Makeup Academy’s online Airbrush Makeup Workshop will get you professionally trained and ready to work on clients in as little as 3-6 months!

Here are a few other perks to enrolling in this 3-unit program:

  • Get digital AND physical copies of your textbooks!
  • Expand your learning experience through instructional videos, quizzes, self-assessments, and more!
  • Practical assignments will give you hands-on training – which you’ll do with the airbrush makeup starter kit included in your course materials!
  • Your tutor will be a industry expert in airbrush makeup, with decades of experience!
  • Get a full 2 years to complete your program (but feel free to finish sooner, if your schedule permits it)!
  • QC’s self-paced online learning environment allows you to train from home, on your personal schedule – meaning no deadlines!
  • You can connect with your fellow peers and begin building your network by joining our Virtual Classroom on Facebook!
  • Upon graduation, we’ll mail you a physical certificate that demonstrates that you’ve been properly trained in airbrush makeup!
learn how to do makeup by practicing on another person

3 Ways to Learn How to Do Makeup if You Have No Experience

By Education, Makeup Tips and Tricks, Student Ambassador No Comments

Want to learn how to do makeup but don’t have any prior experience? Paula Alleyne is here to help! A QC Makeup Academy Student Ambassador, Paula is also a graduate of QC’s Master Makeup Artistry Course. Her professional makeup business, PAULA MONIQUE, specializes in bridal, editorial, and special occasions makeup. Connect with Paula in the QC Virtual Classroom on Facebook! 

Why NOW Is the Perfect Time to Follow Your Dreams

How can we maximize our time during the pandemic? The onset of COVID-19 has caused many of us to rethink the way we conduct our lives, both personally and professionally. During this time, as makeup artists, it forces us to reflect on how we do business, how we interact with clients, how we protect ourselves, and the costs associated with doing business in the new normal.

I therefore encourage everyone to take this time to be reflective and improve for the better. Maybe you can use this opportunity to better your existing business. Perhaps you can maximize this time to learn how to do makeup. The important thing is that you use your time productively, so that you can continue pushing yourself forward.

In case you need some ideas, here a few ways you can make the best of a bad situation…

Hygiene and health care are of utmost importance.

If you’re an aspiring or established MUA with some experience under your belt, think of the practices that you had prior to the pandemic. Consider the ways in which you handled and sanitized your products and tools. Ask yourself: is there room for you to be doing better and keeping things cleaner?

Take this time to undo any bad practices you may have had before. Instead, dedicate yourself now to becoming a makeup artist with improved hygiene standards. By being as sanitized as possible at all times, your clients will feel (and be) safer.

Embrace online learning.

Prior to COVID-19, there was a pretty heavy debate regarding whether online making courses were just as beneficial as brick-and-mortar makeup schools. But since the pandemic started, everyone and everything has now moved to the online platform.

I have seen such an increase of makeup courses being offered virtually. Not only does it provide a way to continue learning in the comfort and safety of your own home, it’s proven to be just as effective as its in-person counterpart.

It’s important to understand, though, that online learning requires serious discipline. If you enroll in an online course assuming it’ll be easy, you’ll be in for a major awakening. We all have hectic lives, which is why many online makeup courses are self-paced. But with this freedom comes a certain level of responsibility on our end. Discipline is therefore required to ensure that you learn, complete assignments, and keep progressing.

Take advantage of “free” time.

Some of us may still be on lockdown. For those of us who aren’t, there are still major social distancing rules in effect. As such, a bunch of activities that required physical attendance are now rescheduled or cancelled.

This means that that extra time might suddenly turn into open availability within your schedule. Still, try to use it productively (at least once in a while)! Develop a new makeup technique, or strengthen areas where you may be weak. This is time that can also be used to review your business plans, finances, and budget for the future.

Time waits for no one. Every effort you can make counts!

3 Ways to Learn How to Do Makeup If You Have No Experience

1. Research it!

Look at blogs, read books or magazines, and watch videos. I realized I had an interest in makeup years ago, when I saw a makeup brochure from AVON. It had sketches of where to apply makeup products, such as blush, as well as ideas for eyeshadow application.

I asked my older sister questions about makeup. I looked at magazines and paid attention to how makeup was applied on models. Reading books like Face Forward by Kevyn Aucoin or Bobbi Brown’s Makeup Manual was also extremely eye-opening. I watched YouTube videos by makeup artists like Wayne Goss and Angie Di Battista, as well as videos on the history of makeup throughout various era and historical periods.

When it comes to makeup, there’s a whole world of information out there. A little research will go a VERY long way!

2. Practice it!

Practice on yourself and practice on others. After learning about makeup, I decided to start practicing it on myself. I attempted costume designs to go with the looks I was creating. I tried the smoky eye, red lips, nude lips – you name it!

I also began practicing on friends and family members. Applying your knowledge by working on other people’s faces is one of the single best ways to improve your skills and hone your craft. For me, these were times of trial and error. There were definitely mistakes made in the beginning – so, a big round of applause goes out to my sisters, my mother and my friends. They bore with me along the way, and put up with my technique when my hand was less than gentle.

The point is, eventually I got better! Even my sisters started to appreciate the torture of waiting in the chair while I finished. One big lesson I learned as I practiced was adjusting my facial expression. When working on clients, you need to know how to wear a good poker face. We’ve all had that experience when applying makeup; that internal freak-out when it seems like the look isn’t going as intended.

Over time, as I became familiar with different products and colors, I knew not to freak out. For the sake of your client, it’s important to always remain calm. Because at the end of the day, it is ALWAYS going to work out and be okay. It just might take a bit of patience.

learn how to do makeup by practicing on another person 2

3. Learn it professionally!

Being self-taught is great, but being trained by a legitimate expert is even better. There are tons of industry pros and instructors out there who are happy to offer their knowledge on makeup artistry. Learning with them and discovering the theory behind makeup application is wonderful. It gives you the confidence to form your own type of artistry, rather than simply relying on the replication of other people’s looks.

Why I Chose to Be Professionally Trained

I chose to be professionally trained because I started to notice a trend on social media regarding an increasingly popular type of makeup application. Much of the application did not reflect the looks I saw in magazines – and these magazine editorials were what I began to fall in love with. I personally felt like I wanted to learn more.

One of the biggest lessons I chose to get professional makeup training was so I could learn about the business attitude behind the artistry. The art of makeup is important, but the need to conduct yourself as a professional is just as important. So, I enrolled with QC Makeup Academy!

If you’d like to learn more about my journey in starting an online makeup education with QC, you can read my other blog article here.

One of the biggest perks about being a QC Makeup Academy student is the community it’s developed over the years. In the Virtual Classroom on Facebook, for example, you get to meet other artists within the industry. It’s nice because these are fellow students and graduates who are on the same journey as you! It’s also a place where we encourage each other, offer constructive criticism, and ultimately help one another grow.

During the time of the COVID-19 pandemic, having this online community has helped many people to stay connected and motivated. Being a part of an educational institution encourages you to think about your business, maintaining high standards, and how you can continuously improve. It’s an all-win situation!

Your Makeup Artist Training: Nathan’s Tuesday Tips (Part 4)

By From the Experts, Makeup Tips and Tricks No Comments

If you want to take your makeup artist training to the next level, there are few in this industry better capable of guiding you than Nathan Johnson. While there are many amazing things that set QC Makeup Academy apart from other makeup schools (both online and in-person), Nathan’s expertise and genuine love of the craft definitely rank near the top of the list!

He is an industry professional who not only knows his stuff, but also truly cares about each and every one of QC’s students and graduates!

makeup artist training by Nathan Johnson

From the incredible instruction he provides throughout QC’s online makeup classes, to the support he gives in the Virtual Classroom and the amazing monthly webinars he hosts – Nathan is the embodiment of a true beauty expert, whose makeup knowledge is only outmatched by the size of his heart!

Another way he goes above and beyond in his mission to enhance our students’ makeup artist training is through his Tuesday Tips! Each week, Nathan films a short clip, in which he reveals useful tricks to help you better your makeup artistry skills. On Facebook especially, this segment – aptly called “Nathan’s Tuesday Tips” – had grown wildly popular!

In this monthly blog series, we gather these Tuesday Tips so we can share them with you here! Missed our previous installments? No worries! You can find them here:

Today, we’ll take a look at another 6 of Nathan’s most valuable beauty hacks. Want to add to the knowledge gained in your classes and take your makeup artist training to the next level? Then you don’t want to miss out on these gems!

Tip #1: The secret to getting a more natural blush!

“Want a more natural blush? Try cream! It gives a beautiful glow from within – and it’s also an awesome way to tint the lips.”

Tip #2: The right way to highlight!

“Use highlight only on the bones you want to accent. Putting it everywhere, or in too many places, will take dimension out of the face – not add it.”

Tip #3: Achieving crisp, clean foundation!

“Want to keep that foundation crisp and clean? Try applying eye makeup first! No fall-away means perfect, crisp complexion.”

Tip #4: What “full coverage makeup” really means!

“Full coverage does NOT mean heavy makeup. It means more pigment in the makeup. Foundation, when perfectly applied, should always be invisible. You should see the results of it – but you shouldn’t see the product! Heavy makeup is nothing more than heavy makeup.”

Tip #5: How to transform your lashes!

“Are you dealing with scrawny lashes? Try dusting the lashes with a little translucent powder between the coats of mascara! The mascara will grab the translucent powder, resulting in lush, thick, and beautiful lashes.”

Tip #6: Creating your own, custom lip gloss!

“Want to try out your own, custom lip gloss? Try mixing your favorite loose pigment with some petroleum jelly! Voila!”

Build even more on your makeup artist training with QC’s Advanced and Specialty Courses!

special fx makeup woman with skeleton face

Special Effects Makeup: Don’t Commit These 4 Sins!

By From the Experts, Makeup Tips and Tricks No Comments

Gabrielle Rivera is a QC Makeup Academy graduate and professional makeup artist. To see more of her work, visit her Instagram here. Today, Gabrielle reveals 4 mistakes you should never make with special effects makeup!

Special effects makeup is a great opportunity to step outside of your comfort zone, try new techniques, and tap into your creativity. Although special effects makeup can involve creating a look that isn’t perfectly blended or traditionally “pretty”, there are still some makeup sins you DON’T want to commit!

4 Special Effects Makeup Sins You Shouldn’t Commit

sfx character makeup

1. Don’t Overuse Special Effects Makeup Looks

Personally, I enjoy creating over-the-top special effects makeup looks as much as the next artist. However, something I learned early on in my career is the importance of researching realistic images, in order to help me bring my vision to life.

While you might think that SFX looks need to be unrealistic or exaggerated, there are still guidelines you should consider when creating these looks. The best thing you can do as an artist is to research photos of real bruises, cuts, scrapes, and any type of wound you wish to create.

Looking at realistic photos will help you to better design and color your special effects looks.

2. Don’t Overuse (and Misuse) Fake Blood

Another sin I frequently see with special effects makeup is the overuse and misuse of fake blood. Although fake blood can tie an SFX look together and bring it to life, it can also take away from the look if not used properly.

Overusing fake blood is one mistake that I find extremely common. Sometimes, even when it comes to gore-inspired looks, less is more. Time and time again, I’ve seen content where an artist spends a lot of effort adding details to their looks – only for it to be covered up with blood.

Remember: adding blood should accent your design, not overpower it!

sfx makeup demon face with horns and peeling skin

Likewise, misusing fake blood can also quickly make a realistic design appear overtly fake. When designing a look, consider the optimal color and thickness of any fake blood you intend to use. It should closely resemble the wound or effect you are trying to create.

Pro Tip: To make a special effects makeup look more realistic, consider the direction that blood would flow from a wound, or how the blood would splatter. Don’t simply spray blood in every direction. In real life, this doesn’t happen NEARLY as much as you’d think.

3. Don’t Use Sharp or Dangerous Items

In this modern age of social media, artists do not always take the proper care when creating special effects makeup looks. Sometimes, the desire to create a look that will stand out above the rest overshadows the very real need to put your safety above all else.

This is a major mistake that can prove costly, should anything go wrong. Although creativity is always welcomed, it can be dangerous to improperly use materials when creating an SFX look!

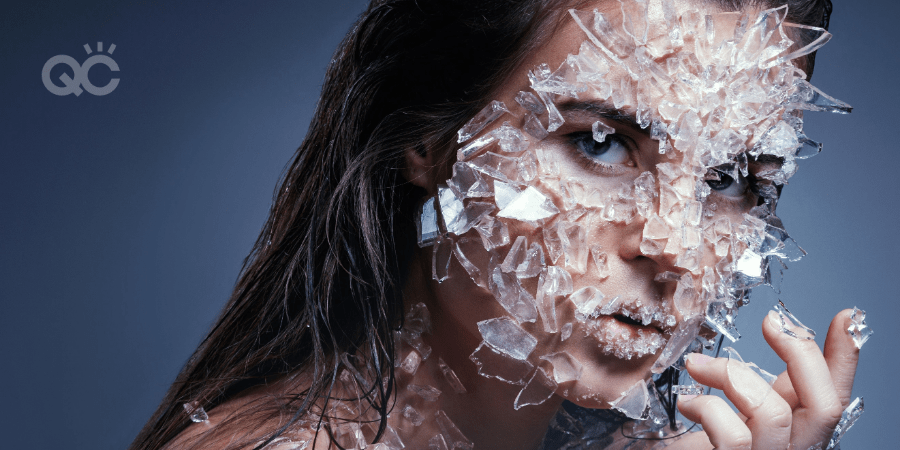
For example, artists should not use real glass, nails, or other sharp objects to bring a design to life. If creating a look that contains normally sharp objects, you should file the tips of down and ensure they are properly covered. Likewise, artists should never use real glass or metal – especially near their eyes, nose, or mouth. Instead, use items made out of plastic or other pliable materials.

This is an important step that’s often overlooked. Yes, it can be more time-consuming to create objects safely, but it’s a critical step of the process. When special effects looks are created with dangerous objects, it can be unsafe for both you and the model. So, please remember that safety always comes first!

special fx makeup woman with shards of glass sticking out of face

4. Don’t Forget to Blend Your Edges

Lastly, a small detail that can take your special effects makeup to the next level and help make it as realistic as possible is to blend your edges! It doesn’t matter if you’re using a premade prosthetic, scar wax, cotton and latex, or other compounds. Unblended edges can quickly diminish the effect of your design.

Blending the edges of your special effects makeup is such an important step in creating a realistic look! It provides a cohesive look from top to bottom. There are a few ways to help blend edges, depending on what product you’re using. Let’s take a look at a few of them…

Cotton and Latex

If you’re creating your own cotton and latex build-up, the easiest way to blend your edges into the rest of your look is to heavily saturate the cotton with latex. Once the cotton is heavily saturated, it changes the consistency. Thus, it’ll be easier to smooth and blend out.

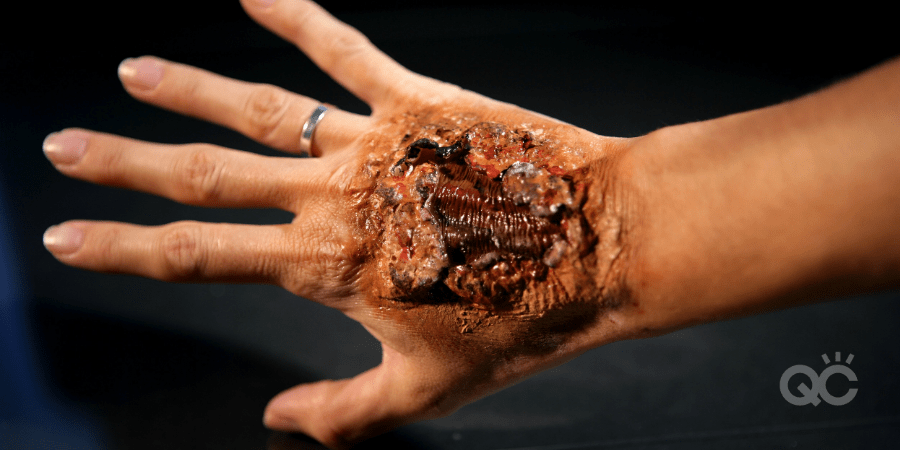
special effects makeup burnt hand prosthetic

Prosthetics

Pre-made prosthetics will usually have thin edges. These are meant to help artists easily blend the prosthetic into the skin. However, depending on the quality of the prosthetics, this may not always be the case.

To avoid bulging edges, you can apply latex and cotton to the edges. This will help blend the prosthetic. Another option would be to use Pros-Aide cream, which is specifically designed to help fill in gaps or seams.

Scar Wax and Other Modeling Components

When using scar wax and or other modeling components, an easy way to blend the edges properly and seamlessly is to use any of the following products:

  • Vaseline
  • Lotion
  • An oil that helps “melt” the product into the skin

The best way to apply any of the above products would be to rub it onto the tips of your fingers and then carefully rub along the edges of your design.

There is a lot to learn about the art of special effects makeup – particularly if you want to create professional and realistic looks. To learn more, enroll in QC Makeup Academy’s Special FX Makeup Course today!

makeup training for deeper skin tones - beautiful black model

Makeup Training: Contouring and Color Correction for Darker Skin Tones

By From the Experts, Makeup Tips and Tricks, Your Makeup Career No Comments

Australian MUA, Charlotte Ravet, is the proud owner of her very own hair and makeup business, A Date With Charlotte. From bridal, to editorial, to film and television, and everything in-between – Charlotte’s extensive makeup training allows her to provide a wide variety of services that cater to ALL types of clientele!

Her extensive resume includes working for Prada, L’Oreal, and even the cast of the hit show, Glee! A developer of educational programs, Charlotte has even been awarded Best Makeup Educator of the Year by the Australian Industry Makeup Awards.

Today, she reveals her top tips and tricks for contouring and color correcting darker skin tones!

The most important skill all makeup artists should master is the ability to create the perfect complexion for ALL skin tones. When it comes to color matching and/or correcting, proper makeup is crucial. This is the single greatest way to understand color theory. Knowing color theory will help you to create colors and custom foundations for all of your clients.

Let’s start with a quick recap on color theory and color correction…

Makeup Training: The Basics of Color Theory

The primary colors are blue, yellow, and red. When you mix these colors together in different combinations, you can create all of the other colors on the color wheel!

Here’s an excellent exercise to train your eye to identify colors and undertones: swatch a bit of foundation on a piece of paper and then use proper paint to recreate that exact same color. For example: start by mixing red and yellow together. Afterwards, add a bit of blue and white for the lightness. Adjust your color until you obtain the perfect shade.

When I did my makeup training, we created makeup for two whole months using nothing but primary colors and white mixed together. This has definitely opened my eyes to the potential of all colors and their diversity!

Makeup Training: Cool vs. Warm Undertones

The undertone of your client’s skin will play a major role in how you should apply makeup on them – and which products to employ!

For those new to their makeup training, here are the basics:

  • Cool undertones can be identified as pink undertones;
  • Skin with warm undertones, on the other hand, will tend to look more yellow;
  • Skin with an olive undertone might look a bit more green;
  • A neutral skin tone is when the skin doesn’t have any predominant color (neither pink nor yellow).

When it comes to deeper skin tones, the same rules apply. For instance, Middle Eastern and Indian skin tones will often have an olive undertone.

Warm and neutral skin tones can be easily observed in deeper skin tones: for example, BeyoncĂŠ has a warm skin tone. As such, she will perfectly suit all golden and bronze tones. On the other hand, Halle Berry has a skin tone that’s more neutral. Their skin intensity is pretty similar.

African skin tones can present red and blue undertones, which are identified as ‘cool’ undertones.

The Colors I Recommend for Deeper Skin Tones

Middle Eastern and/or Indian Skin Tones

Here’s one of my best-kept secrets: for these types of skin tones, I tend to mix a pure orange to my existing foundation.

I often find that foundations containing too much pink wind up turning gray on these skin tones. Alternately, too much yellow increases the olive tone and can make the client look sallow. By mixing a bright pure orange to the foundation, I manage to adjust the shade and brighten complexion. I also recommend using tones of warm bronze or gold to create highlights, as well as an ashy shade for the contour.

Warm or Neutral Skin Tones

These skin tones are rather easy to work with, but I often observe that the chest of my model can be slightly lighter than the face. Remember to always check the chest of your client in order to perfectly color match!

Depending on the undertone, I highlight using gold for warm undertones, or with a deep champagne/peachy shade for neutral skin tones. Contour can be done with a middle brown shade that has a blue undertone. A peach will help to remove pigmentation and dark circles.

Red/Blue Skin Undertones

As I mentioned earlier, red and blue are considered to be cool undertones. As part of your makeup training, this is really important when it comes to color combinations, correction, and contour! You will notice that deep blue, purple, and bright pink hues look wonderful on these skin tones.

There’s a common misconception that deeper skin tones are ‘warm’. As such, many will mistakenly use gold highlights. Yes, a gold highlight is going to catch and reflect the light – but it’s not going to best enhance the features of skin tones with blue and/or red undertones.

I would recommend a cool bronze. You can also play around with the complementary pigments mentioned above for a creative effect. I sometimes use pure yellow to create stronger highlights. For the contouring, I recommend a deep, blue-based brown, as this will create a natural shadow on the skin.

These skin tones often have pigmentation around the eyes and lips. I use a pure orange to conceal these unwanted undertones. You will also notice that the middle of the cheeks and the forehead are often slightly lighter. Use these areas as natural highlights – and do NOT use thick coverage if your model has good skin!

Last But Not Least: Powders

In theory, a loose translucent powder should be suitable to set makeup on every skin tone. But in reality, you would have to select one with a very thin texture, and apply with an incredibly light hand, in order to avoid creating ashy tones on deep skin tones.

Applying powder is always the moment we fear that our makeup will change color. If you aren’t using the correct product, it can ruin all your hard work. For a light application, I sometimes use a bright, loose pink powder. This helps to soften a blue undertone – although most of the time, I like to enhance it.

When I started my makeup training 15 years ago, we barely learned about global skin tones. I had to do a lot of research and teach myself how all skin tones actually work. I was working for one of the most important African TV channels in Paris, and I discovered a lot during those few months. The TV host shared with me their favorite makeup tips, and it was definitely a great experience!

It’s important to regularly update your makeup training. As professional artists, it’s our duty to be able to work in all skin tones, all ages, and all genders. Mastering the art of making the most of everyone’s natural beauty is our everyday challenge!

Did you know that QC Makeup Academy offers a Global Beauty Workshop? Enhance your makeup training and enroll today!

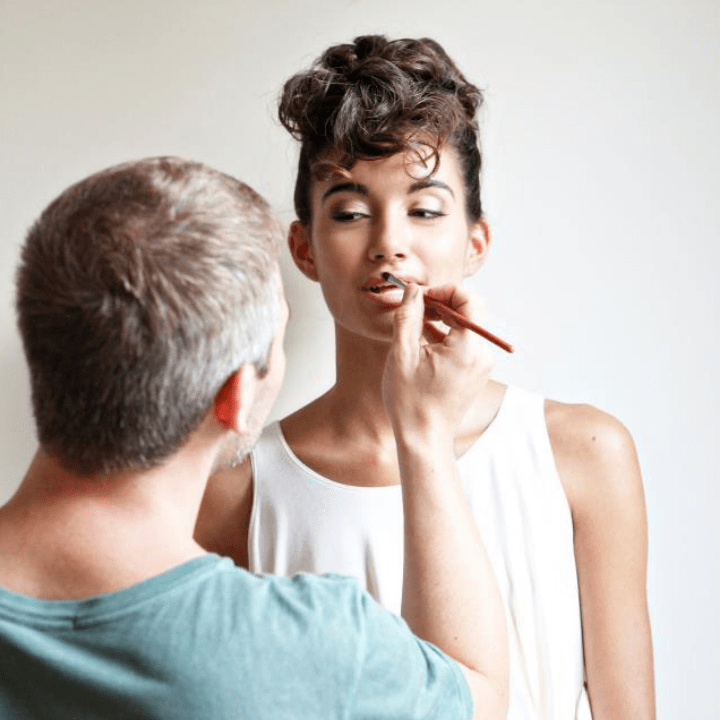
QC makeup classes instructor, Nathan Johnson, doing makeup on female model

Enhance Your Makeup Classes with Nathan’s Tuesday Tips: Part 3

By From the Experts, Makeup Tips and Tricks No Comments

If you want to learn how to do makeup, there are few in this industry better capable of tutoring your makeup classes than Nathan Johnson. While there are many incredible things that set QC Makeup Academy apart from other makeup schools (both online and in-person), Nathan’s expertise and genuine love of the craft definitely rank near the top of the list!

He is an industry professional who not only knows his stuff, but also truly cares about each and every one of QC’s students and graduates.

QC makeup classes instructor, Nathan Johnson

From the incredible instruction he provides throughout QC’s online makeup classes, to the support he gives in the Virtual Classroom and the amazing monthly webinars he hosts – Nathan is the embodiment of a true beauty expert, whose makeup knowledge is only outmatched by the size of his heart!

Another way he goes above and beyond in his mission to enhance our students’ makeup classes and overall training is through his Tuesday Tips! Each week, Nathan films a short clip, in which he reveals useful tricks to help you better your makeup artistry skills. On Facebook especially, this segment – aptly called “Nathan’s Tuesday Tips” – had grown wildly popular!

In this monthly blog series, we gather these Tuesday Tips so we can share them with you here! Missed our past installments? No worries! Check out Part 1 here, and Part 2 here.

Today, we’ll take a look at another 7 of Nathan’s most valuable beauty hacks. Want to add to the knowledge gained in your makeup classes and improve your game? Then you don’t want to miss out on these gems!

Tip #1: The importance of classic makeup techniques!

“Classic makeup techniques are the bases for everything in makeup. If you truly master them, you’ll see that they can be shaped, shifted, [and] transformed to create anything in makeup – from the simplest, cleanest look, to the most dramatic and unseen look!

It’s all in the precision of those classic techniques, and when you know them, you can do anything.”

Tip #2: Why practice makes perfect!

“Not everybody gets everything in makeup on the first try. Sometimes, you’ve got to practice things again, and again, and again, and again. So, if something’s a little stubborn for you, DO it – again, and again, and again, and again!

Because once you get it, guess what? [It] never leaves you.”

Tip #3: How to lift your client’s eyes!

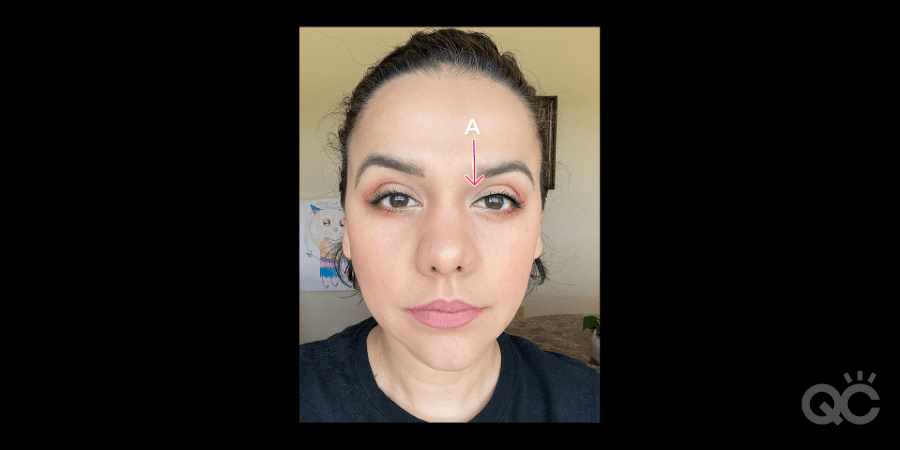
“Want to keep a client’s eye lifted? Imagine an invisible line, going from the corner of the eye to the end of the eyebrow. Be very careful about when you let any product go below that line. This will always lift!”

Tip #4: The importance of practicing makeup on paper!

“Remember: not all practice needs to be on a person! If you can master perfect symmetry and precision – with all the variations of eyeliners and lip liner – on paper, you will easily [and] drastically improve what you can do on a face.”

Tip #5: Why you should use an eyelash curler!

“Open, lifted lashes are a secret that keep your client looking awake and alert. So, don’t skip that eyelash curler.”

Tip #6: The secret to perfecting even eyeliner on loose eyelid skin!

“Is loose eyelid skin causing you to have bumpy, uneven eyeliner? Here’s a trick: tilt the head back, look down (eyes open to a little crack), and that will keep the eyelid skin super tight – allowing for a crisp, even application.

Want to keep it even easier? Use a soft pencil or a liquid, because it won’t grab the skin!”

Tip #7: The quickest, easiest way to refresh your look!

“Want a super fast way to refresh your look? Try changing the lip color! It changes everything in an instant.”

The single best way to become a makeup professional is by taking proper makeup classes! Until October 16th, 2020, enroll in QC Makeup Academy’s Master Makeup Artistry Course and get our new Virtual Makeup Training absolutely FREE!

Learn How to Do Makeup with Nathan’s Tuesday Tips: Part 2

By From the Experts, Makeup Tips and Tricks No Comments

If you want to learn how to do makeup, there are few in this industry better capable of teaching you than Nathan Johnson. While there are many incredible things that set QC Makeup Academy apart from other makeup schools (both online and in-person), Nathan’s expertise and genuine love of the craft definitely rank near the top of the list!

He is an industry professional who not only knows his stuff, but also truly cares about each and every one of QC’s students and graduates.

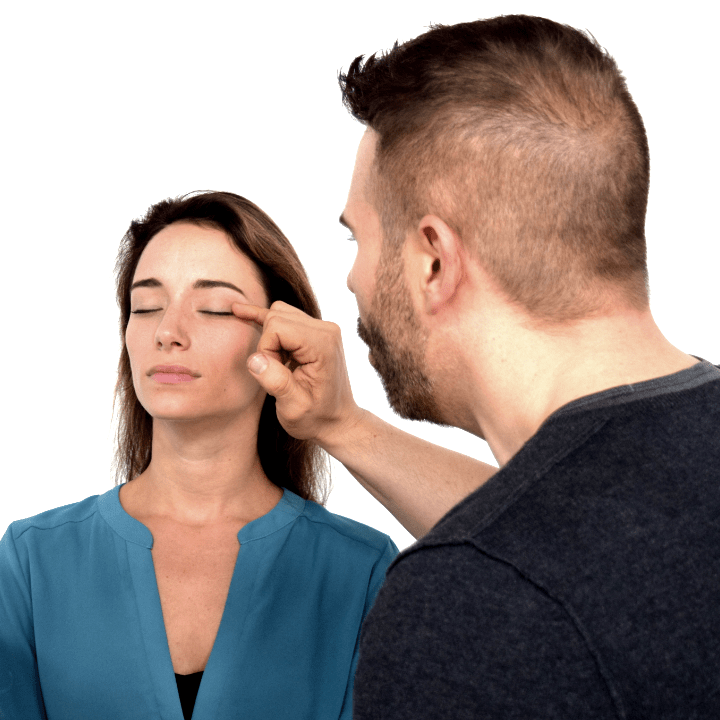
learn how to do makeup with nathan johnson - qc tutor

From the support he gives in the Virtual Classroom, to the amazing webinars he takes part in each month, and everything in-between – Nathan is the embodiment of a true beauty expert, whose makeup knowledge is only outmatched by the size of his heart!

Another way he’s been going above and beyond in his mission to help our students learn how to do makeup is through his Tuesday Tips! Each week, Nathan films a short clip, in which he reveals useful tricks to help you better your makeup artistry skills. On Facebook especially, this segment – aptly called “Nathan’s Tuesday Tips” – had grown wildly popular!

In this monthly blog series, we gather these Tuesday Tips so we can share them with you here! Missed Part One of this series? No worries, you can check it out here!

Today, we’ll take a look at another 7 of Nathan’s most valuable beauty hacks. On a quest to learn how to makeup properly, and looking for ways to improve your game? Then you don’t want to miss out on these gems!

Tip #1: The power of a rich, brown eye shadow!

“If you’re ever in a pinch, and want to know something quick and amazing to do to your client, a rich, deep brown eye shadow can be a game-changer! The quality of the neutral depth of color… It works on every skin tone, every age, and ever single person – no matter what their eye color [is]. It’s pretty amazing! Try it out and see what happens.”

Tip #2: How to properly warm up your client’s skin!

“Never try to warm up your client’s skin by using foundation that’s deeper. You run the risk of creating that dreaded makeup mask; the face that doesn’t match the body. What you do instead is you match the client’s skin perfectly, and then add the warmth [and] add the color with blush and bronzer. They’ll look like a million bucks every time!”

Tip #3: How to tame unruly brows!

“Unruly brows? A spritz of hairspray on a spoolie brush is the perfect way to tame those beasties!”

Tip #4: How to capture the glow from within!

“Want to capture that perfect glow from within? Try putting your blush, bronzer, and highlight on before your foundation.”

Tip #5: How to achieve the perfect lip!

“For a perfect lip, try putting the lipstick on first – and then refine and add crispness to the lip line with your liner.”

Tip #6: How to achieve perfect symmetry!

“Having trouble with symmetry? Work on the side that’s harder for you first, because it’s way easier to duplicate that on the easier side!”

Tip #7: The secret to flawless, natural foundation!

“Want to know the secret to making your client’s foundation look completely flawless and natural? Apply a thin layer – a sheer, light layer – of foundation all over the face. Then apply a second, small layer, only in the areas that need a little bit of extra coverage.

If there are some stubborn spots? The lightest touches of concealer! But that little, tiny, magic, light-handed touch will give you that flawless face that looks like nothing’s there.”

Stay tuned for future installments of this series, where we’ll compile and share even more of Nathan’s educational and practical ‘Tuesday Tips’. The journey to learn how to do makeup has never been this exciting! ❤️️

Want to learn how to do makeup like a true industry professional? Take a course and earn your certification! Until September 18th, enroll in our internationally-leading, online Master Makeup Artistry Course, and get ANY Advanced Course absolutely free!