From the Experts Archives - Page 5 of 18 - Beauty Buzz Skip to main content
Category

From the Experts

Industry Spotlight: Chantal Mariani

By Featured, From the Experts No Comments

Chantal Mariani has been a professional MUA for many years. Her extensive makeup training and resume are groundbreaking, setting the bar high within the beauty industry. It’s with great pleasure that we welcome Chantal as QC Makeup Academy’s newest expert tutor!

As a part of I.A.T.S.E. LOCAL 798, Chantal has had the pleasure of working on films, daytime dramas, news programs, and talk shows with various New York television stations. In addition to doing print work for models and actors, she’s also enjoyed her time as an instructor for makeup artists and design programs in several of New York City’s leading schools.

Chantal has also chaired the Education Department for the East Coast Union of Film and Television Makeup Artists, I.A.T.S.E Local 798. Among her many responsibilities, she was responsible for creating their curricula, as well as serving on the Membership Committee as an adjudicator for new applicants.

Several celebrity clients include:

  • James Earl Jones
  • Patrick Stewart
  • Ellen Burstyn
  • Vanessa Redgrave
  • Christopher Reeve
  • Sigourney Weaver
  • Susan Sarandon
  • Ray Liotta
  • Gwyneth Paltrow
  • Miranda Richardson
  • Iman
  • John F. Kennedy Jr.
  • Elle McPherson
  • Brooke Shields
  • Jaclyn Smith
  • Cicely Tyson
  • And many more!

Let’s get to know Chantal even more!

What sparked your passion for makeup artistry?

Life literally threw me into makeup artistry! I had graduated from the Fashion Institute of Technology, and started my career as a Fashion Buyer on 7th Avenue. One morning while on the subway, my fellow buyer unexpectedly landed a date, and asked me if I had anything I could use to put some makeup on her for it. So, I did her makeup… and she was delighted!

Another work friend then suggested I take a course and get professional makeup training, so I did. My teacher (who was actually Stevie Nicks’s makeup artist) immediately sent me on jobs that he couldn’t do. He even had me sub for him in class!

Every teacher I studied afterwards with did the same! My passion for makeup started the minute I started my makeup training.

Can you speak more about your affiliation with the I.A.T.S.E. LOCAL 798?

I’ve been a member for around 25 years or so. Over that time span, I’ve grown from an excited media makeup artist, to chairing their Education Department!

That position, among other endeavors, allowed me to create their education curriculum. I also got to travel to the Union’s southern territories, where I educated and brought both existing and new members up to my standard. I brought with me the “Boys at Saturday Night Live” (our top special effects makeup experts) and our Business Agent, and there, I taught my beauty classes.

We all offered them our specialty courses, and they never wanted us to leave! I have had former students as members, and in management in the Union, and I am extremely proud of them!!

What is the most rewarding part of being a makeup educator?

How proud I feel of my students! They have nabbed some of the juiciest positions in the field in my opinion, including:

They’re all over! I can’t walk into a trade show without seeing someone I had the pleasure of teaching. In fact, I usually have to factor in extra time so I can chat with them, catch up, and recall memories.

Also, I feel like beloved family to them, and they to me. I am so very blessed!

What are the 4 secrets to your success that might surprise people?

1. TRANSCENDENCE:

A keen, telepathic assessment of a client’s soul, spirit, and energy before I start working on them. I speak to them first. This helps me establish how and where to go for a uniquely custom-designed look. A person in my chair has always been a soul who is a gift from the Universe. First and foremost, it’s always about my relationship with them.
2. HUMILITY:

This is the chief driving force behind everything I do.

3. SERVICE:

If I cannot be of authentic service, and possess integrity in a situation, it is not worth it for me to be in that situation.

4. STEADFASTNESS:

I have weathered numerous storms of injustice, with the hope that justice would be restored. In my experience, it always was – and often, in an even better way!

What advice would you give to your younger self when you were just starting out?

Have faith in your artistry and path of growth!

Follow your path with love and hope. You will have a “thicker skin” for all your endurance, and confidence for all of your future knowledge. Honor your belief in the power of knowledge and education. Trust in the good in people. Above all else, don’t be afraid.

You can do whatever you set your mind to!

Chantal has worked with the industry’s top professionals, and you can learn how she did it in an exclusive webinar on July 14th. Sign up today!

Perfecting the “No Makeup” Look Tutorial [video]

By From the Experts, Tutorials & Tips No Comments

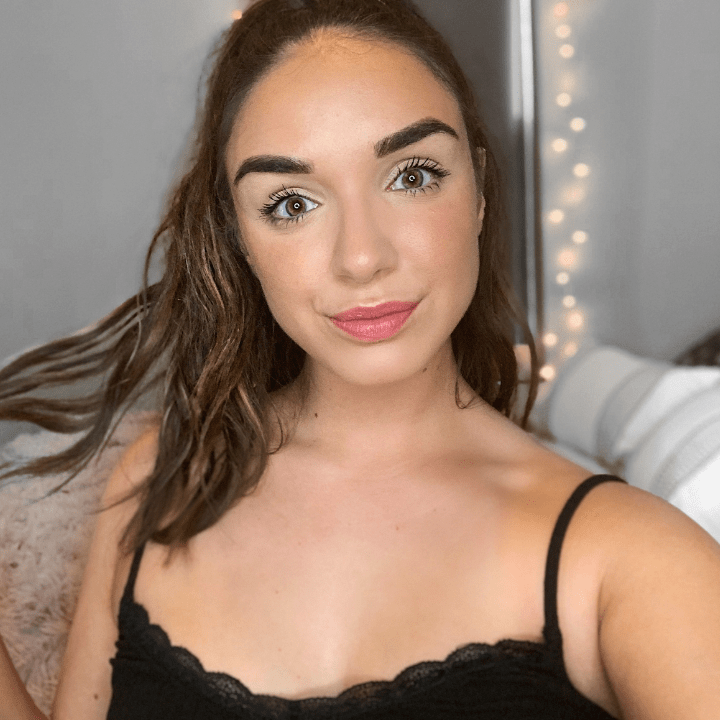
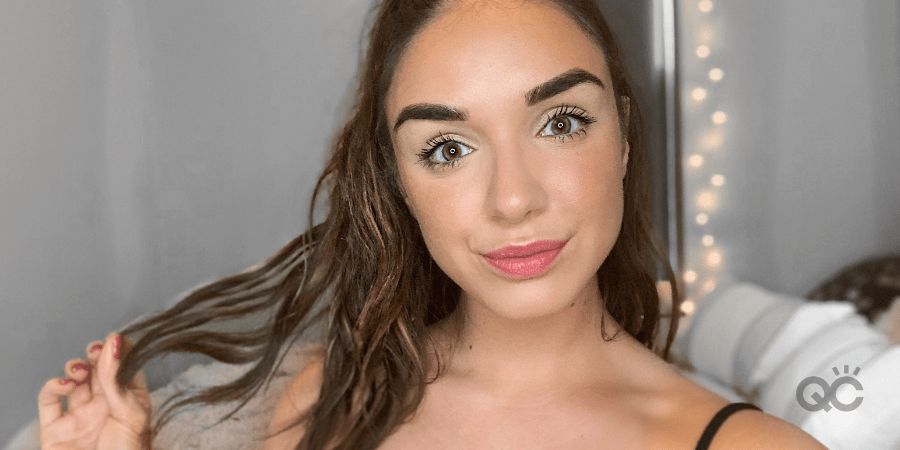
Devyn Gregorio is a QC Makeup Academy Student Ambassador and professional makeup artist. You can find her on her YouTube Channel, DevDevGregs, where she makes beauty videos. Today, Devyn walks us through the step-by-step process of her “no makeup” makeup look!

As you learn how to do makeup, know that there’s more to being a makeup artist than mastering the smoky eye, or a dramatic nighttime look.

Sometimes, less is more! Being able to create the perfect “no-makeup” demonstrates to your clients that you truly understand the makeup theory behind your work. By using makeup to bring out a person’s natural features, you’ll create a final result that gives the illusion of wearing little to no makeup at all.

This skill is especially useful if you’re looking to start a career in the TV and film industry! So, whether you wish to give YOURSELF a casual no-makeup look this summer, or you want to prepare yourself for future clients, this tutorial is for you.

Let’s get to it!

Watch Devyn’s video below!

Makeup Products Needed:

Luckily, because the entire purpose is to go for subtlety, you won’t require your entire makeup kit to create this look. Below is the list of specific products that Devyn uses throughout her tutorial. Feel free to use your own makeup products in replacement of hers.

Here’s what Devyn used:

1. Primer. Devyn uses e.l.f. Jelly Pop Dew Primer, but you can use whichever primer you most prefer!

2. Foundation. Use the product and shade of your choosing. Devyn selects NYX’s Bare With Me Tinted Skin Veil, and mixes the shade, True Beige Buff, with Cinnamon Mahogany.

3. Concealer.

4. Bronzer. Devyn selects the Wet n’ Wild MegaGlo Contour Makeup Stick, in the shade, Oaks On You. This product offers a creamy texture for her bronzer. In addition, she also uses a powdered bronzer (MAC’s Give Me Sun! bronzer).

5. Highlighter. In this tutorial, Devyn uses the highlighter product from the Alamar Cosmetics Brighten & Bronze Complexion Trio kit (in Medium/Tan). In addition, she also uses Maybelline’s Master Chrome Metallic Highlighter (in Molten Gold).

6. Brushes. In particular, you’ll want:

  • A large, fluffy brush for your bronzer
  • A contour blender brush
  • A powder brush
  • A highlighter brush
  • A brow brush

7. Loose setting powder. Devyn’s loose setting powder of choice is Juvia’s Place I Am Magic Setting Powder, in the shade, White Sands.

8. Blush. Devyn’s chosen blush is ColourPop’s Fresh n’ Peachy.

9. Brow pencil. Devyn uses NYX’s Micro Brow Pencil in the shade, Brunette.

10. Setting spray. As with the rest of this list of products, feel free to use whichever setting spray you want! Devyn selects Wet n’ Wild’s PhotoFocus 3-in-1 Primer Water.

11. Mascara. In this tutorial, Devyn uses Benefit Cosmetics’ BADgal BANG! Volumizing Mascara.

12. A lip product of your choosing, such as lip balm, a clear gloss, etc. Devyn chooses e.l.f.’s Sheer Slick Lipstick in the tone, Cherry Slush.

Let’s Recap!

Before diving into any of the steps, Devyn first reiterates the most important thing to remember when creating a natural makeup look: use a LIGHT hand!

After all, it’s always easier to build up a look’s intensity. It’s a lot harder to take away from a look if you go in with a heavy hand, right from the get-go. So long as you apply your makeup in thin, sheen layers, you’ll quickly discover that you can still use ALL of your regular products – even for this laid-back “no makeup” look!

Now, let’s move onto the look itself…

Step 1: Prime Your Skin.

Even though the name suggests no makeup, you know that you’re still going to be putting makeup on your face. As such, it’s important to properly prime your skin first. Not only will it make your skin feel its best, it’ll help protect your pores from getting clogged!

Step 2: Apply Foundation.

Next, Devyn applies a lightweight foundation to her skin. Because she currently has a bit of a tan, she chooses to mix two shades together, in order to match as closely as she can with her skin tone. Notice how she first uses her finger to apply the foundation to her skin, before blending it in afterwards with a blending sponge.

Because our hands have a natural tendency to warm up our makeup product, don’t hesitate to do the same when applying your foundation. Just make sure that your hands are cleaned and sanitized with soap first!

As you can see, Devyn’s skin looks a lot more evened out after applying her foundation. However, it’s not full coverage, as the aim of this look is still to appear natural.

Step 3: Apply Concealer.

Once again, you’re aiming for the “no makeup” illusion. So, here’s where keeping that light hand in mind is key! Here, Devyn applies a small dot of her concealer below each eye, before using her finger to pat it in and blend it out.

The final result should brighten and cover the skin beneath your eyes, while still looking breathable!

If you wish to take this a step further, you can add some brightness to your forehead and chin by applying the same small amount of concealer to these areas as well. Should any areas of your face require some spot concealing, feel free to tend to that, too.

Step 4: Time to Contour!

Rather than apply the bronzer directly to her face, Devyn instead uses her e.l.f. Precision Airbrush Stipple brush to apply the product. This allows for lighter coverage, in keeping with a more natural, organic look.

She applies her bronzer right onto her brush, before gently tapping it over the typical areas where she would bronze, such as her:

  • Cheekbones
  • Outer area of her forehead (near the hairline)
  • Around the jawline, blended downward into the neck

Next, Devyn moves onto powdered concealer and contour products. Using her Alamar Cosmetics trio palette, she takes a contour blender brush to first gather some of the highlight shade. She then gently presses it onto her under-eye areas.

Step 5: Set with Powder.

Now it’s time to set the rest of your face with some loose powder! Using a fluffy powder brush, press the powder throughout your face. This will help set both the liquid and cream products you’ve previously applied.

At this point, if you wish to go back over your bronzer with a powdered bronzer, you can do so for an added little POP!

Step 6: Additional Highlighting.

If you aren’t a fan of highlighting your skin, feel free to skip this step.

Here, Devyn relies on a highlighter she typically uses in her everyday makeup look. Once again, the secret here is to use a light hand! This can create a whole new affect on your skin.

After tapping a highlighter brush two times against her product, she swipes the brush head along her cheekbones and temples, using a feathery-light pressure. Keeping a loose grip on your brush handle will help you achieve these dainty strokes.

Since you’re trying to make it look as though you’re wearing little to no makeup, the goal with your highlighter is to make it appear as though you’re organically catching the light in certain angles. You DON’T want your highlights to be too obvious!

Step 7: Add Blush.

This is Devyn’s final step to finishing off your complexion. Lightly tap and press your blush into apples of your cheeks. This will bring a bit of a natural redness back to your skin, in the places you want it most!

Step 8: Define Your Eyebrows.

Time to move onto your brows! Taking her micro brow pencil, Devyn aims to perfect her existing brows – rather than completely fill them in or reshape them. Start by combing them up. This will allow you to see where their natural shape is. This is the shape you want to honor in this “no makeup” look!

Then, whenever you see spare areas, fill them in with fine, hair-like strokes. Start at the bottom of your eyebrows, and work your way up. Once finished, use your brow brush again to help blend everything together.

Step 9: Apply Eyeshadow…

…Just kidding! This is a “no makeup” look, after all!

Actual Step 9: Apply Setting Spray!

Devyn’s now ready to move onto her eyes. But before she does that, she prefers to apply her setting spray. Right before the spray is completely dried, Devyn takes a little more of her powdered highlighter and applies it to her eyelids.

Step 10: Put on Mascara.

If you wish to curl your eyelashes first, go ahead! If you don’t feel like doing this, though, that’s okay, too. Using your mascara of choice, apply it to your upper and lower lashes. Depending on how intense you want the final result to be, feel free to go back in and add another coat of mascara.

Step 11: Finish with Your Lips!

The final stage to Devyn’s process is to apply some sort of lip color/product. The beauty of the “no makeup” look is that there are a LOT of options for what you can choose to wear! The most important tip to remember is that dry lips will not complete any look.

Even though you’re going for a natural illusion, even just a thin layer of Chapstick can add a little extra shine to your beautiful pout!

If you’d prefer to add a bit of color, stick to soft, natural shades. Pink and peach colors are awesome choices! If you choose a product with a stronger pigment, gingerly tap it onto your lips so as not to get too bold of an application. You’ll be able to add some nice color and hydration, without overdoing it and ruining the “no makeup” mirage.

And with that, your “no makeup” look is complete!

Did you follow along with Devyn, and give this look a try? If so, let us know how it turned out in the comments below!

Want to learn how to do makeup professionally? Enroll today in QC’s internationally-leading Master Makeup Artistry Course, and become a professional makeup artist in as little as 3-6 months!

Special Effects Makeup: Sliced Face Tutorial [video]

By From the Experts, Tutorials & Tips No Comments

Gabrielle Rivera is a QC Makeup Academy graduate and professional makeup artist. To see more of her work, visit her Instagram here.

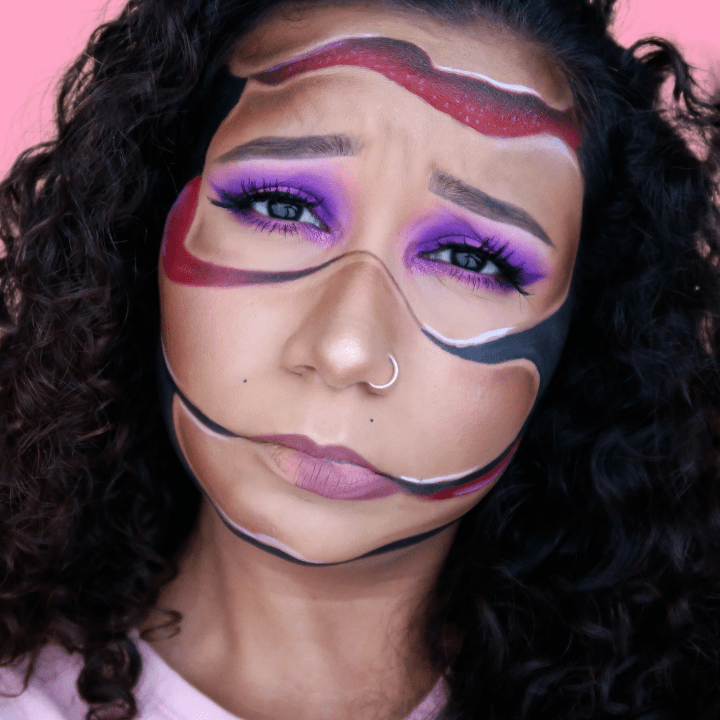
Part of being a special effects makeup artist – or even just an MUA in general – is about keeping up with popular trends! One such trend that’s been gaining more and more popularity is the sliced faced SFX look, originally created by the “Queen of Illusion Makeup”, Mimi Choi.

Want to learn how to master this look? Gabrielle’s here to break down each step, from start to finish!

Watch her video below!

Makeup Products Needed:

For such an elaborate special effects makeup look, there are surprisingly very few products you need when following along with Gabrielle’s special effects makeup tutorial! Keep in mind that you’re more than welcome to use any of your own products, in place of the ones Gabrielle is using.

Below is the list of makeup products she used to create the sliced face look on herself:

1) A brown eyeliner pencil.

Gabrielle recommends using a color that’s close to your complexion! Because you want the final product to appear realistic, don’t use a black eyeliner pencil. The color will be too harsh, and will give you trouble when trying to blend it into your natural skin tone.

2) Body paints.

Gabrielle uses some of the Paradise Paints by Mehron. Specifically, she chooses the white, black, and red colors. If you don’t have access to body paints, Gabrielle suggests using everyday makeup items in their place, such as:

  • Red lipstick
  • Eyeshadows
  • Eyeliners

Basically, use whatever you have at your disposal!

3) Brushes.

Because you’ll need to be precise in certain parts of this look, arm yourself with some smaller brushes! This will help you have the most control over your product, especially when coloring in between tighter lines. A reliable shader brush will also come in handy, too!

4) Eyeshadows.

Try to match the shades you use with the paint hues you select for this look. For example, Gabrielle sticks to red, black, and brown eyeshadows.

Let’s Recap!

Notice how Gabrielle has already created a bright, purple smoky eye before starting her tutorial. You can feel free to do this look with a bare face, if you’d prefer. However, if you’d like to spice it up with a bit of a glamorous twist, you can first create a smoky eye of your choosing.

Now, let’s start breaking down this special effects makeup look!

Step 1: Creating the Outline

Gabrielle begins by taking her brown eyeliner pencil and lightly outlining her face. From there, she begins creating additional lines and loops on the main parts of her face (i.e. nose, cheeks, jaw, forehead, etc.).

Many of her lines connect with each other, and add dimensional depth. This step is creating the overall design of your sliced face look.

Remember: As you follow along with Gabrielle, leave spaces between the lines, wherever she advises you to! These gaps will be filled in with a different color later.
Note: You can play around and have fun with the way you outline your face! You don’t need to follow the exact design that Gabrielle is doing. Just remember that asymmetry is key to this look! You don’t want everything to be perfectly balanced on both sides of your face. After all, you’re trying to create the illusion that your face has been slashed!

Step 2: Filling in With Red Paint

Now that Gabrielle has finished the initial outline, it’s time to go in with her red SFX paint! This is going to really help define each of the sections she’s drawn, and make them pop.

Since her paints are water-activated, she sprays a bit of water onto the lid, before wetting her brush and dipping it into the paint.

Then it’s time to apply the paint onto her face! Notice the way Gabrielle carefully follows the outline when filling in her desired sections. For those tighter sections between the lines, use a thin brush.

Step 3: Shading with Black Paint

Once Gabrielle has finished with the red paint, it’s time to fill in the larger sections with black. You’ll notice how these black sections are strategically placed around the outer part of Gabrielle’s face, such as her jawline, temples, and upper forehead. This is so that Gabrielle’s face is framed, and made to appear smaller.

Step 4: Adding Depth to the Red Paint

Using a flat shader brush, Gabrielle then uses a burgundy shade to add definition to the red paint from Step 2. Using a light hand, she pats on this darker red just along the upper lines, right below where her natural skin tone starts.

With a small, flat-headed brush, Gabrielle then grabs some black and adds it to all the high points of her red sections. Once you’ve created the initial outline, use your brush to lightly drag the black down into the red. This will help blend the black in, and add even more depth!

Step 5: Incorporating Some Shading

Gabrielle prefers using her flat shader brush (specifically, the Morphe m167) for this step. However, feel free to use your own blending brush of choice!

She then refers to her Morphe Dare to Create Palette, selecting the Stroke (matte warm tan) and Mass (matte chocolate mousse).  Don’t forget to tap off any excess product from your brush, before applying it to your face!

Following along all the lines and curves Gabrielle has already painted on her face, she makes sure to leave a bit of room between the paint and the eyeshadow she’s applying now. For this step, a lighter hand is your best friend! Apply thin, sheen layers, and blend them inward. If you need to add more intensity, do so by adding more of these sheer layers.

The finished result will look like natural shading across your face!

Step 6: Adding More Depth

Taking a slightly darker brown than what Gabrielle used in the previous step, she then goes back in and adds the tiniest bit of depth to the brown shading. To achieve this, she pays close attention to keeping her brush strokes contained to the very outer corners.

Step 7: Creating a Fake Bottom Lip

This step is a lot less dramatic than the subtitle implies, don’t worry. All Gabrielle does here is apply some soft pink liquid lipstick. (Again, feel free to use whichever lip color you want!) When applying this product to the left-hand side of her bottom lip, she extends the coverage a bit further downward.

This creates the appearance of that side of her bottom lip being larger than it actually is.

Step 8: Highlight with White Accents

Here, you can use white eyeliner, white paint, a lightly-toned concealer, or whatever you most prefer! Just ensure that it’s a light shade, in order to best create the highlighting effect.

With a thin, fine detail brush, Gabrielle uses white body paint to draw thin accent lines throughout her design. Lastly, Gabrielle stipples tiny white flecks into the red section, before blending them with her finger.

The purpose of this final step is to make all those red and black sections really stand out. It also gives the overall look an extra level of profundity!

And just like that, you’re done!

Did you enjoy this special effects makeup tutorial? If so, check out Gabrielle’s other tutorial, where she demonstrates how to create a bejeweled skull!

Tried this tutorial on yourself? Let us know how it turned out in the comments below!

Want to become an SFX pro? Enroll today in QC’s leading online Special FX Makeup Course, and earn your International Special FX Makeup Professional certificate within 3-6 months!

Why Other Makeup Artists Are Your Friends, Not Enemies!

By From the Experts, Your Makeup Career One Comment

Australian MUA, Charlotte Ravet, is the proud owner of her very own hair and makeup business. From bridal, to editorial, to film and television, and everything in-between – Charlotte provides a wide variety of services that cater to all types of clientele!

Her extensive resume includes working for Prada, L’Oreal, and even the cast of the hit show, Glee! A developer of educational programs, Charlotte has even been awarded Best Makeup Educator of the Year by the Australian Industry Makeup Awards.

Here, she explores the many reasons why your fellow makeup artists are some of your best allies within this industry!

“It’s a small industry!”

If you’re a beauty lover who’s currently learning makeup, and who has dreams of becoming a pro MUA, be ready to hear this sentence every day!

Yes, it’s a small industry. This much can’t be denied. But as an international makeup artist myself, I can testify that there are no borders. In reality, it’s a WORLDWIDE industry! As makeup artists, the level of passion we have for our craft is ultimately what brings us together, and makes the industry seem small by comparison.

So, why does this matter? After all, isn’t it great to work in an industry where people get to know each other so quickly? Yes, of course it is!

But there is one thing you’ll need to be ready to deal with: competition.

The fact is, there will always be someone you’ll envy within this line of work. Whether it’s because of her resume, her success, her connections, or her skills. The real question is: is it bad to be a bit jealous?

No, it is not. I’m personally not jealous by nature. But I am giving myself career goals, in order to reach the same level as the artists I admire. Once I decided to approach my career with this positive mindset, I quickly discovered the importance of networking and sharing.

Even more importantly, I realized just how supportive the makeup artist community can be towards others! Just because other MUAs are technically your ‘competition’, it doesn’t mean they’re your enemies. The two don’t need to be synonymous!

In fact, one of the most valuable things you can possibly be taught when learning makeup is that your competition are actually your FRIENDS!

Why You Should Make Friends with Your Competition

Honestly, there are too many reasons to name. If I tried, we’d be here all day! But I can definitely come up with a few of the most important ones.

Here are a just some examples of how you can support – and get support from – this wonderful community:

1. Other Artists Can Become Part of Your Network

Ever since the early days of my professional career, I’ve always valued my network. I was lucky to have a successful start in TV makeup, right after I finished learning makeup and earning my certification. When I was booked for other jobs afterwards, I always recommended other artists.

The TV productions appreciated that I didn’t let them down. In the same breath, other artists would recommend me for work whenever they could. A good rule of thumb to abide by is this: always recommend someone you know will be the best for the job.

Don’t be scared that the artist could steal your clients! Remember: self-confidence is key!

My network works in the same way that my private relationships do. Just because you have a close friendship with one person, it doesn’t have to mean that any other friendships mean any less, or will suffer.

The same can be said about your clientele. If you know you’re always doing your best for your client, always make a great impression, and have a secure work relationship with them, why would they try to book someone else?

In this industry, people provide excellent word-of-mouth, and often help each other out. There will always be more potential clients! Plus, professional makeup artists will rarely try to actively seek out and steal your faithful clientele.

If you know someone in your network would be the best fit for a potential job, don’t worry that recommending them will somehow hurt your own career. In reality, this other makeup artist WILL remember your kind recommendation, and they’ll be likely to recommend YOU when a similar opportunity arises on their end.

In the worst-case scenario: if it just so happens that another MUA does steal your contact, well, it was not worth it! All you can do is live and learn. Simply refrain from recommending this makeup artist again in the future.

2. Other Artists Can Help You to Continue Learning

I always strive to continue learning. After that, I plan to learn again, and then again! You get the idea. There’s always something new to discover. Importantly, you often can – and should – learn from others.

I’m an educator, and have taught classes to other makeup artists. Some of them even had 30+ years of experience! Still, that doesn’t stop them from coming to me, and seeing what new and exciting things I can teach them.

Similarly, I always jump at the chance to learn from other skilled experts within the industry. As artists, we should ALWAYS continue in our quest for more knowledge!

There’s no shame to ask for advice. Reaching out to others for help is not a sign of weakness. If anything, it signifies your love of the craft and your dedication to always self-improve. One thing I recommend is involving yourself in online communities! Personally, I love being a part of Facebook groups.

I’m always happy to share some tips, and likewise, learn a lot from the community myself.

3. Your Relationship with Other Artists Strengthens Your Reputation

We have one reputation… and ONLY one!

You can be the best in your game, but if you don’t have support from your industry, this often won’t be enough. Being kind and helpful with others doesn’t cost anything, but it absolutely goes a long way! How you treat others will play a major role in how others perceive you and your business.

You’ll quickly learn that makeup artists who speak badly about others are not the most talented ones. Putting other artists down won’t make you shine. Gossiping about other artists – whether it be to your network or your clients – will only make you look extremely unprofessional.

If you want to build a positive reputation, make yourself known for all the RIGHT reasons. Be kind. Be fair. Have a strong work ethic. These are the best strategies to making a strong, pleasant impression!

4. Other Artists Can Provide Encouragement

Working as a makeup artist can be exhausting! We don’t always fully understand this when learning makeup, but we quickly do once we begin working in the field.

Sometimes, the best people to lift you up when you’re feeling down are the ones who actually understand what it is you’re going through. When I’m feeling frustrated or overwhelmed, I need my “makeup family” to remind me why I’m doing this job. Their support can help ground me, and bring me back to my roots.

They can help remind me why I love this industry so much!

We ALL have our rough days. It’s important to know that it’s okay to not always be okay. In regular life, you need your friends. If you’re struggling, you rely on those who understand you best.

In your professional career as an MUA, this is provided to you in the form of your makeup artists friends!

How to Start Making Friends in the Industry

First, create your network while you are learning makeup. Look around and ask yourself:

  • Are there other artists around you who are sharing your passion?
  • Are you coming into contact with fellow MUAs who inspire you?
  • Are there other artists who seem genuinely happy for you when you succeed?

The nature of your friendship with other industry pros can be as similar (or as different) from a regular, everyday friendship as you want it to be. Remember: not everyone in your professional network will be your new BFF. That’s okay!

Many of the relationships you forge in your career will be of a professional nature. They will help build your network and establish your reputation. With this in mind, you want to make sure that you always give your best, most professional image.

Above all else, present yourself as reliable, organized, and committed to your work!

Another option is to join specialized groups! Here are just a few examples of wonderful Facebook groups that welcome all professional makeup artists:

If you’re a QC Makeup Academy student, graduate, or are simply figuring out if you want to be learning makeup from an online school, I also recommend the QC Makeup Academy Virtual Classroom. This is a fantastic place for you to meet other aspiring MUAs!

Online groups and forums give you the chance to learn from other artists, as well as the opportunity to ask questions. I’ve met a few of my current industry friends through these groups, before we met in real life. They’re an excellent, convenient way to stay connected with the industry, and exchange tips and advice.

Another suggestion is to start assisting professional artists. Assisting is an excellent way to build a relationship with an experienced artist, while also refining your own skill-set. You’ll learn a lot, and have the opportunity to observe and connect with the professional industry!

Food for Thought

These past few months have shown us just how vital respect and kindness are towards others. You don’t need to announce when you are helping someone, or passing on work to another artist, or encouraging someone, or sharing a makeup technique…Acts of kindness will always be able to say more than words ever could.

Competition is real in the makeup industry. But the only rule to remember is that your competition should only push you to be YOUR very best! Competition is not about spending energy to put others down.

We shouldn’t be afraid to sometimes ask for help, whether it be to find work or to improve upon our skills. And if someone judges you? Well, that just means that person isn’t worth being a part of your “makeup fam”!

Your success starts today! So, start being the person – and the artist – you want to be!

Want to start learning makeup, so you can get your career started? Enroll today in QC’s leading international Master Makeup Artistry Course!

Boost Your Makeup Artist Salary with These 5 Online Services!

By From the Experts, Your Makeup Career No Comments

Throughout many parts of the world, businesses are slowly beginning to re-open. However, for just as many of us, social distancing is still the primary way of life for the foreseeable future. This doesn’t mean that your MUA business (or makeup artist salary) needs to suffer, though!

Over the past few months, we’ve looked at various opportunities for you to maximize your time at home in a way that benefits your career goals. For instance, we’ve examined:

QC’s executive tutor and celebrity MUA, Nathan Johnson, has shared tons of invaluable advice as well! Particularly, he’s offered tips for optimizing your makeup practice/education while at home, and even expanded on this topic in an eye-opening webinar!

Today, Nathan wishes to build on this momentum, and continue motivating you to follow your dreams! Yes, we’re still in the midst of a pandemic. But no, that does NOT mean you should allow it to discourage you! You, your career, and your dreams still all have room to thrive!

So, if stay-at-home orders are still prevalent where you live, fear not: Nathan’s got 5 ways that you can still work virtually, so you can continue to bring in an income for your MUA business.

Keep reading to discover how you can boost your makeup artist salary – even from home!

Online Makeup Consultations

This is a practice that more and more makeup artists are adding to their business as a standard practice. By offering virtual consultations, you’re not only providing clients a way to work with you, despite a pandemic… but you’re also no longer limiting yourself to strictly local clients!

Online consultations mean that you can now also work with long-distance clients, who reside practically anywhere in the world. Many makeup artists find this service to be incredibly beneficial for their business and provide it on a permanent basis. Definitely something worth considering, as it will absolutely help boost your makeup artist salary!

There’s also tons of wiggle room here, in terms of the types of remote consultations you can provide. Some popular examples could include:

  • One-on-one lessons for a new look. This can be look-specific or general technique lessons.
  • Seasonal makeup lessons. The purpose of this can be to help teach clients some new trends that are not only appropriate for the current season but are perfect for their specific features.
  • Makeup kit makeovers. There are many beauty lovers out there who can probably benefit from Spring cleaning their kits and cosmetic bags! Through a virtual consultation, you can walk them through all of their products and advise as to:

Group Party Lessons

Have the gals gather, and give them all a virtual makeup lesson! There’s a pretty big market for online group makeup classes, so why not capitalize on it during a time when it would benefit everyone the most?

Now that everyone is working from home and relying on virtual meetings, they’ll want to know how to look their best. This is an amazing opportunity to teach women and men how to create dimension and maximize their features on video!

Plus, this is another service that you can incorporate into your everyday business, even once social distancing rules eventually lift. It’s a convenient and fun way to boost your makeup artist salary while keeping things fresh!

The content of these lessons could vary week-to-week, or even month to month, depending on how often your clients want to gather in their online forum. Here are just a few ideas of topics you could cover with your audience:

  • How to master a red lip and find the red that’s right for YOU
  • Eyeliner 101: breaking down each variation, and what they all do
  • How to effortlessly eradicate dark circles
  • Maximizing the dimensions of the face through natural applications of blush, highlighter, and contour
  • Quite literally ANYTHING related to a classic technique or makeup trend
  • And tons more!

Because many of these topics are so broad, and you aren’t confined to the limiting space of a physical classroom, there would be no limit to the number of people permitted to sign up for your virtual classes!

Start Working with Your Favorite MLM

In general, online events are very easy and lucrative. Once provided with your favorite company’s products, you can then use them on yourself and rely on your makeup education and skincare training when marketing the products to others. The best part is that it can all be done from the comfort of your own couch!

When done right, this strategy can result in major sales, and positively affect your makeup artist salary. You can learn how to combine direct selling with your makeup training in this webinar hosted by Nathan Johnson!

Familiarize yourself with popular, trending videos currently online (via Facebook, Instagram, YouTube, TikTok, etc. and see if you can utilize any of these platforms in a similar way to help market the products. When it comes to being a seller for an MLM, it’s all about personality. You need to sell yourself, as much as you’re selling the product.

If you’re charming, funny, knowledgeable, and learn the art of social media marketing, you’ll not only make sales—you’ll open yourself up to a global audience!

Pro Tip: Should you wish to get involved with an MLM, make sure to do proper and thorough research! Unfortunately, there are a lot of scammers out there, so you need to protect yourself. This article is a great read, and provides a very honest and objective breakdown of everything you need to know before getting started!

Social Media Presence

Here’s a fun fact: great YouTube videos can earn you cash. So can a powerful Instagram feed!

Nowadays, a very popular avenue for artists is to become an online influencer. Don’t get us wrong – such an endeavor will require lots of time, patience, and hard work. Unless you’re lucky enough to have something go viral, most people don’t become famous overnight.

Getting to the ‘influencer’ level and actually making a profit off of it will require you and your channel to acquire an extremely high number of subscribers. In order to do this, you’re going to need:

  • social media channel
  • A strong brand
  • A charismatic personality, or likable niche
  • A regular posting schedule
  • Decent (to high-quality) filming and editing equipment
  • At least some understanding of marketing strategiesSEO, etc.
  • Something to say – that is, you need to have solid, relevant, and original content

It’s also just as important to learn what NOT to do when marketing yourself (and your makeup business) across social media. This article looks at some helpful do’s and don’ts to keep in the back of your mind!

Want some additional tools to help you find SEO Keywords for your website and stay on top of your backlinks? Here are 3 resources courtesy of SPopli that might help get the job done!

Writing Articles for Beauty Blogs and Publications

Not to mention, it’s an extremely convenient way for you to boost your makeup artist salary. All you need is a laptop, somewhere cozy to sit for a couple of hours, and a WiFi connection… What could be simpler?

In reality, there are a huge number of freelancers, brands, and even accredited makeup schools that will pay you to write high-quality content articles for their beauty blogs! As an industry pro with proper training, education, and experience, you’re a fountain of knowledge. There are PLENTY of people out there who can benefit from your expertise.

Of course, another way you can work remotely, maintain your online visibility, and potentially attract new clients is by starting a beauty blog for your makeup business. That being said, you have more options than simply writing for your own blog.

That way, once life inevitably goes back to normal, you’ll be ready to offer ALL of your clients – near and far – these awesome, flexible services! At the end of the day, there are many lucrative ways to earn money and increase your makeup artist salary. Don’t limit yourself to believing they always have to be in person.

The best part about all of these suggestions is that they transcend the current pandemic. Yes, they’re extremely useful for you to utilize NOW – but they’re also just as beneficial on a regular day, too. By introducing these services to your makeup business presently, you’ll have the proper time to work out all the kinks.

Stylized photoshoots are another excellent way to boost your makeup artist salary! Keep reading to discover why!

The Differences Between Film and Stage Makeup

By Education, From the Experts No Comments

Updated 2024

Makeup has played a huge part in the entertainment industry for decades, transforming actors into their characters. However, not all makeup is created equal. While film and stage makeup may seem similar at first glance, there are significant differences that make each type unique.

Not to worry though, we’ll go over the differences between film and stage makeup in this article. So, whether you’re a makeup enthusiast or a professional, read on to discover the art of transformation and how it differs between film and stage productions.

Keep reading to learn the differences between these two makeup mediums…

What is Film and Television Makeup?

Film makeup, also known as cinema or movie makeup, is specifically designed to be worn in front of a camera. Its primary purpose is to enhance the actor’s features and make them look flawless on screen. Unlike stage makeup, which needs to be seen from a distance, film makeup focuses on details that are magnified by high-definition cameras.

Techniques Used in Film and Television Makeup

To achieve a seamless appearance on camera, film makeup artists use various techniques and products. The most common ones for movie makeup include:

  • Contouring: This technique involves using darker shades to create depth and dimension and lighter shades to highlight specific areas of the face.
  • Airbrush Makeup: A popular technique in film makeup, airbrushing involves using a spray gun to apply foundation, creating a smooth and even finish.
  • Special Effects Makeup: This type of makeup is used to create dramatic transformations or add realistic-looking wounds, scars, and other features to the actor’s face.

Best Film and Television Makeup Practices

This is a competitive field for aspiring makeup artists. To stand out, you will need to ensure you are following best practices. You can start by considering some of the factors below.

1. Current Television and Film Makeup Trends and Techniques

Staying updated with current trends and techniques in movie makeup is part of being a makeup artist. Understanding these trends allows artists to create looks that resonate with today’s audience while also meeting the needs of each production. Continuous education through workshops, online tutorials, and networking with industry professionals can help artists refine their skills and maintain a competitive edge in a dynamic field.

2. Working Well Under Pressure

Working under pressure while maintaining precision and attention to detail is a vital skill for makeup artists in the fast-paced world of film and television. Tight schedules and last-minute changes can create stressful environments, but the ability to stay calm and focused is key to success. This involves not only excellent time management but also the capacity to adapt quickly to new challenges without compromising the quality of work. A strong mindset and thorough preparation can help artists thrive under these conditions, ensuring that they deliver outstanding results even when the stakes are high.

3. Tools for Television and Film Makeup

Having the right tools is crucial for achieving a natural-looking appearance on camera. This includes high-quality makeup products that suit various skin types, as well as essential tools like brushes, sponges, and palettes.

Investing in the right equipment ensures that you are consistently creating high-quality looks. This is because it allows makeup artists to effectively execute their vision, adapting to different lighting and camera conditions.

The products and techniques a makeup artist should use when creating looks for film and television require a light hand. You’re only going to want to use products that have been professionally made for HD (high definition).

You want to create looks that are more natural and pick up well when on camera. Regular makeup products won’t be as reliable in helping you achieve this.

Top Makeup Products for Film and Television Makeup

  • HD foundations and concealers 
  • Airbrush liquid foundation 
  • Creme blushes 
  • Neutral colored lip liners / lipsticks / lip tints
  • Loose, translucent setting powder

What is Theatrical and Stage Makeup?

Unlike film/TV makeup, which should look “natural” and lightweight, theatrical and stage makeup requires the opposite approach. This is because heavier products and bolder looks are needed.

When you watch a play or live performance, you can’t rely on cameras to zoom in on the actors’ faces and illustrate the tiniest details. Often, you’re sitting in a rather large theater space. The further away you are from the stage, the harder it is to see the actors’ faces.

Theater/stage makeup aims to compensate for this by offering exaggerated looks and features. This way, the makeup can be seen from all the way to the back of the room! In these types of settings, the lighting used also tends to be quite harsh, in order to properly illuminate the entire set. If the makeup is too natural or subtle, this can also alter how the performer looks altogether!

Techniques Used in Stage Makeup

To achieve a bold and dramatic look that can be seen by the audience, stage makeup artists use techniques such as:

  • Heavy contouring: Stage lighting can wash out facial features, so heavy contouring is necessary to add depth and dimension to the actor’s face.
  • Bright and bold colors: Unlike film makeup, stage makeup uses vibrant and exaggerated colors to make the actor’s features stand out on stage.
  • Stylized character makeup: In some cases, stage productions call for stylized and exaggerated character makeup, such as in musicals or fantasy plays. These types of makeup usually involve intricate designs and detailed prosthetics.

Best Stage Makeup Practices

Stage makeup is all about creating dramatic looks that can be seen by an entire audience. To achieve this, here are some best practices to keep in mind.

1. Know Your Lighting and Set Design

Understanding the lighting and set design of each production is crucial for applying stage makeup effectively. Different lighting setups require different color choices and application techniques. Additionally, knowledge of the set design helps artists choose colors and styles that complement the overall aesthetic of the performance.

2. Take Audience Viewing Distance into Account

When applying stage makeup, it’s essential to consider the distance between the audience and the stage. Makeup needs to be visible from all angles, so techniques like heavier application and bright colors are often used. It’s also crucial to keep in mind that different parts of the stage may have varying lighting and viewing distances, requiring adjustments in makeup application.

3. Collaborate with Costume Designers

Makeup is an integral part of any performance, but it should also work together with other elements, such as costumes. Collaborating with costume designers can help ensure that both aspects complement each other and create a cohesive look for the production. This involves discussing color schemes, overall themes, and ensuring that the makeup reflects the character’s personality and role.

Top Makeup Products for Stage Makeup

For this medium, you’d be best off using proper makeup products, specifically made for the stage. These products are specifically crafted to be able to endure harsher conditions while remaining vibrant.

Some of the most commonly used brands for theatrical and stage makeup include:

(That last one is a true Holy Grail item, by the way!)

Key Differences between Film and Stage Makeup

While both film and stage makeup have similar purposes – transforming actors into their characters – they differ in many ways:

  1. Intensity: Film makeup is more subtle and natural-looking, while stage makeup is more intense and dramatic.
  2. Application techniques: Film makeup uses airbrushing and other precise techniques, while stage makeup relies on heavy contouring and bright colors for visibility on stage.
  3. Lighting: Film makeup needs to withstand close-ups under high-definition lighting, while stage makeup must be visible from a distance under bright stage lights.
  4. Time constraints: Actors in films can pause and touch up their makeup between takes, whereas stage actors need long-lasting and durable makeup that can withstand an entire performance without touch-ups.
  5. Overall effect: While both types of makeup aim to transform the actor into
Working with actress to prepare stage makeup

Starting a Career in Makeup for the Entertainment Industry

If you’re interested in pursuing a career in film and television makeup, stage makeup, or both, here are some steps you can take to get started:

  1. Develop your skills: Start by practicing different makeup techniques on yourself and others. Consider taking classes, such as the Special Effects Makeup course offered by QC Makeup Academy, to improve your skills and learn about the latest trends and techniques.
  2. Build a portfolio: Assemble a portfolio of your work to showcase your skills and versatility as a makeup artist. This will be essential when applying for jobs or seeking clients.
  3. Network: Learn how to network as a makeup artist. Attend industry events, connect with other professionals in the field, and build relationships within the entertainment industry. These connections can lead to opportunities for work.
  4. Gain experience: Look for volunteer or internship opportunities to gain experience and build your resume. This will also allow you to network and make connections in the industry.
  5. Stay updated: Continuously educate yourself on current trends and techniques through workshops, classes, and online resources. This will help you stay competitive in a constantly evolving industry.

By following these steps and consistently honing your skills, you can establish a successful career in makeup for the entertainment industry. Remember to always stay passionate, creative, and open-minded as you navigate this exciting field.

Frequently Asked Questions

How is stage makeup different from regular makeup?

Stage makeup is designed to be seen from a distance and must be more intense and exaggerated in order to stand out under bright stage lights. Regular makeup, on the other hand, aims for a natural appearance.

How does television makeup differ from regular makeup?

Television makeup needs to withstand close-ups under high-definition lighting, so it often involves highly precise techniques such as airbrushing. Regular makeup typically focuses on enhancing natural features without the need for high-definition adjustments.

Can I use the same products for both film/television and stage makeup?

While some products may overlap, it’s important to use specific products and techniques for each type of makeup. For example, stage makeup typically needs to be more long-lasting and durable, while film/television makeup requires a more natural finish that can withstand high-definition cameras.

Are there any specific tips for creating cosplay makeup looks?

Yes, for cosplay makeup, it’s important to consider the character’s design and features and use products and techniques that will help bring those elements to life. This may involve using prosthetics, body paint, or special effects makeup. It’s also helpful to research tutorials or seek guidance from experienced cosplayers or makeup artists. Overall, creativity and attention to detail are key to achieving a successful cosplay makeup look.

What is the best way to remove stage/film/television makeup?

For stage/film/television makeup, which tends to be heavier, an oil-based cleanser or makeup remover designed for strong makeup can be effective. Following up with a gentle facial cleanser and moisturizer is crucial to cleanse and nourish the skin. Overall, find a removal routine that suits your skin type and preferences.

What is SFX makeup and how is it related to movie makeup and stage makeup?

SFX makeup, or special effects makeup, is a specialized art used to create realistic designs for film, television, and stage productions. It utilizes prosthetics, body paint, and other materials to transform actors into characters with unique features or injuries. While SFX makeup resembles traditional makeup, it focuses on extreme looks for genres like horror and fantasy. Many SFX artists also have experience in stage and film/television makeup, adding to their value in the entertainment industry.

Click here to see an actual course sample of the Theatrical Makeup section in the Master Makeup Artistry Course!

Mastering the Smoky Eye Tutorial [video]

By From the Experts, Makeup Tutorial No Comments

Devyn Gregorio is a QC Makeup Academy Student Ambassador and professional makeup artist. You can find her on her YouTube Channel, DevDevGregs, where she makes beauty videos. Today, Devyn walks us through the step-by-step process of a killer smoky eye look!

Watch her video below!

Let’s Recap!

As a makeup artist, mastering the smoky eye is sort of like a rite of passage. It’s a skill that every respectable MUA needs to have, since you’ll encounter innumerable clients who will request this look from you. Not to mention, a solid smoky eye is an essential addition to your makeup portfolio!

As a graduate of QC’s Master Makeup Artistry Course, Devyn knows the importance of a good smoky eye better than anyone! Indeed, it’s a staple look she frequently incorporates into her own makeup routine, her YouTube vlog, and her professional makeup career.

In my opinion … if you’re only going to learn how to do one eyeshadow look, [smoky eye] is the type of look you should learn!

Devyn Gregorio

As Devyn points out, there are a LOT of different ways (and with different techniques) that you can approach the smoky eye. However, her go-to process for achieving this look can be broken down into 4 easy-to-remember steps.

So, let’s take a look at Devyn’s interpretation of the classic 4-step smoky eye!

Before You Begin, Make Sure to Prime!

Devyn begins by introducing the Soft Glam Palette by Anastasia Beverley Hills. This is what she’ll be using to create her eye makeup. While we will be referencing the colors from this specifically palette, you can use whichever eyeshadow products you’d like when recreating this tutorial!

You’ll want to start by priming your eyes, which Devyn has already done, using Urban Decay’s Primer Potion.

She then sets her upper eyelids with the very first shade in the Soft Glam Palette: Tempera. While she pats on this light shade, she urges you to keep in mind that working on your own face is an obviously different experience than applying your skills on a model.

If you wish to learn how to do a successful smoky eye on clients, it’ll be important that you also acquire some real-world experience in working on other people’s faces, too.

Step 1: Your Crease Shade

For her crease, Devyn selects the Burnt Orange shade from the Soft Glam Palette. In terms of brushes, she selects the Morphe M518 brush. Importantly, this brush is fluffy in texture, which will help create a more flawless blend.

Note: When choosing your brush, make sure that it’s not TOO fluffy! You want to maintain control over where the eyeshadow is being spread across the eye. You want the product to be primarily concentrated in your crease.

Devyn then begins to apply the Burnt Orange shade along her crease. Notice the way she swivels the brush head into tiny, circular strokes! This is a key technique she uses when blending eyeshadow.

Devyn also notes how, since she’s working on herself, she’s raising her eyebrow a bit. This helps her to get better access to the crease. If working on a client, you can urge them to keep their eyebrows neutral. Then, use your fingers to lightly lift the skin, just enough for you to properly work on their crease.

The goal of this step is to get an even blend!

Remember: Don’t try to start by doing too much, too quickly! During this step, try to keep things tight along your crease. It’s alright to create a small blending effect, but try not to spread it out too far or too high. Pay attention to where the brow bone sits, and how much crease and lid space it gives you to work with. Work with it, not against it!

Step 2: Your Outer Corner Shade

Next, Devyn selects a darker shade from the palette: Cypress Umber. If you’re using a different palette, choose a rich, medium brown hue. She switches brushes for this step, now opting for a much smaller blending brush.

Add the product to your brush, and begin applying it to the outer half of your lid. Apply the product on a diagonal, moving upwards towards your crease. Again, start small and gradually build! Don’t go into it with a heavy amount of product.

As with any type of makeup application, you’ll achieve way better results if you apply your product in sheen layers. If you have a heavy hand, be mindful to go in with lighter pressure. When it comes to a smoky eye, it’s all about the blend!

Once you’ve built it up to the corner, you can then begin inviting it up into the crease. Don’t blend this darker shade over the entire crease, though. Try to only incorporate the eyeshadow to about half way through.

Note: Once you’ve laid down the foundation with these two steps, you can now go back in and intensify the look (if desired). Now’s the time to embolden the color, fan out the blend a bit more, or even just to smooth out the blending so that every color transitions into each other seamlessly!

Step 3: Your Lid Shade

For her eyelids, Devyn picks a bright, glittery Bronze shade. Instead of using a brush, Devyn opts to tap the products directly onto her finger. So long as your hands are clean, this is absolutely a useful method for applying eyeshadow, since your body temperature will help warm up the product!

Should you not wish to use your finger, you can use a flat eyeshadow brush for this step.

She then stipples the eyeshadow onto the center of her lid, working it out so that it meets the outer corner and upper crease. Go back in with a second layer, to help build coverage. Use your finger to blend this brighter shade with the darker, contrasting shades already applied your outer corner and crease.

Afterwards, if you want to intensify the lid even more, now’s the time to go back in with your flat brush for a third layer of product! For an added POP, wet your brush with a setting spray after you’ve gathered the product (and before you apply it to your eyelid).

Step 4: Your Brow Bone + Inner Corner Highlight Shade

You’ll notice that Devyn takes a quick break off-camera before this final step, to apply the rest of her makeup and add some false eyelashes. You can also choose to do the same, or simply wait until you’ve completed your smoky eye.

Devyn then delves into the last part of this 4-step tutorial, which is to highlight the brow bone and inner corner of the eye. Using a flat eyeshadow brush, she gathers some of the shade, Glistening. For those not using the Soft Glam Palette, this is a glittery, peachy-gold color.

She then taps it onto the inner corner of her eye. It’s not a terribly dramatic result; more so a subtle pop that brings extra dimension to the overall look (especially from the right angles). Afterwards, she swipes her brush along the outer, lower half of her eyebrow. Because Devyn has a good amount of brow bone space, she lightly works this color out to cover more of that empty space.

Bonus Step: The Bottom Lid

This step is optional. However, to get a well-rounded smoky look, it’s definitely a great inclusion to add to the process!

Using the same color that you used on the outer corner of your eye, as well as a light hand, apply this hue along your lower lash-line. Blend it out so that it doesn’t look like a chunky, harsh line. Again, remember to approach this step by layering your product. If you want a darker result, add more layers.

Finish off the look with a little mascara on your lower lashes… and voila! You’ve achieved a sexy, perfect smoky eye!

Devyn’s Food for Thought

When it comes to the art of makeup, the key is to learn the basics first. Once you’re confident in your ability to get the basics of a given look down, you can then go back in and get more creative.

In terms of a smoky eye, this same notion applies. While the 4 steps outlined in Devyn’s tutorial help to teach you how to create a standard smoky eye, there’s still plenty of room to build off of it and add more dimension!

Play around with different colors; experiment with the depth, intensity, and blend. Makeup allows you to truly express yourself, so don’t hesitate to try new things!

It’s only by trying that you’ll learn how to truly grow!

Curious as to which other looks are needed within your professional makeup portfolio? Enroll in QC’s Portfolio Development Course, and learn everything you need to do!

Products + Tools You Absolutely NEED in Your Professional Makeup Kit!

By From the Experts, Makeup Tips and Tricks One Comment

Australian MUA, Charlotte Ravet, is the proud owner of her very own hair and makeup business. From bridal, to editorial, to film and television, and everything in-between – Charlotte provides a wide variety of services that cater to all types of clientele!

Her extensive resume includes working for Prada, L’Oreal, and even the cast of the hit show, Glee! A developer of educational programs, Charlotte has even been awarded Best Makeup Educator of the Year by the Australian Industry Makeup Awards.

Here, she examines the best (and cheapest) online tools to help you market your makeup artist business!

As an MUA and makeup lover, the one thing we never want to stop buying is… makeup! Of course, if you’re not careful, this can spell trouble for our bank account. This is why, over the years, the main thing I’ve learned is to keep it simple!

There are two reasons for this:

  1. As a professional MUA, makeup is my living. This means that I have to be mindful to manage my spending on beauty products. This is because my budget also needs to be allocated to things like advertising, marketing, space rental, and other business expenses.
  2. The more organised my professional makeup kit is, the easier (and faster) I can provide my services for clients!

As part of my standard practice, I typically have two separate makeup bags. One is for classic beauty makeup; the other, for creative and/or editorial. This helps me better organize my professional products. Plus, it means I don’t need to lug ALL every single product with me to a given job.

Breaking Down My Professional Makeup Kit

When it comes to your professional makeup kit, you need to have an assortment of products. Let’s take a look into mine to illustrate the types of things you’ll need.

To start, the usual essentials within my kit’s beauty bag include:

  • Skincare items
  • Foundations
  • Concealers
  • Powders
  • Eyeshadows
  • And much more!

On the other hand, my creative/editorial makeup bag is reserved for pigments, glitters, and body paint.

Beauty Bag Must-Haves + Tips:

Foundations, Contour, and Concealers

I would recommend having at least 6 liquid foundation shades in your professional makeup kit. They should range from light to dark. This will better help you adjust to different clients’ skin tones.

If the foundation comes in a glass bottle, I recommend buying an empty plastic bottle and switching the packaging. (Muji has some great ones that are pretty cheap!) Glass can be heavy to carry for a mobile makeup artist.

My Personal Favorites

My favourite foundations tend to come from the line, YSL Touche Éclat. I find they create a radiant glow and lightweight finish. Another staple foundation product is M•A•C Studio Face and Body. This line offers 13 different shades to choose from!

For the contour, concealers, and other foundations, I’ve found an all-in-one solution: cream palettes! If there’s one thing I can’t live without, it’s a primary cream colours palette!  My personal favorite brands for this are RCMA and Maqpro.

The awesome thing about cream palettes is that they give you one texture for everything! You can adjust the pigments, depending on how full the coverage needs to be. I frequently alter and/or create shades of contour, foundation, and eyeshadows by mixing the primary colors with the white.

Similarly, you can also sheer it out, using a mixing medium. Here are the mixing mediums I use with wax-based cream pigments:

Maqpro

Maqpro’s Makeup Mixer will help produce a cream foundation that’s ideal for medium coverage. To set it, I use translucent powder.

Kryolan

This is one of my latest finds, and I absolutely LOVE it! Kryolan’s Mixing Medium is silicone-based. It mixes very well with the cream pigments to obtain a fluid texture water that’s also sweat-resistant. I’ve found it perfect for both private clients and brides!

RCMA

RCMA’s Color Process Foundation Thinner is oil-based. It’s optimal for softening harder foundations, restoring dried palettes, and adjusting a foundation’s consistency. I love the dewy finish it produces! I definitely consider this a must-have for my editorial looks!

Honorable Mention

For a great highlight, I always use YSL Touche Éclat’s highlighter pen! I love how effortlessly it brightens darker spots on the skin.

Eye Makeup

For eyeshadow, I have two large magnetic palettes, with a collection of my favorite shades. One is for neutral colors, while the other is more creative. I always keep the black shades separate, as it is a pure pigment (which typically makes it more fragile).

I also carry my eyeliner pencils in a drawing pencils case. These cases have separated spaces for each pencil. This will help keep them organised and well protected!

Lips

A useful tip for your professional makeup kit is to decant your lipsticks into lighter-weight, portable plastic palettes. For me, I tend to go with the clear plastic palette from Vueset. My professional makeup kit also contains clear gloss from M•A•C Cosmetics. Whenever I want to create a lustrous effect on my client’s lips, I simply mix the lipstick with this gloss!

Brows

For editorial eyebrows, I ALWAYS have pear soap and M•A•C Cosmetics Fix+ in my arsenal. For the eyebrow makeup itself, my favorite line is the Inglot eyebrow wax. In case you’re interested, I find that 16 is the best shade for medium-to-dark eyebrows!

Skin

I love skincare! As a makeup artist, you know how vital good skin is the key for great makeup. Let’s breakdown some of my most recommended skincare essentials!

Primers

A silicone, blurry primer is fantastic for for mature skin. It can also be used a base when working with silicone-based foundations. Always match the primer’s texture with the foundation you are using!

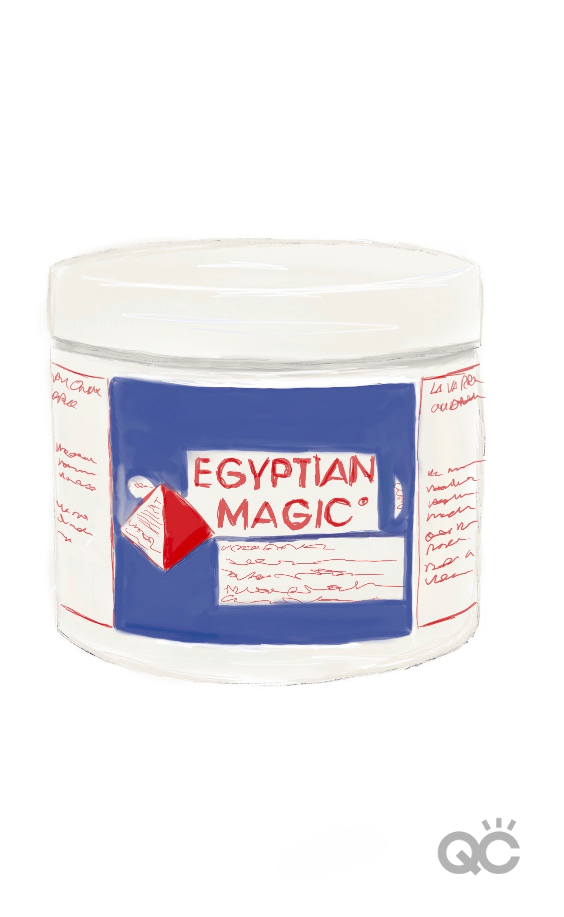
For a radiant complexion, I swear by the Brightening CC Serum from BY Terry. If you’re looking for an effective skin cream to add to your kit, Egyptian Magic offers a wonderful, all-natural product that protects lips and repairs dehydrated skin.

I also use it to add a little extra glow to my editorial looks!

Creams and Cleansers

You never know when you’ll work with a client who has sensitive skin, so as a rule of thumb, try to use organic skincare products that are perfume-free. In my professional makeup kit, I always have soothing creams as well.

Creams and serums are the very first products applied before makeup. This is why it’s so important to use all-natural products whenever possible. You want to avoid allergies and adverse reactions with your clients!

Creative/Editorial Bag Must-Haves + Tips:

As much as I love pigments and glitters, I have learned the hard way that it’s best to keep them separated from other products. A lot of glitters are sold in hard plastic jars, which can easily break.

For this reason, I recommend purchasing some softer, plastic jars to hold your glittery products instead. For extra protection, place these products in a separate (plastic) pouch.

My Personal Favorites

For pigments, my go-to products are Maqpro’s Paris Star Powders, and Down Under Cosmetix. I also swear by Kryolan’s Aquacolor line, because the colors are rich and super easy to apply. Plus, these glycerin-based eyeshadows also come in neon shades!

Tools

I must own around 700 makeup brushes! For every client, I always have a fresh and sanitized set, ready to use. Once any job is done, I then place my used brushes in a zipper bag. This way, I’ll know to clean them later, while also ensuring I don’t contaminate any of the clean items.

The one type of brush that serves as the true MVP is the angled brush. I seriously cannot live without angled brushes! On top of using it for makeup, I also sometimes use it with micellar water to remove little mistakes on the client’s lips or liner.

Crown Brushes is my go-to brand, as they are great quality brushes for affordable prices.

Other standard tools to have in your professional makeup kit include little fan brushes (for mascara) and palettes. Personally, I prefer acrylic palettes because they don’t keep the product cold. Metal palettes can sometimes tend to do that.

Remember:

The fabulous part about being a makeup artist is that there will ALWAYS be something new to discover, whether it’s a new product or trend! But before buying each product you have a crush on, try to achieve the result with what you already have.

A makeup artist must know how to mix and adapt textures! The best makeup doesn’t come from the best product – it comes from great technique.

Keep reading to discover which 5 makeup products you surprisingly DON’T need in your professional makeup kit!

How to Create a Special Effects Character Look from a Script

By From the Experts, Your Makeup Career No Comments

Gabrielle Rivera is a QC Makeup Academy graduate and professional makeup artist. To see more of her work, visit her Instagram here. Today, she draws on her professional expertise – as well as her experience in QC’s Special Effects Makeup Course – to share 3 of the best ways to create a Special FX character, based on a script.

One of the most exciting (and slightly nerve-wracking) moments as a makeup artist is when you’re presented with the opportunity to create a Special Effects character from a script. This is your opportunity to apply what you’ve learned from:

  • Your Special Effects makeup schooling
  • Your experience working in the field
  • Your creativity

It’s critical that you produce effective, accurate results. Without you, the writer’s vision of this specific character can’t be brought to life!

But where do you begin? Here are a few key points to consider when creating a Special Effects makeup look, based on the character in the script!

How to Create a Special Effects Makeup Look Blog - Burn Makeup on Arms

Research and Realism

As an avid movie watcher, one of the first things I typically comment on when I see other people’s work is the realism of a look.

For instance, is the makeup realistic? Is the overall appearance applicable to both the setting and time period of the film?

When characters have features and/or qualities that stand out from the time period, I personally become less intrigued by the makeup and more distracted. The last thing you want to do as a Special Effects makeup artist is pull the viewer OUT of the experience!

Research, research, research!

When creating a character from a script, the best thing you can do for yourself is to conduct research about the:

  • Time period
  • Setting
  • Physical characteristics
  • Qualities and personality traits of the character being described

Let’s look at one example… Say that the setting of the story takes place in a Victorian era. It logically follows that the Special Effects makeup should accurately reflect this time period. This could mean a pale base, bright blush, deep colored lips, etc.

Alternately, if you see in the script that the character has been infected by a disease, the makeup should age and worsen gradually. You need to give the realistic illusion that the character is deteriorating as the story progresses.

So, you MUST focus on both consistency and continuity in this kind of look!

You might start this character’s Special Effects makeup by creating a slight discoloration in the skin, as well as under the eyes. Gradually, you may then add darkened veins, or small areas of bumps, to indicate that there is an infection.

In this age of technology, use all resources to create accurate representations of these real-life components (such as bruising, burns, cuts, scratches, bullet wounds, and deformities). Ensuring that you maintain continuity and realism in your character makes them way more realistic and believable!

Makeup artist applying special effects makeup to actor

What Special Effects Category is it?

When people think of Special Effects makeup and characters, they tend to automatically jump to the idea of traditional “monsters”. But this is just a minor portion of a much larger world!

In reality, Special Effects makeup and designs fall under several categories that can be used to your advantage.

Monsters that go bump in the night is a very common category when people think of Special Effects makeup. However, this genre in-and-of-itself has many subcategories that can help you determine where your character best fits.

Here’s a quick breakdown:

1. Slashers

Think of your classic Freddy Krueger, Jason Voorhees, and Michael Myers slasher characters here. If the character in the script fits this slasher paradigm, your first thought should be what you can do to help make them stand out from the rest!

2. Paranormal

This category would include ghosts and spirits. Now, you might be thinking, “Aren’t these things invisible to the naked eye?”

While this is true in some cases, there are plenty of classic films – such as “Thirteen Ghosts”, “The Shining”, and entire “The Conjuring” universe – that all do phenomenal jobs of bringing apparitions to life in a way that stays realistic.

3. Creatures and Extraterrestrial

Another popular Special Effects category is the one dedicated to creatures from the beyond. Some commonly known examples are:

  • Frankenstein
  • The Lochness Monster
  • Aliens
  • And so much more!

Depending on what the script calls for your character, you may need to tap into a more creative side. This will help you bring to life a creature that has never been seen before.

Pro tip: If you’re creating a character that’s not necessarily from this world, a good trick is to use features of animals as a starting point for your look!

How to Create a Special Effects Makeup Look Blog - Prosthetic Makeup

4. Gore

Aside from classic common horror movie classic tropes, Special Effects character makeup also includes the gory side of makeup. This typically includes creating:

  • Bruising
  • Cuts
  • Scrapes
  • Lesions
  • Weapon wounds
  • And more!

When creating gore Special Effects makeup looks, one of the most important things you need to do is research (as mentioned in tip #1). Your Special Effects makeup should look as realistic as possible in order to help support the script.

You also need to pay close attention to the timeline of the movie when creating gore Special Effects looks. For example: if a character was in a car crash a week ago, the bruising will not be as bright as if it just happened.

Similarly, the coloring needs to accurately reflect the age of the bruises. As well, any cuts the character received would not necessarily be bloody, but rather, starting to heal.

Collaboration and Vision

Lastly, one of the single greatest ways to create a Special Effects character look from a script is to collaborate with the other cast and crew members working on the project, such as:

  • Hairstylists
  • Wardrobe designers
  • Actors
  • Producers
  • Directors, etc.

Working together to bring to life a complete character that fits the vision of the script is vital! Think of it the same way you would with regular makeup: in addition to the makeup, the hair and/or clothing can be the factor that makes or breaks the look!

Just like with the Special Effects makeup, the character’s clothing and hairstyle(s) should be appropriate to the time period and story setting. Every element needs to work together to help keep your character realistic.

Not only should you consider the character’s clothing and hairstyles when developing your Special Effects makeup look – you should also consider what lifestyle and social status the character has (if applicable).

All of these smaller components are what will be combined to ultimately create a character that fits the script to a T!

Special effects makeup look - girl with monster teeth

Remember: putting effort into addressing all of these fine details will also help you, as the artist, stand out from others. By mastering the art of creating a Special Effects character look based on the script you’re given, you’ll be able to not only make a lasting impression, but even increase your chances of being booked for future projects!

Interested in becoming a Special Effects makeup artist? Here are Gabrielle’s 5 secrets to getting your career started!

Breaking Down My Skincare Routine [video]

By From the Experts No Comments

Devyn Gregorio is a QC Makeup Academy Student Ambassador and professional makeup artist. You can find her on her YouTube Channel, DevDevGregs, where she makes beauty videos. Today, Devyn shares with us her regular skincare routine, as well as her go-to products!

Watch her video below!

Let’s Recap!

With everything currently going on in the world, studies have shown that not only has the skincare market been on the rise, but that it’s also beneficial for your mental health! With that in mind, we want to show you what the skincare routine of a professional makeup artist looks like.

Devyn is not only a graduate of QC’s Master Makeup Artistry Course; she’s also a current student in the Skincare Course . As such, she understands that at the heart of every good makeup routine, there MUST be a solid skincare routine to back it up.

In addition to being good for the soul, healthy skin is the key to truly flawless makeup!

In this video, Devyn takes us through each step of her daily skincare routine, along with a breakdown of the products she uses, and why she likes these products specifically.

Devyn’s Skin Type

Such as with makeup, choosing the right skincare products all comes down to your skin type. Devyn discusses how, when she was younger, her skin was oilier and led to frequent breakouts. However, as she grew up, her skin type gradually changed to a more normal-to-combination skin type.

That being said, she’s found that her skin is very sensitive. While her skincare products have to be effective, they also need to be gentle. Her skin is prone to reacting easily to most skincare products, such as anything containing glycolic acid or alpha hydroxy acids (known as ‘AHAs’).

Using such products causes Devyn’s skin to break out across her forehead with red, irritated bumps. Definitely not ideal!

For this reason, Devyn notes how her skincare routine is rather straightforward and simple. She’s found the holy grail products that work for her unique skin type and needs. As such, she tends to stick faithfully to these products, and not stray away from them.

A Walk-Through Devyn’s Skincare Routine

It’s worth noting that Devyn admits that her skincare routine may not always be 100% the same every single day. However, it is consistent, and done on a weekly basis. Which products she uses per day is dependent on her skin and what it needs at the time!

Let’s get started!

1 – Kind to Skin Cleansing Wipes by Simple Skincare

This is the first skincare product that Devyn introduces us to, which she uses to remove her makeup at the end of each day. Devyn credits this product in helping her remove most (to all) of her makeup – without causing her skin to break out or experience a burning sensation.

If your skin is sensitive, or you’ve experienced any type of allergic/irritable reaction to other types of makeup wipes, Devyn highly recommends this brand as an alternative!

Usually, she only needs one wipe to get the job done. However, depending on how much makeup was applied that day, you may require more.

2 – Purity Made Simple Cleanser by philosophy

Next up in Devyn’s skincare routine is her facial cleanser! Devyn claims that Purity Made Simple is her absolutely favorite cleanser she’s ever used, namely because it’s a 3-in-1 product. It offers all of the following properties:

  1. It’s a makeup remover
  2. It’s a cleanser
  3. It’s also a toner

In terms of its ability to effectively remove makeup, Devyn confirms that this cleanser lives up to its promise. (Especially if used after the Simple Skincare makeup wipes). The fact that it’s also a toner is particularly beneficial for Devyn’s skin, due to its ability to balance the skin without throwing off its pH balance.

In general, cleansers can have the tendency to be too harsh on the skin. Although it will cleanse it, as it should, it may also strip your skin of some of its natural oils. Therefore, having a cleanser that also includes toner within the recipe helps to avoid this!

While she doesn’t necessarily use this product every single day, Devyn does state that on days where she does use it, she finds that she only needs to go in with her eye cream and moisturizer afterwards… and then be all finished!

This cleanser by philosophy is a wonderful skincare option for anyone who prefers to keep things simple, and doesn’t have the time (or interest) for a skincare routine with 1,000 steps. I, for one, can seriously relate!

Although listed as the third item in her skincare routine, Devyn admits that this exfoliating cleanser (also by philosophy) is her absolute FAVORITE skincare product! “I swear by this stuff so much!” she exclaims with a smile. “This is the best, most micro-fine, scrubbiest exfoliate I’ve ever used. I absolutely love it!”

Thanks to orange peel being one of this product’s ingredients, you can also expect a delicious, luxurious smell when cleaning your face (which is always a wonderful bonus).

Devyn always makes sure to listen to what her skin needs on a given day. As such, she’ll tend to use this product either every third day, or every other day (if her skin feels like it needs a little extra help).

In terms of when she uses it during the day, Devyn says she tends to apply it in the morning, as it gives her skin a nice, fresh feeling. It also makes for a terrific base on which to apply her makeup!

4 – Facial Spray with Aloe, Herbs, and Rosewater by Mario Badescu Skincare

Because the Purity Made Simple cleanser already has toner in it, this facial spray is not needed on days where she washes her face with that product. However, on the days where Devyn washes her face with the microdelivery exfoliating wash, she always uses Mario Badescu’s facial spray to tone her skin afterwards

As she says, it’s a great way to give your skin an extra blast of hydration after exfoliating it! Simply spray it on the same way you would a makeup setting spray. Then lightly tap it in with your fingers to help it absorb into your skin and dry faster.

5 – Purity Made Simple Eye Gel by philosophy

The next step in Devyn’s skincare product is to apply some eye cream. Devyn admits that she’s not overly picky about what sort of product she uses here, so long as it’s not jam-packed full of bad ingredients that will irritate her eyes.

That being said, she credits this eye gel as being a higher-quality product that’s super affordable for most budgets.

Another upside: a little bit goes a long way! You don’t need to use much of this product for it to do its job, so it’ll last you a long time. Devyn finds this eye gel to be light and hydrating, without feeling sticky or greasy.

Because Devyn doesn’t really experience dark circles or puffiness under or around her eyes, she’s not affected by the fact that this product doesn’t offer any sort of brightening effects. However, for those of you who do tend to have dark circles or puffiness around your eyes, you may need to see for yourself if it benefits your skin in the ways you’re looking for.

As a makeup artist, you already know that moisturizing is SO important when it comes to any skincare routine! No matter what skin type you have, never underestimate the power of moisturizing and hydrating your skin.

For those of you on a budget, Devyn does admit that this product is a little pricier than her normal spending range (it costs $52.00 USD).

However, the benefits it has on her skin are well worth the cost! For starters, since it’s both a day and night cream, you don’t have to shop around and pay for two separate products. If you think about it that way, the price is actually a pretty good deal!

In terms of Devyn’s skincare routine, she tends to apply a lighter amount in the morning, and a more thorough amount in the evening. This is to make sure that her skin gets that little extra boost of hydration, which is always a smart idea before going to sleep!

After all, it’s when you’re asleep that your body works hardest to regenerate new, healthy skin cells and collagen!

Pro tip: Don’t forget to use some of that moisturizer on your neck as well! Neck wrinkles are a real thing!

Devyn’s Favorite Mask Products

Next, Devyn takes a look at some of her all-time skincare face masks…

Laughing, Devyn describes this product as a “purifying, pore-gunk-sucking” mask. At a purchase price of $ 45.00 USD, it also falls on the slightly more expensive price range. But Devyn assures us that this is reflected in its high quality and effectiveness!

In addition to certain areas of her face having rather large pores, Devyn’s skin can also sometimes have a habit of getting blocked up, particularly around her chin. As such, she uses this mask to target those specific spots. It’s also a great weapon to use against random pimples!

Of course, if you feel your skin could benefit from applying it all over, then go for it! Either way, Devyn recommends this product as a solid, go-to clay mask.

Hands-down, this is Devyn’s #1 favorite sheet mask on the market! As someone who has a lot of redness in her skin, especially around her T-zone, Devyn swears by this product.

“I’m not kidding you, when you put it on, it just feels so nice and soothing,” she says. “But when I take it off… First of all, my skin just feels so juicy and plump. But my redness is pretty much gone! It is SO calming to my skin!”

Better yet, this amazing skincare product is incredibly cheap. At Ulta alone, you can purchase it for a mere $3.75 USD!

3 – Lip Sleeping Mask by Laneige

Even as a makeup artist, it can be easy to forget that your lips need to stay hydrated, too! Devyn loves this product so much, that even though she’s using a sample-sized jar in her video, she plans to purchase the full-sized one as soon as she runs out.

She even goes as far as to proclaim that nothing does as good of a job on her lips as this sleeping mask! Wow!

For starters, if you have a sweet tooth, you’ll quickly become obsessed with its bubble-gum candy scent. While the product itself is a bit thick, it’s not sticky. From the moment you put it on, you just know that it’s giving your lips some deep, well-needed hydration that’ll last you throughout the night.

“This is just a delicious product! I love it!” Devyn says.

Just by seeing her level of enthusiasm, we’re inclined to believe her!

What is YOUR skincare routine like? Do you have some holy grail products you feel we should know about? Let us know in the comments!

The best way to become a skincare expert is by getting professional training and earning your certification! Enroll in QC’s leading online Skincare Course today!