Sarah Cavanagh, Author at Beauty Buzz - Page 15 of 21 Skip to main content
All Posts By

Sarah Cavanagh

The Do’s and Don’ts of Henna – Part 2

By Education, Makeup Tips and Tricks No Comments

As a professional makeup artist, it’s important to keep expanding your skill-set. The more knowledge you have about makeup, the better (and more inclusive) your services will be!

The best way to broaden your training is with makeup classes. For example, QC Makeup Academy has a program entirely devoted to teaching you about cosmetic and beauty practices from all around the world! As part of this Global Beauty Workshop, you’ll learn all about Henna.

In Part 1 of our look into the art of Henna, we broke down what it is, where it comes from, and its symbolic/historical roots. Importantly, we also took a look at some of the proper (and improper) habits to adopt when incorporating Henna into your makeup business.

Let’s expand on this, and check out a few more ways to properly do Henna – as well as some ‘sins’ you need to avoid!
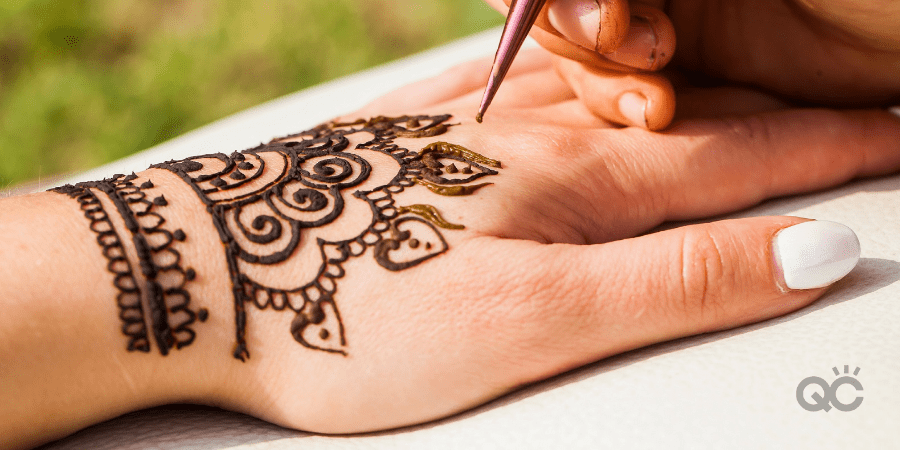
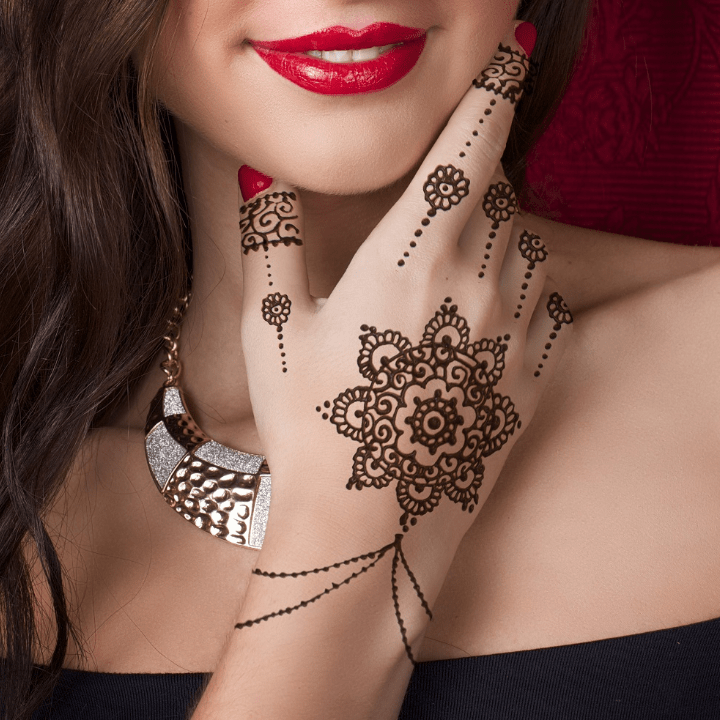
Do: Make Your Own Henna Products

Unfortunately, it’s very easy to cut corners and purchase the wrong Henna products. The less organic the ingredients are, the worse the quality of the final product will be.

In recent years, it’s become a bit of trend – particularly in Western culture – to buy pre-mixed Henna cones. While this is undoubtedly a bit more convenient, we recommend against doing this. If you buy a pre-made concoction, you’ll have no way of knowing exactly what’s gone into the mixture. Furthermore, you won’t be able to control the ratios, the consistency, or create the ideal cone for application.

Instead, your best bet is to purchase fresh Henna powder, and mix it yourself. Typically, this powder will be mixed with water and oils (such as eucalyptus oil, henna oil, and/or black clove oil). There are also plenty of ways for you to create the Henna cone yourself. This YouTube video, for example, breaks the steps down in an easy-to-follow tutorial.

When researching into where to purchase your Henna powder, make sure to be thorough. There are tons of sellers out there who claim to offer high-quality powder, when in reality, it’s anything but! What you want to look for is a Henna powder that’s marketed as “body art quality”.

This specific type of powder is ground into very fine particles, so that when mixed with water and oils, it turns into a smooth mixture that creates a beautiful finish – without losing its texture and clogging up the opening of your Henna cone.

Pro Tip: If your makeup classes are teaching you how to do Henna tattoos (that is, Henna designs on the skin), make sure to stay away from ‘Neutral Henna’. While good for conditioning hair, it does nothing on the skin and would be a waste of your money!

Don’t: Use Henna Containing Chemical Additives

Much like with other beauty products, when Henna ingredients are all-natural, they’re far less likely to cause any damage to your client’s skin. On the contrary, Henna powder containing harmful chemicals can be a concern.

It’s believed that the greenness of your Henna powder indicates how pure it truly is. If the powder is a strong green hue, it’s supposed to be of higher quality.

The problem is, many scammers have caught onto this fact, and have found a way to create fake (but convincing) alternatives. For instance, they may lace their Henna powder with green dyes in order to replicate the authentic, bright green color.

So, how do you know who to trust when buying your Henna powder?

Do your research! Never purchase any Henna powder whose ingredients aren’t openly listed for you to see. Only buy pure Henna powder that doesn’t contain chemical additives. And when looking into potential sellers, do as thorough of a background check on them as you can!

Read reviews, scour their website, search for them on social media. There are plenty of online chat groups and forums you can look into, where other Henna artists may recommend trusted suppliers.

The bottom line is: never purchase your materials from a supplier unless you’re confident in their product. Using anything less than pure Henna powder can potentially lead to issues down the road with clients, which can seriously damage your professional reputation.

Do: Avoid Black Henna

In order to change Henna from its natural greenness to a dark black color, there are many suppliers who opt to add PPD (para-phenylendiamine) to their powder. Unfortunately, this is a rather powerful chemical sensitizer, and can be seriously dangerous to some people!
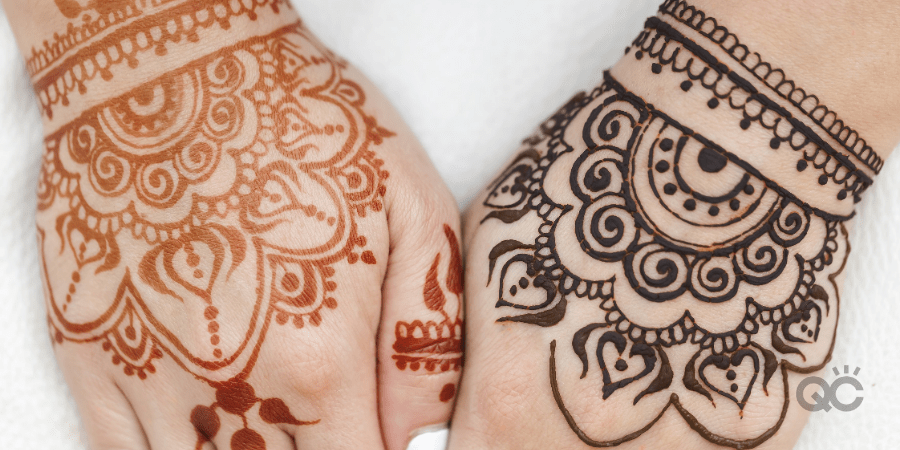
Some possible side effects of prolonged exposure of PPD on the skin include:

  • Allergic reactions
  • Redness/swelling
  • General skin irritation
  • Burns
  • Blisters
  • Permanent scarring

Needless to say, you don’t want to risk any of your clients experiencing any of these unwanted reactions! You’re better off avoiding PPD-infused Henna powder altogether. Yes, you may encounter some clients who specifically request black Henna.

However, for the sake of her safety, and the overall safety of your business, we recommend explaining the potential health risks to her, and declining such a service. Worst case scenario, if she refuses to budge, you can always recommend she visit an airbrush tattoo artist instead.

While it may cost you an appointment, it will ensure your client remains safe. Ultimately, this matters more.

Don’t: Prepare at the Last Minute

Your global beauty makeup classes will go into great depth about how to properly mix and create your Henna product. But one thing that’s especially important to stress is that you give yourself enough time to prepare your products before each appointment.

For starters, it may take some trial and error for you to learn what the perfect consistency is for your mixture. On top of that, you need to allow your Henna mixture to sit for at LEAST 6 hours before you can apply it to your client’s skin.

Anything less, and it may not stain the skin properly, have the desired color, or last as long before fading.

To ensure your client gets the best results, let your Henna mixture rest for as long as possible. You can even prepare the mixture for your appointment the day before, and let it sit overnight.

Pro Tip: Want to REALLY be organized? Prepare a large batch of your Henna mixture, and store it in your freezer! It can remain in there for up to six months, without ruining any quality.

Do: A Patch Test

When it comes to Henna tattoos, your makeup classes will ingrain in your head the importance of doing a patch test first. This will help determine whether or not your client’s skin will react well with your Henna mixture.

Could you imagine if you skipped this step, started applying the Henna all over your client’s hand, and she suddenly broke out into a severe allergic reaction? Such negligence could spell the end of your career!

Henna artists find that the inner part of your client’s wrist is the optimal spot to do a patch test. Simply apply a bit of your Henna mixture, and then advise her to keep an eye on it over the days to follow. Specifically, she needs to note if she experiences any irritation, swelling, or redness.

This is also a perfect opportunity for her to get a real feel for what she can expect from a full Henna application! Let her know what to expect in terms of the color changes the Henna will undergo over the next few days. She may find that the final result is exactly what she was expecting! Alternately, she may discover that it’s different than she originally thought it’d be.

All of this is why a patch test is so crucial! Ideally, you’ll want to perform it during the initial consultation. It’s best for you and your client to know as early on as possible whether you can provide the service she’s looking for. Neither of you want any unwanted surprises on the day of the appointment!
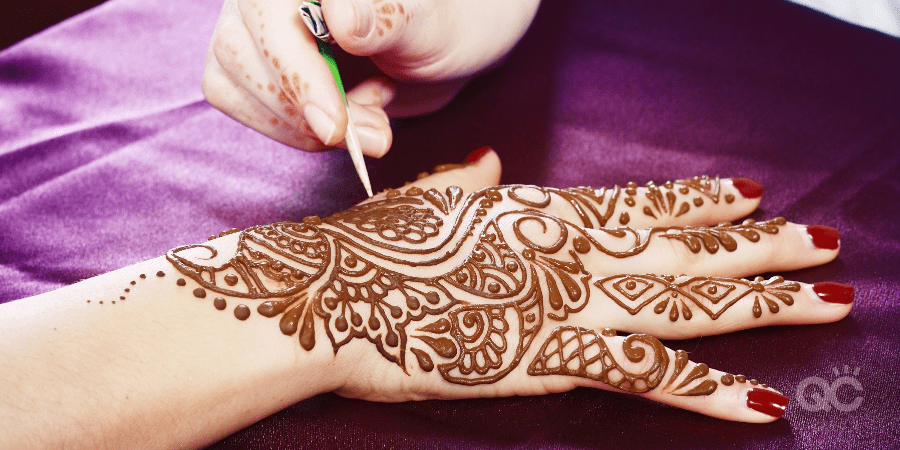
Interested in discovering other ways that global beauty makeup classes will help strengthen your career? Check out this article for 3 more awesome reasons!
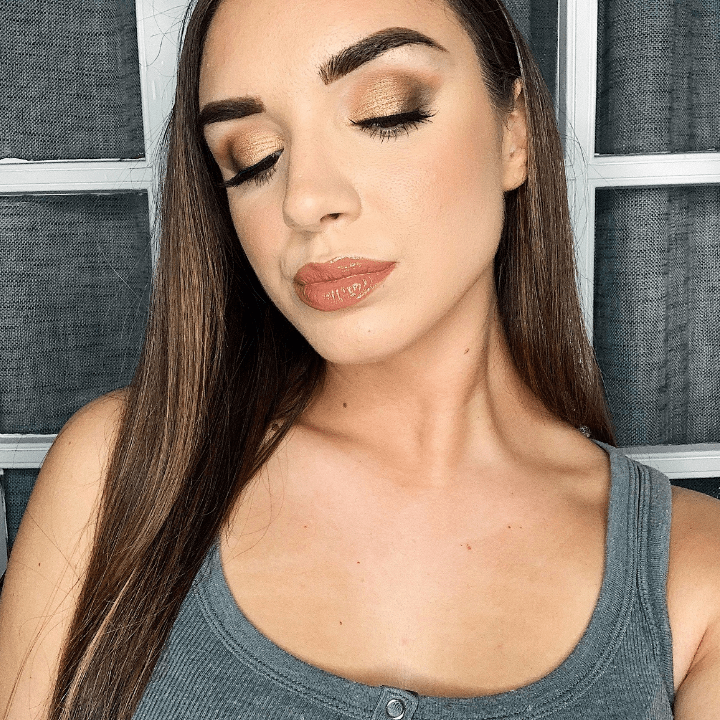
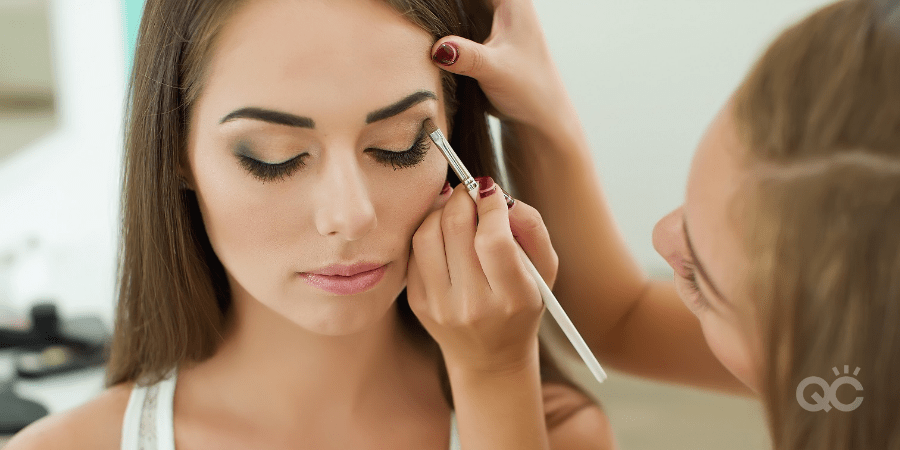
Ready to diversify your techniques and open up your services to an even larger clientele? Enroll in QC’s leading online Global Beauty Workshop today! 

Mastering the Smoky Eye Tutorial [video]

By From the Experts, Makeup Tutorial No Comments

Devyn Gregorio is a QC Makeup Academy Student Ambassador and professional makeup artist. You can find her on her YouTube Channel, DevDevGregs, where she makes beauty videos. Today, Devyn walks us through the step-by-step process of a killer smoky eye look!

Watch her video below!

Let’s Recap!

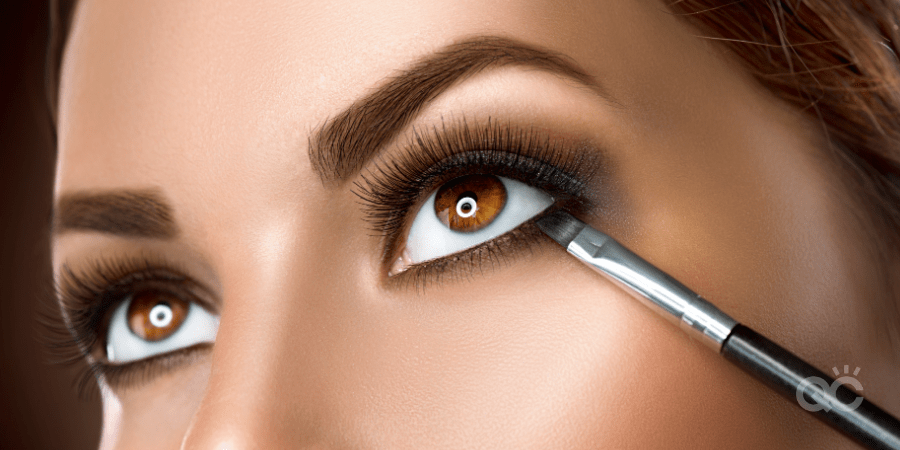
As a makeup artist, mastering the smoky eye is sort of like a rite of passage. It’s a skill that every respectable MUA needs to have, since you’ll encounter innumerable clients who will request this look from you. Not to mention, a solid smoky eye is an essential addition to your makeup portfolio!

As a graduate of QC’s Master Makeup Artistry Course, Devyn knows the importance of a good smoky eye better than anyone! Indeed, it’s a staple look she frequently incorporates into her own makeup routine, her YouTube vlog, and her professional makeup career.

In my opinion … if you’re only going to learn how to do one eyeshadow look, [smoky eye] is the type of look you should learn!

Devyn Gregorio

As Devyn points out, there are a LOT of different ways (and with different techniques) that you can approach the smoky eye. However, her go-to process for achieving this look can be broken down into 4 easy-to-remember steps.

So, let’s take a look at Devyn’s interpretation of the classic 4-step smoky eye!

Before You Begin, Make Sure to Prime!

Devyn begins by introducing the Soft Glam Palette by Anastasia Beverley Hills. This is what she’ll be using to create her eye makeup. While we will be referencing the colors from this specifically palette, you can use whichever eyeshadow products you’d like when recreating this tutorial!

You’ll want to start by priming your eyes, which Devyn has already done, using Urban Decay’s Primer Potion.

She then sets her upper eyelids with the very first shade in the Soft Glam Palette: Tempera. While she pats on this light shade, she urges you to keep in mind that working on your own face is an obviously different experience than applying your skills on a model.

If you wish to learn how to do a successful smoky eye on clients, it’ll be important that you also acquire some real-world experience in working on other people’s faces, too.

Step 1: Your Crease Shade

For her crease, Devyn selects the Burnt Orange shade from the Soft Glam Palette. In terms of brushes, she selects the Morphe M518 brush. Importantly, this brush is fluffy in texture, which will help create a more flawless blend.

Note: When choosing your brush, make sure that it’s not TOO fluffy! You want to maintain control over where the eyeshadow is being spread across the eye. You want the product to be primarily concentrated in your crease.

Devyn then begins to apply the Burnt Orange shade along her crease. Notice the way she swivels the brush head into tiny, circular strokes! This is a key technique she uses when blending eyeshadow.

Devyn also notes how, since she’s working on herself, she’s raising her eyebrow a bit. This helps her to get better access to the crease. If working on a client, you can urge them to keep their eyebrows neutral. Then, use your fingers to lightly lift the skin, just enough for you to properly work on their crease.

The goal of this step is to get an even blend!

Remember: Don’t try to start by doing too much, too quickly! During this step, try to keep things tight along your crease. It’s alright to create a small blending effect, but try not to spread it out too far or too high. Pay attention to where the brow bone sits, and how much crease and lid space it gives you to work with. Work with it, not against it!

Step 2: Your Outer Corner Shade

Next, Devyn selects a darker shade from the palette: Cypress Umber. If you’re using a different palette, choose a rich, medium brown hue. She switches brushes for this step, now opting for a much smaller blending brush.

Add the product to your brush, and begin applying it to the outer half of your lid. Apply the product on a diagonal, moving upwards towards your crease. Again, start small and gradually build! Don’t go into it with a heavy amount of product.

As with any type of makeup application, you’ll achieve way better results if you apply your product in sheen layers. If you have a heavy hand, be mindful to go in with lighter pressure. When it comes to a smoky eye, it’s all about the blend!

Once you’ve built it up to the corner, you can then begin inviting it up into the crease. Don’t blend this darker shade over the entire crease, though. Try to only incorporate the eyeshadow to about half way through.

Note: Once you’ve laid down the foundation with these two steps, you can now go back in and intensify the look (if desired). Now’s the time to embolden the color, fan out the blend a bit more, or even just to smooth out the blending so that every color transitions into each other seamlessly!

Step 3: Your Lid Shade

For her eyelids, Devyn picks a bright, glittery Bronze shade. Instead of using a brush, Devyn opts to tap the products directly onto her finger. So long as your hands are clean, this is absolutely a useful method for applying eyeshadow, since your body temperature will help warm up the product!

Should you not wish to use your finger, you can use a flat eyeshadow brush for this step.

She then stipples the eyeshadow onto the center of her lid, working it out so that it meets the outer corner and upper crease. Go back in with a second layer, to help build coverage. Use your finger to blend this brighter shade with the darker, contrasting shades already applied your outer corner and crease.

Afterwards, if you want to intensify the lid even more, now’s the time to go back in with your flat brush for a third layer of product! For an added POP, wet your brush with a setting spray after you’ve gathered the product (and before you apply it to your eyelid).

Step 4: Your Brow Bone + Inner Corner Highlight Shade

You’ll notice that Devyn takes a quick break off-camera before this final step, to apply the rest of her makeup and add some false eyelashes. You can also choose to do the same, or simply wait until you’ve completed your smoky eye.

Devyn then delves into the last part of this 4-step tutorial, which is to highlight the brow bone and inner corner of the eye. Using a flat eyeshadow brush, she gathers some of the shade, Glistening. For those not using the Soft Glam Palette, this is a glittery, peachy-gold color.

She then taps it onto the inner corner of her eye. It’s not a terribly dramatic result; more so a subtle pop that brings extra dimension to the overall look (especially from the right angles). Afterwards, she swipes her brush along the outer, lower half of her eyebrow. Because Devyn has a good amount of brow bone space, she lightly works this color out to cover more of that empty space.

Bonus Step: The Bottom Lid

This step is optional. However, to get a well-rounded smoky look, it’s definitely a great inclusion to add to the process!

Using the same color that you used on the outer corner of your eye, as well as a light hand, apply this hue along your lower lash-line. Blend it out so that it doesn’t look like a chunky, harsh line. Again, remember to approach this step by layering your product. If you want a darker result, add more layers.

Finish off the look with a little mascara on your lower lashes… and voila! You’ve achieved a sexy, perfect smoky eye!

Devyn’s Food for Thought

When it comes to the art of makeup, the key is to learn the basics first. Once you’re confident in your ability to get the basics of a given look down, you can then go back in and get more creative.

In terms of a smoky eye, this same notion applies. While the 4 steps outlined in Devyn’s tutorial help to teach you how to create a standard smoky eye, there’s still plenty of room to build off of it and add more dimension!

Play around with different colors; experiment with the depth, intensity, and blend. Makeup allows you to truly express yourself, so don’t hesitate to try new things!

It’s only by trying that you’ll learn how to truly grow!

Curious as to which other looks are needed within your professional makeup portfolio? Enroll in QC’s Portfolio Development Course, and learn everything you need to do!

5 Popular Fashion Styling Jobs

By Fashion Styling No Comments

Were you born with a natural sense of style? Do you have an innate knack for perfectly reflecting your personality in your fashion? Are you constantly complimented for your killer outfits, effortless color schemes, and on-point matching skills?

If you answered YES to any of these questions, then a career in fashion styling may be perfect for you!

Think about it: could there be anything better than being paid to do what you love? That’s pretty much the dream! So, if you’re ready to turn your hobby into a lifelong, successful career, there are plenty of incredible opportunities available to you.

Read on to discover how you can start on the path to becoming a fashion stylist, as well as some of the most popular career options!
What is Fashion Styling?

As a professional stylist, it will be your responsibility to provide fashion styling advice and recommendations. Depending on which clientele you choose to target as part of your business, you’ll help select and coordinate outfits for:

  • Individual clients
  • Clothing brands
  • Companies and businesses
  • Media
  • Fashion houses, etc.

Let’s make one thing super clear right away: this is NOT the same thing as being a fashion designer. Designers are responsible for physically creating the clothing. You won’t do this as a fashion stylist. Your job will be to select existing clothing and accessories that your client(s) will wear.

How Do You Get into Fashion Styling?

You’ll gain invaluable knowledge such as:

An accredited fashion styling course is the single greatest first step you can take in your journey to get into the industry! Online beauty schools, such as QC Makeup Academy, allow you to gain a high-quality education from real-world, expert professionals – all from the comfort and safety of your own home!

This industry can be extremely competitive. So, making sure you have proper training, education, and a professional certification under your belt is practically a must! It’ll be difficult to stand out from the competition otherwise.

  • The history of fashion styling
  • Basic fashion elements (e.g. patterns, fabric, body type, fitting and draping, etc.)
  • Accessorizing
  • Building a wardrobe for different genders, lifestyles, professions, etc.
  • Bridal and maternity styling
  • Styling on a budget
  • Thorough business knowledge to help YOU start your own fashion stylist business
  • And so much more!

You’ll graduate from your fashion styling program a true expert; ready to take the industry by storm and begin finding clients right away!

The Most Popular Fashion Styling Jobs

Celebrity/Red Carpet Stylist

Though this figure is admittedly in a smaller percentile, it does show you what can be possible. Who knows? As you grow your resume, gain experience, and build your reputation, maybe you’ll one day become one of Hollywood’s biggest names in fashion styling!

Obviously, because you’d be working with such highly-esteemed clientele, this particular career path pays rather well. As of May, 2020, the average annual salary for a celebrity fashion stylist in the United States is $50,423. That being said, there are acclaimed stylists out there making as much as $123,500!

In addition to your standard awards shows, you would also get to provide your expertise for press conferences, premieres, concerts, or even just a celebrity’s daily life.

This probably comes as no surprise. After all, who wouldn’t want to work with A-listers and help select their outfits for such events as The Academy Awards, The Grammys, etc.? In terms of dream fashion styling career paths, this one is definitely high on the list!

Personal Stylist

Plus, there’s a lot of wiggle room in personal styling for you to control your service rates, adjust them according to the client’s needs, etc. As you can see, the sky is limitless!

The beauty of this particular type of styling is that it can be done virtually anywhere, for pretty much anyone in need of your services. One day, your client can be a stay-at-home mother who wants to give herself (and her clothes) a fresh makeover. Next, you can be assisting a CEO of a major local company.

Maybe you’re not interested in the glitz and glam of Tinseltown. That’s okay! Another wildly popular path for stylists is to focus on personal styling for the everyday client.

Pro Tip: Still socially distancing due to COVID-19? Not a problem! A very popular option, especially for personal stylists, is to also offer virtual services! You can tie this into your business as a standard service, but during something like a pandemic, it gives you a way to continue booking clients… without anyone needing to leave the safety of their homes!

Fashion Editorial Stylist

Ever looked at the photos within a magazine? (I mean, who hasn’t at least once, right?) Then you’ve seen the work of an editorial stylist before!

In this corner of the industry, you’re the mastermind behind all of the amazing outfits and accessories donned by high fashion models in a professional photoshoot.

Plus, this type of fashion styling is one that will vastly expand your network. This is because you’ll often be working very closely with other industry pros. Some examples of people you’ll develop close working relationships with include:

Fashion Show Stylist

Want to help dress up your favorite models before they strut their stuff down the runway? You can use your professional fashion styling certification as a stepping stone towards this career path!

Here, you’ll be collaborating with fashion houses and/or independent designers. They’ll be coming to you – the expert – and trusting you to make choices that best represent their company and overall brand. It’ll be up to you to deliver!

As such, you’ll be responsible for selecting the best clothing, shoes, and accessories, according to what they have within their given line for the fashion show. Then the models will show off the final product. You’ll have a personal hand in what ultimately gets showcased on the catwalk!

Makeup Artist

At first glance, this doesn’t sound like it has anything to do with fashion styling. But hear me out!

It’s actually a very common practice in this community to pioneer a single business that provides multiple types of beauty services. In fact, fashion styling and makeup artistry are very commonly paired together – namely because they compliment each other so well.

As such, there are many fashion stylists out there who then further their education to incorporate professional makeup training. Likewise, more and more makeup artists are earning their fashion styling certification so that they can add styling to their business.

Especially for freelancers, it’s an excellent way to pander to an even wider audience. Why only offer one service, when you can offer more? More variety means more bookings, which means more profit for your business.

Plus, if a client were to need assistance with their makeup and their outfit for a special occasion, she can simply book both services with you! It’s more convenient for her, and more beneficial overall for you. There’s no downside!

All of these career options are just the tip of the iceberg, too! Not to mention, there’s absolutely nothing stopping you from dipping your toes into different waters. Want to be a personal stylist and an editorial stylist? Go for it! The beauty of this kind of profession is that you CAN if you want to!

If you’re interested in a career in fashion styling, there are countless avenues you can pursue and opportunities to take advantage of. Believe in yourself, and start the path towards your dream future today!

As the author, Debasish Mridha once said: “Don’t wait for the opportunity… Create it!”

Enroll today in QC Makeup Academy’s leading online Fashion Styling Course, and earn your certification in as little as 3-6 months!

5 Tips for Booking Freelance Makeup Artist Jobs After COVID-19

By Your Makeup Career One Comment

With everything that’s been going on in the world these past few months, it can sometimes be easy to forget that eventually, things will go back to normal. Work will pack back up, and the economy will begin to recover. In certain areas around the globe, we’re already beginning to see the first stages of this!

So, what does this mean for your makeup career?

Well, for starters: if you’re a freelance makeup artist, don’t worry – there will still be plenty of opportunities to book clients! You just may need to take a few extra precautions and adjust some of your strategies, that’s all.

What exactly do we mean by this? Let’s take a look…

Target the bridal community

One of the downsides of COVID-19 is that a lot of engaged couples have needed to postpone their wedding day, due to social distancing rules. But once those rules are lifted, they’ll only be all to quick to get right back on track!

As a makeup artist, this can mean a lot of potential clients for your business. If you’re already skilled in bridal makeup, you can make this a shining focus of both your social media content and your professional portfolio.

Research popular wedding-related hashtags in your area, and incorporate them into your posts. This could easily help draw the attention of brides who have resumed researching into vendors and suppliers for their big day!

Don’t know much about bridal makeup? Then now’s the perfect time to start learning! Begin your research, take an accredited makeup course that teaches bridal makeup, and practice on yourself as much as possible. Better yet, practice on any of your friends or family members who are willing to be your model!

(Just make sure social distancing has been lifted first, or that you already live with this person in an immediate environment. Otherwise, it still won’t be safe enough yet to put your hands all over someone else’s face!)

By mastering your bridal makeup skills now, you can be ready to start booking clients as soon as life returns to normal!

Amplify your online presence

Once businesses start opening back up, people are going to be flocking to the internet to see what’s available to them and what isn’t. When they do, you want YOUR name to come up on their radar!

If you don’t already have an online presence for your freelance makeup artist business, start there ASAP. Build a website, create social media pages, research into marketing analytics and strategies, etc. These days, you can’t afford to NOT to market your business online!

If you already have these things established, then it’s time to now build on them. Ask yourself:

  • How can I improve my social media channels?
  • How can I increase my visibility?
  • Can I strengthen my website in any way?
  • Can I put out ads to target potential clients in my area?

Right now, you want your online presence, and the content you put out there, to be relevant to people’s current wants and needs. If someone is hopping online to search for a local makeup artist who can properly (and SAFELY) do their makeup immediately after social distancing has been lifted, you want them to not only find your freelance business – you want them to think to themselves, this is the MUA for me!

ALWAYS keep things clean

Logically, the best place to start is to always ensure that you’re keeping your makeup products and tools proper sterilized. This is a given, and definitely something you already should have been doing anyways. However, recent events have made it only too clear that it’s more important now than ever!

Clients will be far less likely to work with you if they see ANY sign of you being unsanitary, your work station being in total disarray, or your tools not being clean. All you need is one client to spread the word about uncleanly habits, and your reputation as a freelance makeup artist could quickly take a dive.

We know you don’t want this!

Pro tip: Since it’s that time of year, why not utilize your time at home right now to Spring clean your professional makeup kit? This will help make it much easier to maintain your kit going forward!

Have safety protocols ready

Let’s move onto the clients themselves. In the beginning, you may encounter some people who want to get their makeup done, but are still hesitant about coming into such close contact with strangers. One great way to combat this is to extend your sanitation practices to your appointment etiquette!

For example: for the first little while after social distancing rules have been revoked, maybe you can take extra care to always ensure that only you and your client are allowed to be in such close proximity to each other. Your business can have a maximum occupancy rules in effect, wherein only the client is allowed to attend their appointment.

Alternately, if you’re working in an environment where you can’t escape there being more people around, you can set up some type of perimeter around your work space, so that others know not to come within 6 feet of you and your client while you do her makeup.

These are just suggestions, of course. If you’d like to read more about keeping yourself and your clients safe (during and after COVID-19), keep reading here.

Ultimately, whatever measures you choose to take are entirely up to you. All we’re saying is, if you can reassure your client from the very beginning that you have a safety plan in place to continue to keep her safe while working with you, she’ll be much more willing to book!

Reach out to current and past clients

No, you don’t need to touch base with each one of them individually. (Though, hey, if you want to, by all means!) Rather, you can rely the email campaigns you’ve already set up for your freelance business, and utilize those.

There may be customers you’ve worked with before who would like to work with you again… and soon! Problem is, when the time comes that you re-open, they might not necessarily know. Even if you announce it on social media, they may not see it.

A better bet would be to send out a mass email to everyone within your client database. Chances are much better that this won’t go unnoticed! In it, you can let them know that you will be resuming your services (either by a given date, or at the present time).

You can also take this opportunity to lay out those safety protocols we discussed above, and include them within the email itself. If there is any other pertinent info you feel they should have, feel free to include that as well. Just don’t make the email too lengthy, or your audience may gloss over the more critical information.

You may be surprised at how many past clients wind up reaching out to you to book appointments! And even if they don’t, they may know someone who is in need of your wonderful services. Next thing you know, you’re being contacted by a brand-new client, thanks to word-of-mouth!

Remember:

There’s been a LOT of negativity getting thrown around ever since COVID-19 started. Even though much of it has been justifiably warranted, don’t let it fool you into thinking that this pandemic means the end of your makeup career.

It’s not.

Yes, it may require a bit more time and even more dedication than usual. You may need to be patient at first. But hard work does pay off! While things may feel a bit shaky at first, eventually, things will go back to how they used to be.

Before you know it, you’ll be booking more jobs for your freelance makeup artist business than you know what to do with! So, go forth and shine. We believe in you!

Another guaranteed way to book more clients is by having your professional makeup certification. Enroll in QC’s leading online Master Makeup Artistry Course today, and get certified in as little as 3-6 months!

Products + Tools You Absolutely NEED in Your Professional Makeup Kit!

By From the Experts, Makeup Tips and Tricks One Comment

Australian MUA, Charlotte Ravet, is the proud owner of her very own hair and makeup business. From bridal, to editorial, to film and television, and everything in-between – Charlotte provides a wide variety of services that cater to all types of clientele!

Her extensive resume includes working for Prada, L’Oreal, and even the cast of the hit show, Glee! A developer of educational programs, Charlotte has even been awarded Best Makeup Educator of the Year by the Australian Industry Makeup Awards.

Here, she examines the best (and cheapest) online tools to help you market your makeup artist business!

As an MUA and makeup lover, the one thing we never want to stop buying is… makeup! Of course, if you’re not careful, this can spell trouble for our bank account. This is why, over the years, the main thing I’ve learned is to keep it simple!

There are two reasons for this:

  1. As a professional MUA, makeup is my living. This means that I have to be mindful to manage my spending on beauty products. This is because my budget also needs to be allocated to things like advertising, marketing, space rental, and other business expenses.
  2. The more organised my professional makeup kit is, the easier (and faster) I can provide my services for clients!

As part of my standard practice, I typically have two separate makeup bags. One is for classic beauty makeup; the other, for creative and/or editorial. This helps me better organize my professional products. Plus, it means I don’t need to lug ALL every single product with me to a given job.

Breaking Down My Professional Makeup Kit

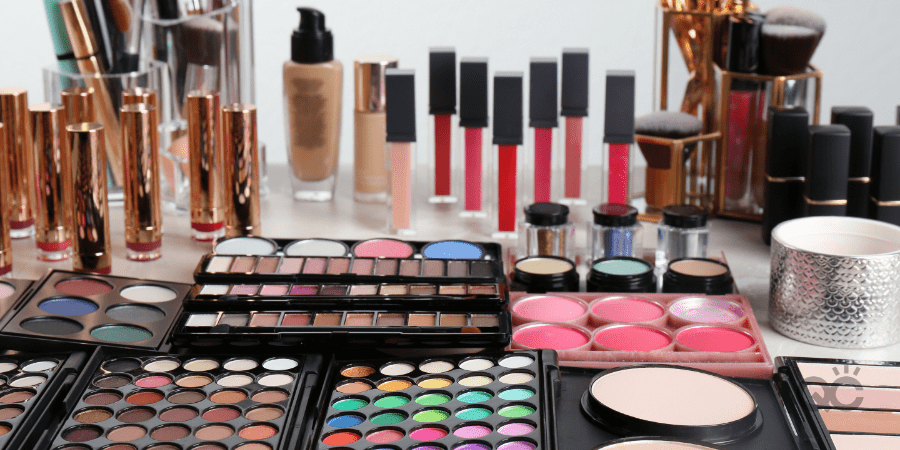
When it comes to your professional makeup kit, you need to have an assortment of products. Let’s take a look into mine to illustrate the types of things you’ll need.

To start, the usual essentials within my kit’s beauty bag include:

  • Skincare items
  • Foundations
  • Concealers
  • Powders
  • Eyeshadows
  • And much more!

On the other hand, my creative/editorial makeup bag is reserved for pigments, glitters, and body paint.

Beauty Bag Must-Haves + Tips:

Foundations, Contour, and Concealers

I would recommend having at least 6 liquid foundation shades in your professional makeup kit. They should range from light to dark. This will better help you adjust to different clients’ skin tones.

If the foundation comes in a glass bottle, I recommend buying an empty plastic bottle and switching the packaging. (Muji has some great ones that are pretty cheap!) Glass can be heavy to carry for a mobile makeup artist.

My Personal Favorites

My favourite foundations tend to come from the line, YSL Touche Éclat. I find they create a radiant glow and lightweight finish. Another staple foundation product is M•A•C Studio Face and Body. This line offers 13 different shades to choose from!

For the contour, concealers, and other foundations, I’ve found an all-in-one solution: cream palettes! If there’s one thing I can’t live without, it’s a primary cream colours palette!  My personal favorite brands for this are RCMA and Maqpro.

The awesome thing about cream palettes is that they give you one texture for everything! You can adjust the pigments, depending on how full the coverage needs to be. I frequently alter and/or create shades of contour, foundation, and eyeshadows by mixing the primary colors with the white.

Similarly, you can also sheer it out, using a mixing medium. Here are the mixing mediums I use with wax-based cream pigments:

Maqpro

Maqpro’s Makeup Mixer will help produce a cream foundation that’s ideal for medium coverage. To set it, I use translucent powder.

Kryolan

This is one of my latest finds, and I absolutely LOVE it! Kryolan’s Mixing Medium is silicone-based. It mixes very well with the cream pigments to obtain a fluid texture water that’s also sweat-resistant. I’ve found it perfect for both private clients and brides!

RCMA

RCMA’s Color Process Foundation Thinner is oil-based. It’s optimal for softening harder foundations, restoring dried palettes, and adjusting a foundation’s consistency. I love the dewy finish it produces! I definitely consider this a must-have for my editorial looks!

Honorable Mention

For a great highlight, I always use YSL Touche Éclat’s highlighter pen! I love how effortlessly it brightens darker spots on the skin.

Eye Makeup

For eyeshadow, I have two large magnetic palettes, with a collection of my favorite shades. One is for neutral colors, while the other is more creative. I always keep the black shades separate, as it is a pure pigment (which typically makes it more fragile).

I also carry my eyeliner pencils in a drawing pencils case. These cases have separated spaces for each pencil. This will help keep them organised and well protected!

Lips

A useful tip for your professional makeup kit is to decant your lipsticks into lighter-weight, portable plastic palettes. For me, I tend to go with the clear plastic palette from Vueset. My professional makeup kit also contains clear gloss from M•A•C Cosmetics. Whenever I want to create a lustrous effect on my client’s lips, I simply mix the lipstick with this gloss!

Brows

For editorial eyebrows, I ALWAYS have pear soap and M•A•C Cosmetics Fix+ in my arsenal. For the eyebrow makeup itself, my favorite line is the Inglot eyebrow wax. In case you’re interested, I find that 16 is the best shade for medium-to-dark eyebrows!

Skin

I love skincare! As a makeup artist, you know how vital good skin is the key for great makeup. Let’s breakdown some of my most recommended skincare essentials!

Primers

A silicone, blurry primer is fantastic for for mature skin. It can also be used a base when working with silicone-based foundations. Always match the primer’s texture with the foundation you are using!

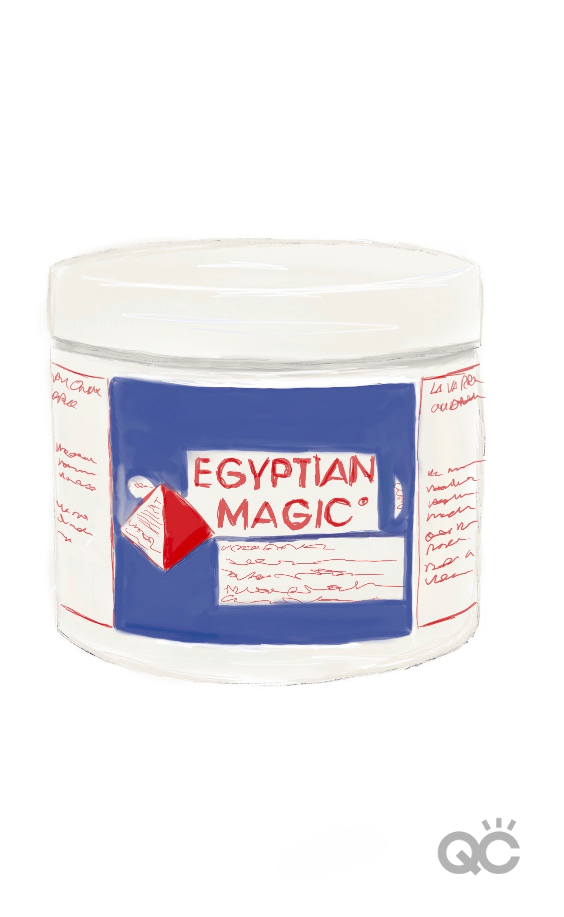
For a radiant complexion, I swear by the Brightening CC Serum from BY Terry. If you’re looking for an effective skin cream to add to your kit, Egyptian Magic offers a wonderful, all-natural product that protects lips and repairs dehydrated skin.

I also use it to add a little extra glow to my editorial looks!

Creams and Cleansers

You never know when you’ll work with a client who has sensitive skin, so as a rule of thumb, try to use organic skincare products that are perfume-free. In my professional makeup kit, I always have soothing creams as well.

Creams and serums are the very first products applied before makeup. This is why it’s so important to use all-natural products whenever possible. You want to avoid allergies and adverse reactions with your clients!

Creative/Editorial Bag Must-Haves + Tips:

As much as I love pigments and glitters, I have learned the hard way that it’s best to keep them separated from other products. A lot of glitters are sold in hard plastic jars, which can easily break.

For this reason, I recommend purchasing some softer, plastic jars to hold your glittery products instead. For extra protection, place these products in a separate (plastic) pouch.

My Personal Favorites

For pigments, my go-to products are Maqpro’s Paris Star Powders, and Down Under Cosmetix. I also swear by Kryolan’s Aquacolor line, because the colors are rich and super easy to apply. Plus, these glycerin-based eyeshadows also come in neon shades!

Tools

I must own around 700 makeup brushes! For every client, I always have a fresh and sanitized set, ready to use. Once any job is done, I then place my used brushes in a zipper bag. This way, I’ll know to clean them later, while also ensuring I don’t contaminate any of the clean items.

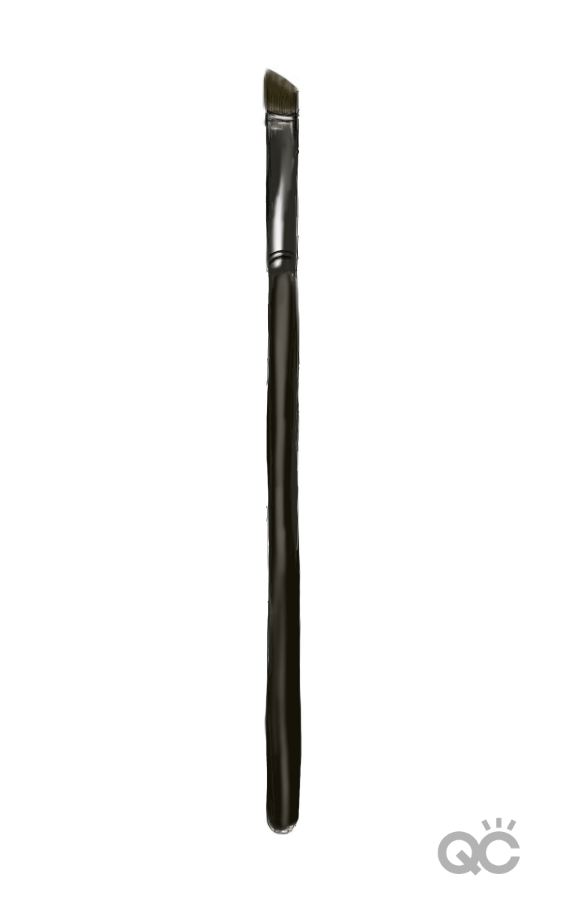
The one type of brush that serves as the true MVP is the angled brush. I seriously cannot live without angled brushes! On top of using it for makeup, I also sometimes use it with micellar water to remove little mistakes on the client’s lips or liner.

Crown Brushes is my go-to brand, as they are great quality brushes for affordable prices.

Other standard tools to have in your professional makeup kit include little fan brushes (for mascara) and palettes. Personally, I prefer acrylic palettes because they don’t keep the product cold. Metal palettes can sometimes tend to do that.

Remember:

The fabulous part about being a makeup artist is that there will ALWAYS be something new to discover, whether it’s a new product or trend! But before buying each product you have a crush on, try to achieve the result with what you already have.

A makeup artist must know how to mix and adapt textures! The best makeup doesn’t come from the best product – it comes from great technique.

Keep reading to discover which 5 makeup products you surprisingly DON’T need in your professional makeup kit!

How Stylized Photoshoots Can Increase Your Makeup Artist Salary

By Your Makeup Career No Comments

We’ll let you in on a neat little secret: if you’re looking for ways to boost your makeup artist salary and bring in more clients for your business, you should consider taking part in stylized photoshoots!

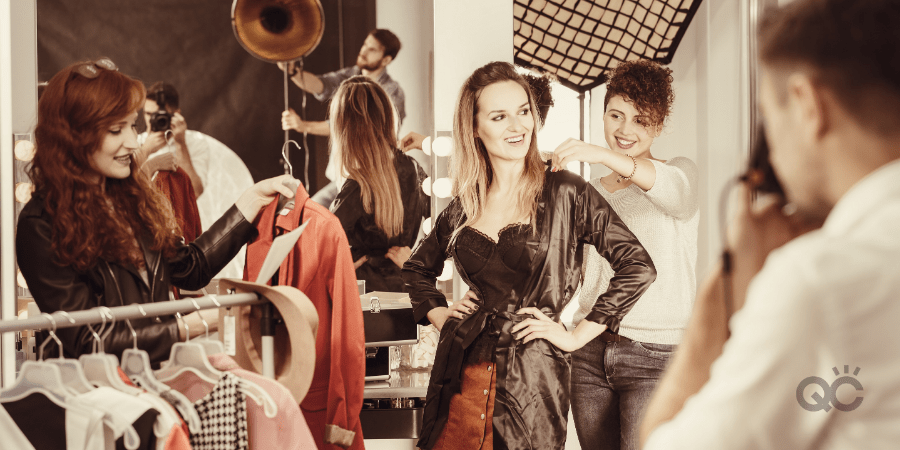
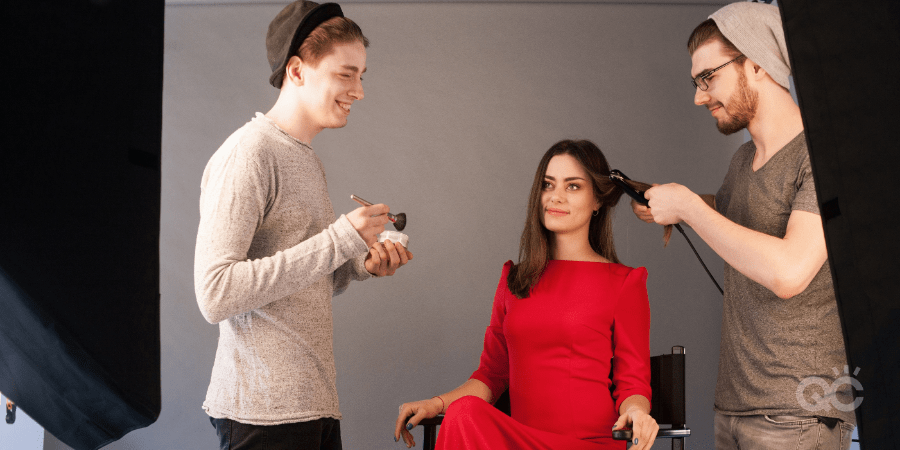
In short, a stylized shoot is exactly as the name implies: a photoshoot that’s styled. Often, there are props involved, sets, outfits, models, and a team of fellow industry professionals working alongside you. In a lot of cases (though not always), the work is unpaid. Typically, all those involved will trade services and they all end up with portfolio-ready images!.

“But wait,” I bet you’re thinking, “how can an unpaid gig help my business make more money?”

That’s a fair question. Luckily, we’ve got the answer! You’ll have to keep reading to find out what it is…

Stylized Photoshoots Mean High-Quality Content for Your Portfolio

Of course, part of doing that also requires you to grow your makeup portfolio. You’ll find that most clients will want to see examples of your work before deciding to hire you. But if you need a portfolio to help book clients, but also need clients in order to build a portfolio – how exactly is that supposed to work?

When you’re first starting your professional MUA career, you’re likely not going to be booking a bevy of clients right away. After all, it takes time to get your name out there and build your reputation.

It may mean that you’ll need to offer complementary services, at least in the beginning. For instance, you can do makeup on a friend or family member, in exchange for them being your model. This is always a solid option!

An even better one, though, is to get involved in a stylized shoot. Why? For starters, you’ll have a professional photographer who can supply you with top-notch images for your portfolio! As part of a stylized photo shoot, it’s common practice for the makeup artist to exchange her free services for a copy of the photos that come from the shoot.

High-quality pictures are one of the most important aspects of any MUA’s professional portfolio. So, getting them at no charge? Score!

Stylized Photoshoots Can Add More Variety to Your Portfolio

Do you have a knack for SFX makeup, and wish to showcase it a bit in your portfolio? Organize a Special FX-themed stylized shoot!

Is your niche bridal makeup, and do you want your portfolio to have a model that actually looks like she’s attending her wedding day? Put together a stylized shoot with that vision in mind!

Because a stylized shoot is creating the final image from the ground up, you can tailor it to reflect any style, theme, or element that you want! If you’re not the one planning the shoot, you may not be able to dictate every little detail. But you’ll certainly be able to still share your ideas with everyone else involved, and work most of them in!

When your makeup portfolio demonstrates variety, it’s telling potential clients that you have a wide skill-set. It’ll say to them: Look at all these different makeup looks I can offer you! Not only does this make you look even more like a professional, it opens you up to more people who are likely to want to book with you.

These are all factors that are guaranteed to help boost your makeup artist salary!

Stylized Photoshoots Help Grow Your Network

A major benefit to stylized shoots is that you get introduced to all sorts of other professionals within the beauty industry. If that weren’t cool enough, then you get to work alongside them! In a job like this, who you know can sometimes be just as useful as what you know.

But how can your network help your MUA business earn more money?

Well, the longer you know someone and have developed a professional relationship with them, the more likely you’ll be to recommend them to clients. Likewise, they can do the same for you! Word of mouth is a very powerful asset, especially in the beauty industry.

If a client is pointed in your direction by someone they trust, odds are pretty good that they’ll check out your business – at the very least. This can lead to even more paying clients wanting to work with you!

And hey, even if they don’t always wind up booking with you, you’re still going to get more exposure, which is never a bad thing! Who knows, they mean still go on to recommend you to their own friends and family, if they know someone else who may be interested!

Stylized Photoshoots Help You Grow as an Artist

If you’re devoting your life to a career as an MUA, we’re willing to bet it’s because your passion for makeup is unparalleled. As part of your journey, you’ll be eager to learn as much as you can, continue your training, and further your education.

You’re an artist, and all artists know one very critical thing: there will always be room to keep getting better!

Stylized photoshoots give you real-world opportunities to refine your expertise in new and challenging ways. Since you’ll be working with all sorts of models, you’ll get to practice your application techniques on different:

These are circumstances you may not always be exposed to if you’re only practicing with people you know! Stylized photoshoots strengthen your ability to adapt.

Especially when first breaking into the industry, they also provide the best way to show you what it’s like to do makeup on strangers. By getting used to this and becoming surer of yourself, you’ll have a much easier time transitioning to providing your services for paying clients!

Obviously, the better you become as a makeup artist, the likelier you’ll be to attract customers. More bookings mean more money. So, it logically follows that using stylized shoots to continue developing your skills is one of the single most effective ways to increase your makeup artist salary in the long run!

Can YOU think of more ways that stylized photoshoots can help boost your income as an MUA? Let us know your thoughts in the comments!

Strengthen your resume and book even more clients with a professional makeup artist certification. Enroll today in QC’s leading online Master Makeup Artistry Course, and earn TWO certifications for the price of ONE!

Master Makeup Artistry Course Sample: Theatrical Makeup

By Uncategorized No Comments

If your dream is to be a makeup artist for live theatre and/or stage productions, the best way to work towards this is by getting professional training from a theatrical makeup course. Luckily, you need to look no further than QC’s most popular program of study, the Master Makeup Artistry Course!

In Unit F of this course, you’ll delve into the world of theatrical makeup: what it is, where it comes from, theory and techniques, and plenty of hands-on application! Today, we’re going to show you a sneak peek of what you can expect to learn from Unit F of the Master Makeup Artistry Course!

Importantly, you’ll get the insider’s scoop into what’s expected of you as a makeup student, as well as an example of a practical assignment. Let’s go!

Master Makeup Artistry Course Unit F

By this stage of the course, you’ll have gained tons of foundational knowledge and practice regarding:

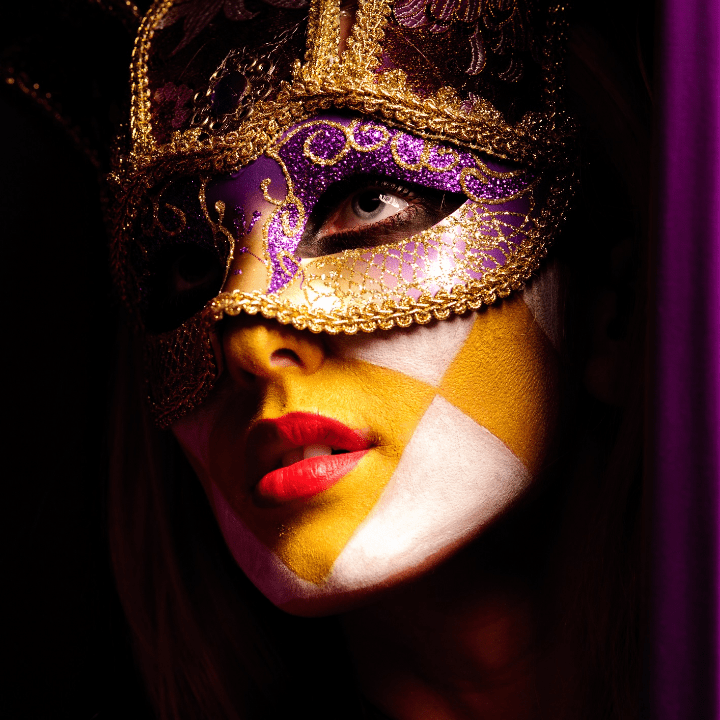
Now, it’s time to learn about makeup for the entertainment industry! This is the entire focus of Unit F, but let’s look specifically at theatrical/stage makeup. The world of theatrical makeup is unlike any other. After all, it’s hard to match the thrill that comes with working on a live production!

In order to learn how to do makeup for the theatre, you must first understand what goes into theatrical makeup in-and-of-itself. It’s much different than bridal makeup, editorial looks, or even makeup you’d do for film and television. Theatrical makeup requires you to delve deeper! You’ll need to learn how to create a character, interpret a script, work with the cast and crew, etc.

In addition, the theatrical makeup course incorporated within your Master Makeup Artistry Course will teach you many other, critical things, such as:

  • Setting up a workstation
  • Adjusting the actors’ makeup suit various lighting conditions
  • Breaking down the steps to successful stage makeup application
  • Filling out and using a Makeup Worksheet
  • Clean up/makeup removal
  • Other roles and responsibilities you can expect on the job
  • How to conduct yourself professionally
  • And so much more!

Preparing for the Assignment

As you’ve learned by now, the best way to approach ANY of your course assignments is by ensuring you’ve first done all the required readings for the unit! For the theatrical makeup portion of Unit F, this means reading the textbook: Theatre, Dance, and Live Stage Performance.

There are also videos included within this section of the unit. We strongly recommend watching them all, too! For example, one of them demonstrates QC Makeup Academy’s executive tutor, Nathan Johnson, creating a “Red Queen” theatrical look on his model. It’s definitely fun to see how he brings this character to life!

Unit F Assignment F3: Case Study Part 2 – A Practical Application

It’s important to note that this assignment can only be done after you’ve already completed Part 1 of the Case Study assignment.

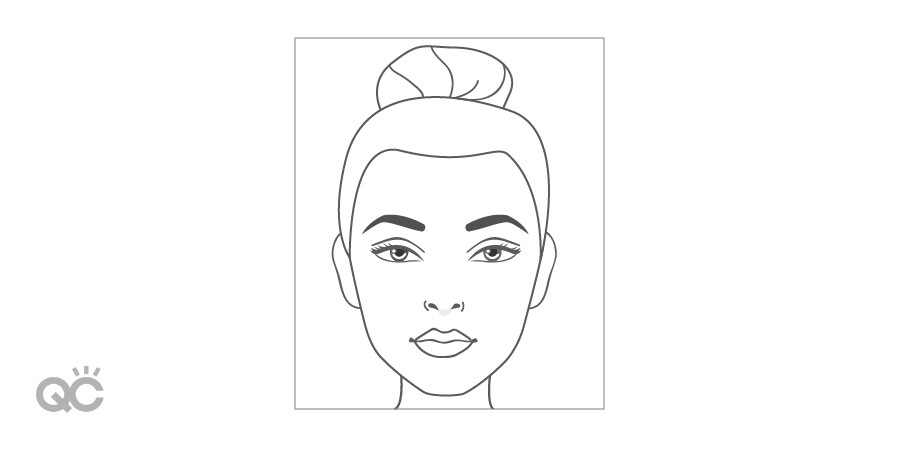
In Part 1, you’ll have used everything you learned from your required readings to create a stage character from scratch. First using the Makeup Worksheet (as provided in the “Handouts” section of your course materials), and then the face template, you’ll design your very own character and their theatrical makeup.

Once you complete that, you’re now ready to move onto Part 2! You can find this assignment on page 95 of your Course Guide. In this portion of the Case Study, it’s time to transfer that makeup design from the face template onto a real model.

Note: In light of COVID-19, we discourage you from using a model under social distancing rules that have been lifted – unless they live in your immediate environment and are willing to participate. Should you be working on this unit of your Master Makeup Artistry Course at the present time, it’s perfectly acceptable to use your own face for this assignment!

Step 1: Take a “before” photo of your model

As much as possible, try to remove all hair from the model’s face. Make sure their skin is clean, and that their eyes are open in the image. To focus as much on the face as possible, try to only include your model’s head and neck in the photo. The framing style should look like the one in the picture below.

before photo of makeup model for qc makeup academy master makeup artistry assignment

Step 2: Create the theatrical makeup look on your model

The goal of this part of the assignment is to bring to life your illustration from Part 1 of the Case Study. As such, try your best to mirror the look as you’ve already drawn it. Similarly, try to stick as closely as possible to the information you inputted into your Makeup Worksheet.

Having said that, if you get inspired and think of additional features that’ll enhance your character makeup for the better, don’t feel like you can’t add them in. One or two minor additions are fine. Just don’t stray too far from your original design, or you’re defeating the purpose of this assignment!

When doing the makeup itself, feel free to use whatever products and techniques you want. When grading your work, your professional tutor will be looking for things like:

  • Originality
  • Attention to detail
  • How well you brought your character makeup to life
  • A proper, accurate demonstration and understanding of the techniques used
  • And lastly, your ability to create attractive results

Keep all this in mind when approaching this assignment!

Step 3: Take an “after” photo of your model

Once you’ve completed your theatrical character makeup and you’re happy with the final outcome, it’s time to capture the results! Use the same framing style as you did in Step 1, with only the model’s face and neck in the image. Just as with the “before” photo, make sure your model’s eyes are open.

After that, you’ll need to take 2 more photos of your work. This time, focus specifically on your model’s eyes. In terms of framing, try to only capture the area from just beneath their nose, to above their eyebrows, as seen in the illustrations below.

master makeup artistry course sample

In the first photo, have them keep their eyes open again. For the second photo, have them close their eyes. Make sure the images are clear and accurately show off the makeup as much as possible. Save them to your computer, where you can then upload and submit them within QC’s Online Student Center.

Remember:

When you enroll in any QC makeup course, you have a full 2 years to complete the program. So, don’t feel rushed to have to complete and submit this (or any) assignment! Because everything is self-paced, there are no deadlines or rigid schedules. You have the freedom – and breathing room – to tackle your studies whenever works best for YOU!

This means that when you are ready to work on your unit assignments, you can put the dedication and effort into them that they require. If you aren’t happy with the results at first, you can keep practicing until you are!

That way, you’ll be able to produce your very best results, each and every time!

Want to take high-quality photos of your makeup assignments, so that your tutor can give you the most thorough feedback possible? Check out these 6 tips from QC’s executive tutor, Nathan Johnson!

How to Be a Makeup Artist When You’re Introverted

By Your Makeup Career No Comments

There’s a common misconception that if you’re an introvert, a career as a makeup artist wouldn’t be the right fit for you. Well, we’re here to squash that myth and tell you that this is NOT true!

In reality, anyone can be a successful makeup artist, so long as they have:

  • Passion for makeup
  • Drive
  • Dedication
  • A hard work ethic
  • And proper training

So, if you happen to be introverted and are also considering a career as an MUA, our advice is: GO FOR IT! And if you happen to be wondering how you can adapt your makeup profession to your personality type, don’t worry, we’ve got you covered there, too.

Let’s take a look at why introverts make awesome makeup artists, as well as the ways you can tackle the industry in a way that works best for YOU!

What is an Introvert?

By nature, an introvert is someone who has a tendency to be reserved and thoughtful. They tend to prefer spending their time in smaller groups, or alone. If a person’s energy level were like an iPhone battery, then an introvert’s would be most optimally charged when in the comfort of their own solitude.

Does this sound like you?

Let’s be very clear, though: being introverted doesn’t automatically mean you’re antisocial. It also doesn’t necessary equate to being shy, soft-spoken, or reticent. There can sometimes be a negative association to the word “introvert”, but there’s nothing bad about being an introvert at all!

The truth is, the terms “introvert” and “extrovert” aren’t black and white. I’ve known plenty of extroverts who are also on the quiet side, just as I’ve known a fair number of introverts who are loud and charismatic.

The main difference between the two is that extroverts recharge their internal batteries through socialization and being around others. On the flip-side, even if an introvert loves hanging around people, their internal battery gets charged and re-energized by spending quality time alone.

Why Introverts Make for Great Makeup Artists

To be a makeup artist means that you’re going to have to frequently work with people. While it’s true that this is definitely more in the extrovert’s comfort zone, an introvert can still thrive under this circumstance.

The thing about introverts is that they have a tendency to carefully think their decisions through. If you’re pursuing something, we’re willing to bet that you’ve considered every possible outcome first. You never go into any situation unprepared!

Furthermore, you’re mindful to only choose experiences that you know will fulfill you. Choosing a career path that isn’t gratifying to you will tend to burn you out really fast. Instead, you blossom when in an environment that motivates you and your passions.

So, if you’re choosing to pursue a career as a makeup artist, we know that this is because this is something you feel very strongly about!

Your clients have a lot to benefit from having you as their makeup artist, too! With an introverted MUA, you know that nothing has been – or will be – done without maximum effort. This means, you’ve researched your craft and your products. You’ll have put in the time and work into your training, and will always take each job very seriously.

It won’t be enough for you to give your clients just an okay result. You’ll always do everything you can to make sure they feel and look their best!

Becoming a Makeup Artist: The Introvert’s Way

If you’re introverted, you still have lots of options in terms of approaching this career path in a way that won’t deplete your internal battery. Here are just a few examples…

Get Your Certification Through an Online Makeup School

Everything’s gradually moving to the internet these days, and makeup training is of no exception. Some people are concerned that online makeup schooling couldn’t possibly replace the quality education you’d get from in-person classes, but this a false fear.

In reality, so long as the online makeup school is legit, of high quality, and properly accredited, you’ll get the exact same level of training as you would from a brick-and-mortar school. In fact, many online makeup instructors have experience teaching for both mediums, and can attest that online makeup schools are just as beneficial for the aspiring MUA… In some cases, even more so!

Plus, with so many of us still adhering to social distancing rules, online makeup school is the only practical (and safe) option at the moment.

As an introvert, online makeup school grants you the opportunity to receive quality training from the comfort and privacy of your own home. Because many schools, such as QC Makeup Academy, allow you to work at your own pace, you can also work it entirely around your own schedule.

You’ll have full control over when and where you study, so you can build your skill-set and receive your certification on your own terms!

Leverage Your Online Marketing Game

Because introverts are at their very best when in the comfort of their own environment, you’ll have plenty of time and energy to devote to building (and then managing) your online presence.

If you’re not quite as tech-savvy in the beginning, we know you won’t cut corners when it comes to soaking in as much information as you can, and learning the ropes of online marketing.

Whether it’s launching your MUA business website, starting social media channels, writing a blog, or what-have-you – as an introvert, you have the unique opportunity to make the most of your solo downtime to build an online presence that’ll be unparalleled!

Knowing you, you won’t shy away from the challenge.

Build Your Portfolio

When the time comes that you’re ready to start putting together your professional makeup portfolio, there will be ways for you to do this without burning you out.

For starters, you can work with people you already know and feel comfortable with! If you have a friend who’s good with a camera, and another who’s willing to be a model, then boom! That’s one golden opportunity right there!

Another possible option is to take part in a stylized photoshoot. Regularly, stylized shoots are unpaid. Instead, you’ll often swap services as the method of payment. So, for providing your makeup artist skills pro bono, you could get a free copy of the high-quality photos that come from the shoot!

Many stylized photoshoots can be done with relatively small groups of people, too. This means you wouldn’t have to worry about being stuck in a frenzy of strangers for an extended portion of the day.

Plus, there’d be times (such as when the set is being put together, taken down, etc.) where you could afford to break away from the crowd and have a breather to yourself, if needed.

Take Advantage of the Flexibility

One of the coolest things about being a makeup artist is that there’s an ample amount of freedom involved. Especially if you’re a freelancer, you have the room to dictate your schedule, the types of jobs you take, etc.

Of course, the more jobs you accept and the more hours you work (especially during prime times) will directly affect your success in this industry. This is important to keep in mind.

In the beginning, you may need to make some sacrifices, and loosen your personal criteria just a tad. There may be times where you have to work in larger groups, in unfamiliar places, at unideal times, in order to build your credibility and make a name for yourself.

But as your reputation grows and you build up your clientele, you’ll eventually have more autonomy to be able to control your working conditions and environment more!

Take Time for Yourself

As an introvert, making time to prioritize yourself is just as important as any business tip we could give you. We know how critical it is for you to recharge and center yourself, especially if you have been socializing.

As a makeup artist, you’ll need to anticipate that there’ll be times where (as we touched on above) you won’t always be able to control your surroundings. Sometimes, you’ll need to be “on” and work alongside larger numbers of people, for extended amounts of time. This just comes with the territory of this profession.

This can be a bit taxing on your internal battery, and we get it. So, make sure that you regularly make time to just do you. Let yourself be alone, and do whatever it is that helps you unwind and relax.

Keeping a healthy balance between your work life and your personal needs is the key to not spreading yourself out too thin. It may take some time, and some practice, but once you’ve mastered this balance, you’ll be guaranteed a long and fruitful career as a professional makeup artist!

Ready to start on your path to success? Enroll today in QC’s leading online Master Makeup Artistry Course, and get a second course for FREE!

Are Makeup Removers Bad for Your Skin?

By Skincare No Comments

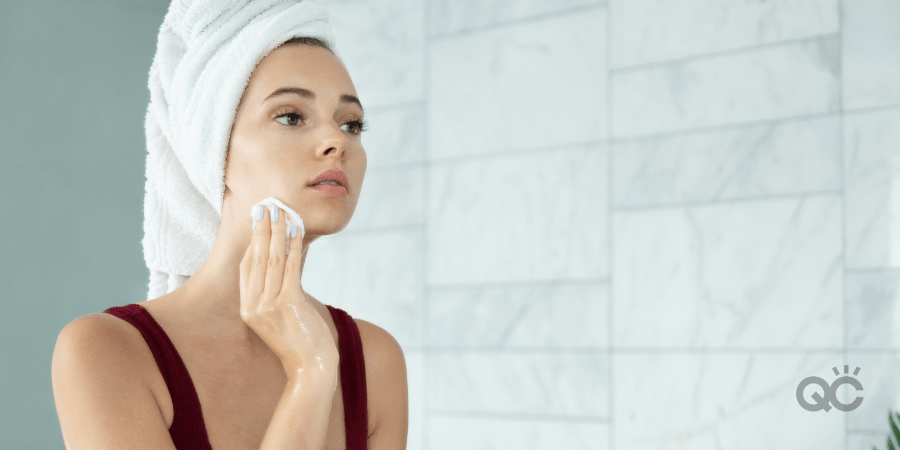
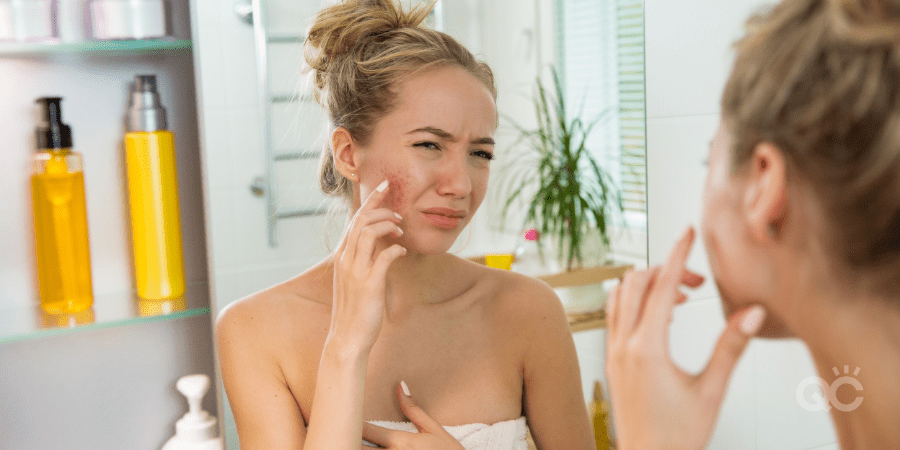
I’ve been using makeup remover wipes and similar products over the course of my whole life. I’ve tended to look over the fact that they sometimes irritated the sensitive skin around my eyes, or left my cheeks unnaturally dry.

Not to mention, the amount of pressure alone that’s required to scrub off a smoky eye is always enough to leave my face downright raw.

If I’m being honest, makeup removers often leave my skin feeling straight-up gross. When I stop and think about it… Should anything masking itself as a skincare product really be making my skin feel this way?

So, I decided to do some digging. As it turns out, makeup removers aren’t nearly as good for our skin as we think they are. That’s not necessarily to say that EVERY makeup remover should be avoided. Rather, it may simply be time to be a little pickier about the product we choose – or perhaps switch to a natural alternative altogether.

Let’s take a look at some of the reasons why certain makeup removers are damaging to our skin, and the healthier options that are at our disposal!

Makeup Removers Aren’t Adequate Cleaning Products

Plenty of makeup removers out there claim to be multipurpose skincare products; capable of cleaning off your makeup and cleaning your skin. Unfortunately, for most brands, only the first promise is actually kept.

Yes, makeup removers are good at doing exactly that: removing your makeup. But they do a lousy job of actually cleaning your skin itself.

This is in large part because makeup remover wipes have a tendency to smear makeup, dirt, and dead skin over the epidermis (the outer layer of your skin), rather than properly removing them from the skin’s surface. For many of us, this is a big reason why our skin feels so irritated afterwards.

If we’re thinking strictly in terms of what a proper skincare routine is supposed to do, this seems a bit counterproductive, doesn’t it?

Makeup Removers Can Leave Behind Grime on Your Skin

Here’s the thing: it’s true that makeup removers and actual cleansers share the same active ingredients: surfactants, emulsifiers, and solubilizers. These are the things that dissolve your makeup, lift oil, and remove dead skin.

The key difference is that when you use a cleanser, you rinse afterwards. This is crucial to actually removing these unwanted things from your skin. With makeup removers, on the other hand, a lot of us have a tendency to skip this critical step.

This also adds to why your skin may feel uncomfortable in the aftermath. If you don’t properly clean away all those active ingredients in the makeup remover, they’re going to continue sitting on your skin, often in high concentrations.

So, should you wish to remain faithful to your makeup remover wipes, feel free to do so. But you might want to start thoroughly rinsing your face afterwards – otherwise, there’s still an adequate layer of grime still lingering in your pores.

Makeup Removers Often Contain Worrisome Ingredients

In order to increase shelf life, many makeup removers contain added – and unwanted – preservatives. Particularly, they may have formaldehyde-releasing chemicals. To put this into perspective: formaldehyde is classified as a carcinogen when under high exposure, and carcinogens can eventually lead to things like cancer.

Maybe this is a bit of a stretch. Still, even if we step back and look through a more realistic lens, there are other causes for concern.

For starters, many makeup removers contain alcohol, which is known to be particularly drying to skin. If you happen to have dry or sensitive skin, this is one of the last things you want to be coating all over your face!

Some other common examples of worrisome ingredients often found in makeup removers include:

  • Mineral Oil – This is the holy grail ingredient in most makeup removers that does the job of actually removing your makeup. If properly rinsed and wiped away afterwards, this in itself isn’t so bad. However, if it’s left behind on your skin, it clogs the pores and makes it unable for the skin to breathe. Hello, breakouts!
  • Sodium Lauryl Sulfate and Diazolidinyl Urea – Both can be prone to causing irritation, swelling, redness, and even allergic reactions.
  • Cyclopentasiloxane – While it claims to promote healthy skin regeneration, it’s also considered a mild carcinogen.
  • Benzalkonium Chloride – This is a very common makeup remover ingredient that just so happens to be banned in both Japan and China. This should probably tell us everything we need to know.

I’ve got to be honest, all of these ingredients sound shady in one way or another. If you wouldn’t be comfortable ingesting them (and I can definitely say I wouldn’t), why would you risk putting them on your skin?

There are Healthier Alternatives!

This article isn’t meant to completely bash makeup removers as a whole. There are ones out there that do their job without compromising your skin. If makeup removers are a staple in your skincare routine and you have no interest in changing that, maybe it’s just a matter of switching things up a bit.

First, try to ditch the makeup wipes altogether. Sure, you can have some on-hand in case of an emergency, but your skin will benefit from removing them from your regular routine. Instead, switch to a different type of makeup remover product, such as an oil or serum.

This part’s important: aim for products that ONLY have natural ingredients! Choose unscented products, or ones whose fragrant component is made from natural resources.

I was once told, “If an ingredient is so long and complicated that you can’t pronounce it, it’s probably an unwanted chemical.” I try to keep this in mind when purchasing any beauty product.

Here are 3 examples of brand-name makeup removers that are made from 100% organic ingredients:

  1. MV Skincare Pure Jojoba Oil
  2. Aromatica Natural Coconut Cleansing Oil
  3. La Foglia Lavendar Makeup Remover

I’ll let you in on a fun little secret, though: there are natural makeup removers that are not actual cosmetic products, but they work just as effectively AND will often cost you next to nothing!

For instance, did you know that sesame oil and coconut oil can both be used to effortlessly wipe away your eye makeup? It’s true! Coconut oil can also be used as a general makeup remover, too.

(Let’s be real… Is there anything coconut oil can’t do?)

Plus, you can also add things like organic raw honey to these all-natural makeup removers, to add extra softness! Raw honey contains antibacterial, anti-septic, and antioxidant properties. It helps promote healthy collagen growth, and is known to be extremely hydrating.

If you want to see just how awesome raw honey is as a skincare alternative, check out this blogger’s experience washing her face with nothing but raw honey for 2 weeks!

Proper Skincare Training is Important

In retrospect, I can probably chalk up my negative experience with makeup removers to a lack of proper skincare knowledge. I mean, just look at how much I learned through a simple Google search! Imagine how much more I’d discover if I took a legitimate skincare course from an accredited makeup school!

Proper skincare courses will not only teach you about various skin types, products, and what works best for which kinds of skin – it’ll also qualify you to work as a certified Skincare Consultant. You’ll be able to use all that education and knowledge to help others for a living!

As it so happens, I’ve actually just enrolled in QC Makeup Academy’s leading online Skincare Course. I intend to get started within the next week. Pretty exciting stuff!

As I work through the program, I’ll ensure to check back in to share my thoughts on the course, and provide an update on all the amazing stuff I’m learning! So, make sure to stay tuned! 😊

With social distancing still in effect, your skincare routine is more important now than ever. Keep reading to discover the top 4 reasons why!

Avoid These 4 Rookie Mistakes in Your Makeup Portfolio

By Your Makeup Career No Comments

As an MUA, your makeup portfolio is a visual representation of your experience, your knowledge, and your skills. It allows prospective clients to physically see the work you do, and help them decide whether your style and overall artistry is what they’re looking for.

As such, it’s important that your makeup portfolio checks off all the right boxes! Sometimes, in order to understand what you should be doing, it’s useful to look at the types of mistakes you need to avoid.

Knowing what not to do is a great first step towards putting together the perfect makeup portfolio that best represents YOU! So, let’s break down some common mistakes right now…

Poor Quality Photos

You want anyone looking at your makeup portfolio to see without question that you’re a professional. You can’t achieve that if the images reflecting your work are:

  • Blurry
  • Improperly framed
  • Have terrible lighting
  • Are of low resolution
  • Are clearly selfies
  • Have been digitally edited

If the photos in your portfolio are not of high quality, that will be the FIRST thing anyone notices! Unfortunately, more often than not, it may also form a negative first impression of your business. We know this isn’t what you want.

Instead, take the time to research local photographers. Find people that have great reviews and a portfolio of their own that you can look over. Alternately, if YOU happen to have a good eye with a camera, it could just be a matter of buying yourself a high-quality one to shoot your own results with.

Yes, as you build up your makeup portfolio, you may need to invest a bit of money from time to time. But you’re trying to build a successful business, right? This comes with the territory.

We promise the payoff will be more than worth it.

Pro Tip: Another great way to build up your portfolio – potentially for FREE – is to collaborate with other local artists by putting together a stylized photoshoot. Often, stylized shoots will be unpaid – but in exchange for your MUA services, you can get a copy of the high-quality photos at no charge!

Not Enough Diversity

It’s great if you’re signature move is a killer smoky eye… Just don’t make this the be-all and end-all of your makeup portfolio. While finding your niche and highlighting it within your portfolio is totally acceptable, it shouldn’t be the sole focus.

A potential client is going to want to know that your makeup skills are multifaceted!

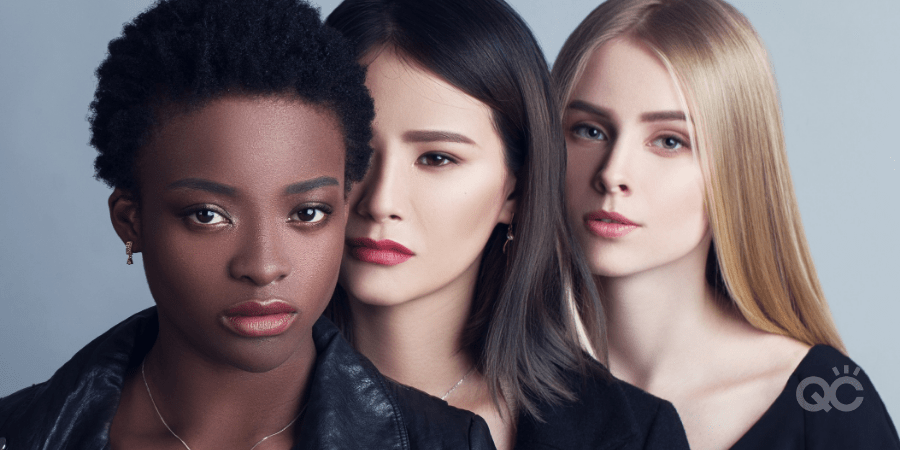
This is why it’s crucial that your portfolio displays a wide range of looks, techniques, and styles. Try to switch things up and show off different skin tones, ages, genders, etc. If you’ve ever worked with someone who has a skin condition, this is great to include in your portfolio, too!

You also want to be able to demonstrate that you know different styles of makeup themselves. Bridal may be your favorite, but don’t limit your portfolio only to bridal makeup. For instance:

Find a good 5-6 makeup styles you’re really solid in, or are popular with the masses, and show them off! Diversity not only makes for a killer makeup portfolio – it lets the photos speak to your skill-set as an artist.

After all, as the saying goes: a picture is worth a thousand words. Imagine what multiple pictures will be able to tell your clients about you!

Too Many Photos

You don’t want potential clients to have to sift through pages upon pages of photos, just to try and find the one they’re looking for. This is not only tedious for them; it makes you look unprofessional.

That being said, there’s a limit to how many photos you should include within your portfolio. For newbie MUAs, we understand that your goal is to demonstrate that you can do ALL kinds of looks! But just as too little diversity can put potential clients off, so too can having a messy, overly crammed portfolio.

Instead, your portfolio should look crisp, poised, and thought-out. You’re going to have to narrow down your photos so that only the best of the best are used. Yes, this means you won’t be able to use every photo you love. But it’ll guarantee that the ones you do choose get to properly shine!

Your Portfolio Isn’t Online

If you’d like to keep reading about how to leverage social media as part of your marketing strategies, we’ve got an excellent article that you can read here.

If nothing else, your portfolio should be a part of your business website. It should be easy to find, and even easier to navigate. You can also go one step further and showcase your portfolio through social media channels, such as Facebook, Instagram, and Pinterest!

If none of your amazing portfolio images are accessible on the internet, you’re severely limiting your visibility and exposure to potential clients! In the end, this is a business move that will only make things more difficult in your journey to success.

This doesn’t mean you can’t have physical copies of your portfolio on hand. But the fact is, we live in a very technological age. Practically everything is done online nowadays.

Bonus Tip: Learn About Makeup Portfolio Development

As a makeup artist, you already know that the single greatest way to properly learn the craft is by educating yourself through accredited makeup courses. Similarly, a terrific way to learn the dos and Don’ts of building your makeup portfolio is to take a workshop devoted to exactly that!

QC Makeup Academy, for example, offers a Portfolio Development Workshop that aims to teach you:

  • How to capture high-quality photos of your work
  • How to create, organize, and managed a stylized photoshoot
  • How to develop your professional network
  • How to put together the best possible portfolio for your business, in order to maximize results

If you’d like to learn more about this workshop – including the course breakdown, tuition, etc. – simply click here!

In the world of makeup artistry, your portfolio is your best friend. So long as you take the time and care needed to develop it right, it’ll serve you well over the course of your entire career.

Do you have any other rookie mistakes that should be avoided when putting together your makeup portfolio? Share your thoughts in the comments!

Interested in becoming a professional MUA, but don’t yet have your certification? Enroll today in QC’s leading Master Makeup Artistry Course and become a trained expert in as little as 3-6 months!